Zen’s Winter Run 2025

I tried to go Gaia green on this grow but I kept running into nutrient deficiencies and had to keep addressing those one by one. I finally put that stuff aside and just went with what I know best (dyna-gro and dyna-bloom with some added micros and mykos), everything settled down and doing well.

I’d love to go all organic, but I’m missing something basic and just can’t get the engine started!
 
I was never fast enough to keep with organic ferts only.
Tried the Gia with Shaded and I was just too slow.
I have been watching how you and stonemason make soil though.
I think that has alot to do with it.
 
I was never fast enough to keep with organic ferts only. Tried the Gia with Shaded and I was just too slow.
Hey Steam, what do you mean not fast enough?

I have been watching how you and stonemason make soil though.
I think that has alot to do with it.
I’ve been trying bits and pieces of KNF as I get the time and opportunity. Gaia is just a cheat that I’m using now until I no longer need it, if I ever get that far. Luckily Gaia is one of the few things that’s cheaper up here.

My goal is to slowly replace anything I buy with KNF/JADAM methods. I’m trying to replace the expensive items first which is why I’m looking at the small worm farm ATM.

The outside experiment went very well. I didn’t get the soil ready in time to pot but just topping the pot with nutes and worm castings kept the GDP Autos looking good. The rain water probably helped too. It gets green algae most summers.

I’m glad my attempts are worth checking out. It’s nice to share and give a little back to the community. Even if it’s what NOT to do. 🤣
 
My plants would be show deficiencies that would take weeks or longer to correct with Gia.
I went back to FF nutes for weekly results to not seeing far enough down the road.
I can stay in the middle of the road if I try with the FF, I was all over the place with Gia.
Only gave it one grow.
 
My plants would be show deficiencies that would take weeks or longer to correct with Gia.
I went back to FF nutes for weekly results to not seeing far enough down the road.
I can stay in the middle of the road if I try with the FF, I was all over the place with Gia.
Only gave it one grow.
In my outdoor test I did run into a deficiency on one tomato plant and later one bell pepper plant. I used calmag twice which seemed to fix it.

As this will be my first indoor run and only my second grow with these nutrients I’m expecting some bumps. How I deal with them will depend on a lot of things but I’ll use my liquid nutrients if that’s what it takes.
 
Worms Day 1:

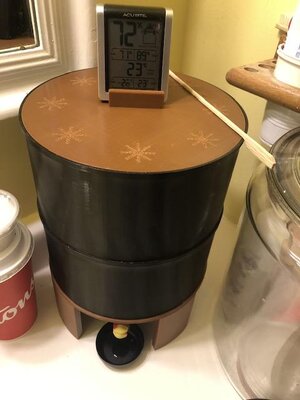
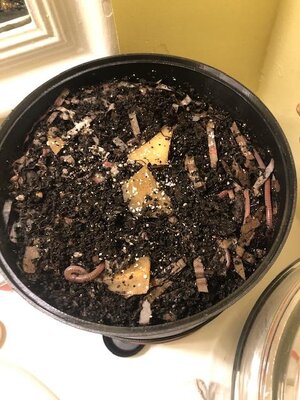
Worm compost/farm is coming along. My idea of using a pet store to source worms paid off.
IMG_6428.jpeg
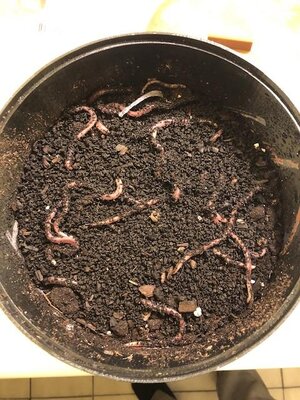
I got 28 medium size worms. All alive, most moving after I transferred them. $8.50 tax included.

I made a bed of shredded office paper and news paper. Dampened it down with a spray bottle before adding some compost soil, forest earth for enzymes, and the worms. I left the light on for a while with the lid off so the worms would go deep. IMG_6429.jpeg

After a while I came back and they were all below the surface. I gave it another quick spray. IMG_6430.jpeg

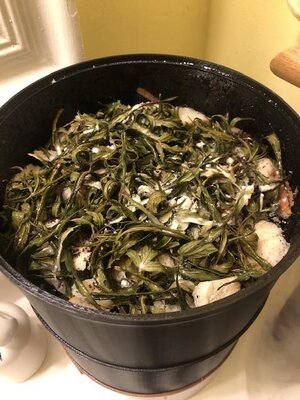
Next I added chopped up bread, dried cannabis leaves and some gypsum before putting the lid on. (Gypsum is good for them and an abrasive for them. I’ll use stone dust next time.)IMG_6431.jpeg

Need to read more and/or watch some videos. I’ll chop things up, no meat or dairy, but I’m not blending anything. Need to add some vegetables and egg shells. Then see if I can manage to keep them moist but not wet.

Need to find out if I leave it puffy when I add things like leaves or if I should pack it down a bit.

I’ve resisted the urge to poke around and see if they are still kicking.IMG_6432.jpeg

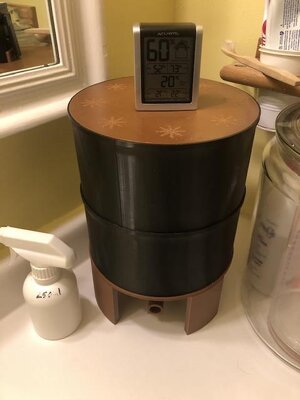
It’s in the downstairs bathroom for now. I’m hoping to move it to the kitchen after my wife gets used to it. Wish me luck.

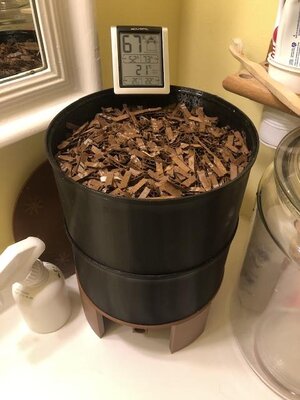
Edit: Found some more clean cardboard to use as bedding.
IMG_6437.jpeg

Leaving the top off and light on one more day after spraying the cardboard. Temperature and humidity is good. I did poke one finger in to see if any came up to eat. Yep, at least a few are into the bread and leaves. Just wish we had the cucumber and watermelon rind. It got tossed with Thursday garbage pickup. 😞

Grabbed another box which had 30 all healthy and added them to the bin. Got a bit messy this time as I added them to the same bin. I just layered things again with new bedding. Leaving the second bin for later use.

So 58 worms should be easy to manage. Supposed to be red wigglers but they look like small to medium night crawlers, not that I’m an expert. Now I need to see how long it takes them to go through the food and cardboard.

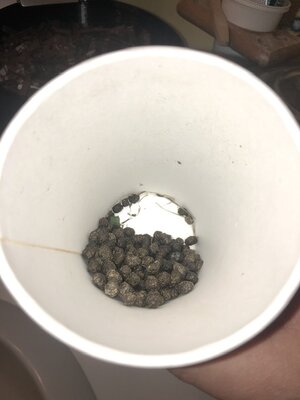
With all the rabbit action in the garden area I was able to put on a rubber glove and collect an inch or two of pellets. IMG_6440.jpeg
 
Last edited:
78016994142__2559535E-F396-47FE-84E6-2F4FD3EE3F93.jpeg

Wow. Only place to find a replacement faucet head. Still cost $50! 😳

Wife wanted it done ASAP since thanksgiving is only 21 days away.

-=-=-=-

We wanted rain for the last two months. Now that the garden is winding down we get 3-5 days of it on the way?78023066208__32D5D79F-3BED-47D3-8965-7100BAFE4717.jpeg
We know they can’t get it right two days in a row.

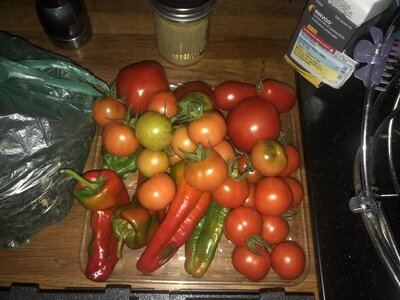
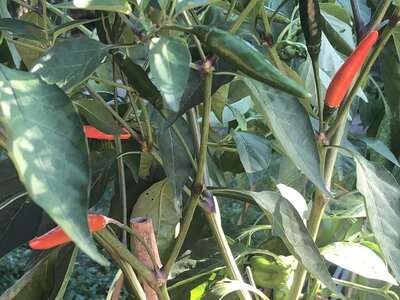
I did pick a bunch of tomatoes last nigh just tuning red so any storm doesn’t knock them off. Peppers are a week or two old. Getting tired of eating them. LolIMG_6445.jpeg
 
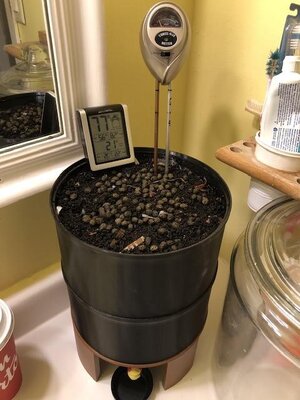
This morning I was wondering how I was going to tell if the worms are moist enough. I knew the top was dry since I’m leaving the lid off a couple of days with the light on to keep them down under the pile until the acclimate.

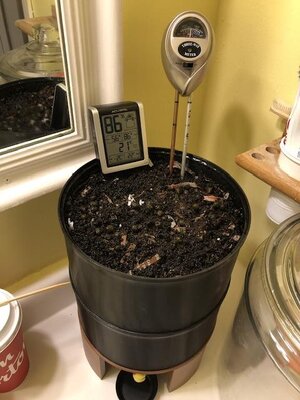
Then I remembered I have an old moisture meter I no longer use. I already added some rabbit droppings and sprayed a bit before using the meter.

Before
IMG_6450.jpeg

After
IMG_6451.jpeg

By tomorrow night I should be able to put damp cardboard on top and then the lid.

I’m testing how things are going today. Turning off the lights for a bit before checking for movement or escapees.
 
Printed a few things yesterday. But the lighter holder was a must have.
78028495406__12223DBA-8724-4DD3-BB1F-BC7814C5A730.jpegIMG_6472.jpegIMG_6471.jpeg

It was at the point every time I took something out one or more lighter would fall over and block my putting items back in. Now…problem solved. 👊
 
I got a surprise text from G$ telling me he might be hooking me up with some Canadian clones. 😳

Not a lot of details other than they should be here no later than mid October. So my seed popping will be saved for the next grow.
I only know one of the two strains being sent. GG#4 Josey Wales cut. 🤤

Thanks @GoodShit97 can’t wait to try them!
 
Well it’s been about a week since I put worms in the composter. Still figuring it and checking things each day.

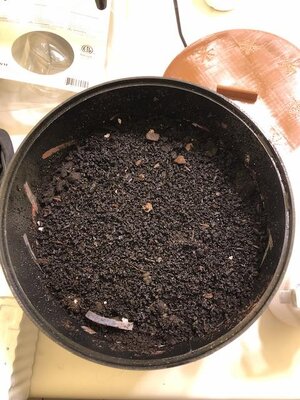
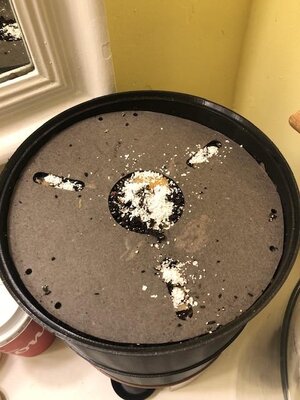
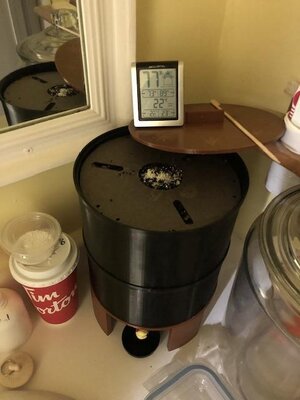
It’s starting to work. Liquid got past the earplugs and there’s castings in the base and bottom bin.
IMG_6551.jpeg

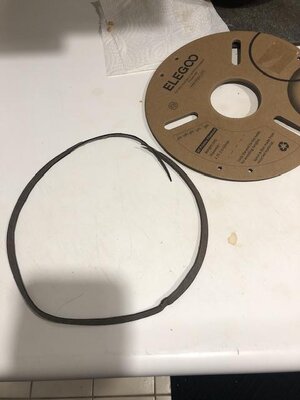
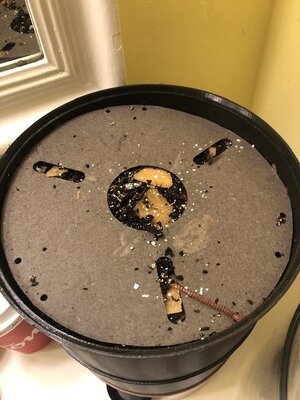
I found out Wednesday that the empty spool from the filament was the same size as the lid. Most guides show you need a damp piece of cardboard or newspaper on top to keep the bedding and material below damp. So I removed and soaked the round part to separate any sections and kept the thickest. I just needed to trim off 1/4” which is easy when wet. 78058287921__1C4CFEF9-1247-42A6-993E-85DA789F345E.jpeg

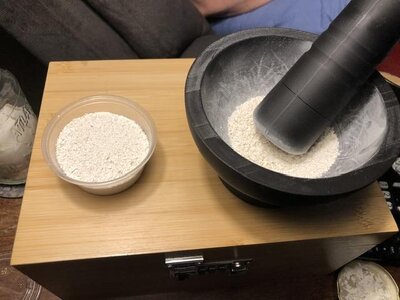
I’d already been saving eggshells so I ground some up trying to keep it not too big and not powder. Some membrane was still on so I pick it out, it’s like rice paper.IMG_6541.jpeg

I put in some cantaloupe and covered with eggshells. IMG_6547.jpeg

They seem to like it. IMG_6546.jpeg

I spray the top with a water bottle until wet again each morning after checking to see if it’s dry. M concerned about it being to damp or dry. Trying to keep it moist is harder than watering plants.

Put a bit more eggshell in the middle.IMG_6537.jpeg

We’ll check it again on the weekend.
 
Well it’s been about a week since I put worms in the composter. Still figuring it and checking things each day.

It’s starting to work. Liquid got past the earplugs and there’s castings in the base and bottom bin.
View attachment 114838

I found out Wednesday that the empty spool from the filament was the same size as the lid. Most guides show you need a damp piece of cardboard or newspaper on top to keep the bedding and material below damp. So I removed and soaked the round part to separate any sections and kept the thickest. I just needed to trim off 1/4” which is easy when wet. View attachment 114839

I’d already been saving eggshells so I ground some up trying to keep it not too big and not powder. Some membrane was still on so I pick it out, it’s like rice paper.View attachment 114840

I put in some cantaloupe and covered with eggshells. View attachment 114841

They seem to like it. View attachment 114842

I spray the top with a water bottle until wet again each morning after checking to see if it’s dry. M concerned about it being to damp or dry. Trying to keep it moist is harder than watering plants.

Put a bit more eggshell in the middle.View attachment 114843

We’ll check it again on the weekend.
Just curious: Did you bake the egg shells? I'm new to worm bins, too, but think I remember someone suggesting that. Maybe even necessary for some reason. I have some toasted eggshells left over from one of stonemason's KNF recipes, but may ht the easy button and switch to ground oyster shell when that runs out.

I love your bin design. The stuff you guys are printing blows me away.

i've never done that... i put old stinky shells in a vitamix and grind till a powder, hold my breath and pour it in a coffee container and seal it up!! my worms don't et it often, pretty much only when i start a new layer. egg shells are a premium at my house though, my chickens go bonkers for them so a lot time i just give them the shells and the worms get some other form of grit.
 
i've never done that... i put old stinky shells in a vitamix and grind till a powder, hold my breath and pour it in a coffee container and seal it up!! my worms don't et it often, pretty much only when i start a new layer. egg shells are a premium at my house though, my chickens go bonkers for them so a lot time i just give them the shells and the worms get some other form of grit.
I did a quick look around trying to see where I read that. Still not sure, lol. I did see several people saying the nuke eggshells in the microwave or toast in an oven to make them easier to grind into powder. I did see some mention boiling the shells and letting them dry to kill off bacteria, like salmonella. That doesn't mean they knew what they were talking about. Plus, you haven't had any issues. Good enough for me.

 
you didn't need to wait for a printer for that...


but i get it man.. totally!!!!.. this coming from a guy who printed his own jean jacket patch!!!!!

View attachment 114864
That, unfortunately, didn’t work on that type of faucet. Even the one I printed needed to be heated up and reformed a bit to work.

I like the patch though. 👊
 
Just curious: Did you bake the egg shells?
No. But the membrane should be washed off as it can cause smells and bacteria.

I'm new to worm bins, too, but think I remember someone suggesting that. Maybe even necessary for some reason. I have some toasted eggshells left over from one of stonemason's KNF recipes, but may ht the easy button and switch to ground oyster shell when that runs out.
You probably read it in Stonemasons KNF thread. When used for gardening they suggest you BBQ the shells to remove any remaining membrane.

I love your bin design. The stuff you guys are printing blows me away.
Not my design but thanks. It was just the first one I saw that wasn’t a shoe box. Has an interesting look that I liked and it was small enough to sit on a counter and look good.

G$ just decided to try as well. He had no luck with one design but tried this one last night with success. Looks Halloweeny as he ran out of black and used orange.
 
i've never done that... i put old stinky shells in a vitamix and grind till a powder, hold my breath and pour it in a coffee container and seal it up!! my worms don't et it often, pretty much only when i start a new layer. egg shells are a premium at my house though, my chickens go bonkers for them so a lot time i just give them the shells and the worms get some other form of grit.
I’m 90% sure it’s what he read in the KNF thread. I don’t recall why but assume bacteria and smell are the reasons like with the worms.

My wife likes hard boiled egg sandwiches. (Also egg salad sandwiches.)Hard boils two eggs about three days a week. I had a jar of them to use in KNF waiting to be BBQed.

A bit of searching and double checking with AI said that eggshells are the best choice unless you have $$$ to get better options that aren’t really needed.

I’ve added a bit of gypsum, Azomite and something else I don’t recall atm to also help with the soil and provide grit. I already have it for the soil grows anyway so why not?

I’ve added egg shells a few times since because I didn’t know to crush all the cannabis trim I added. I gave them a buffet but took away their false teeth. Lol
 
Last edited:
I did a quick look around trying to see where I read that. Still not sure, lol. I did see several people saying the nuke eggshells in the microwave or toast in an oven to make them easier to grind into powder. I did see some mention boiling the shells and letting them dry to kill off bacteria, like salmonella. That doesn't mean they knew what they were talking about. Plus, you haven't had any issues. Good enough for me.
I think washing is fine but double check this. When I grind it by hand the remaining membrane sometimes stays larger and I can pick it out like little rice paper chunks. Okay for the small amount I do but I wouldn’t want to hand grind for a huge compost or outdoor bins. Lol

I’ve only had them for a week now so be careful copying anything I’ve done. I try to work with what I have that’s sustainable and still healthy.

Feel free to ask or point out things. Constructive criticism is welcome.
 
I’ve been printing a few things I thought some members might like. Silly cheap things I can mail.

Canada post screwed that up for now but I’ll get them out asap.

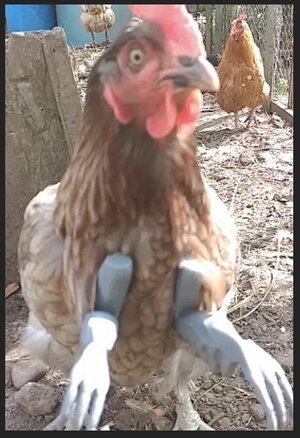
@Stoneyluv this was what made me laugh and think of you. Your chickens like to dress up for Halloween? 🤣IMG_6543.jpeg

Just match up the colours better than this one. 😝IMG_6574.jpeg
 
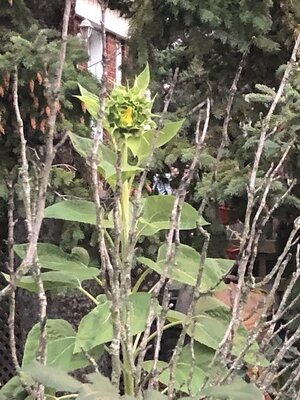
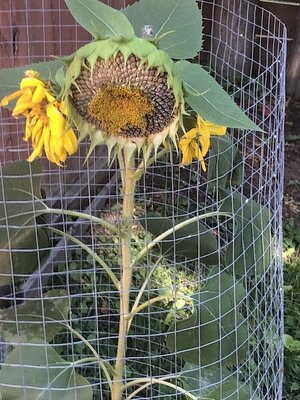
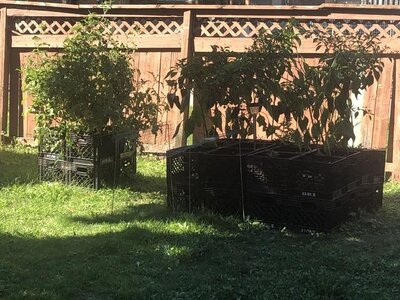
More garden/yard work over the weekend. Trimming bushes and cutting down spent plants. Only tomatoes and peppers left in the vegetable garden. Most of the sunflowers are done but the biggest mammoth.

IMG_6576.jpeg

IMG_6598.jpeg

IMG_6595.jpeg

IMG_6597.jpeg

IMG_6596.jpeg

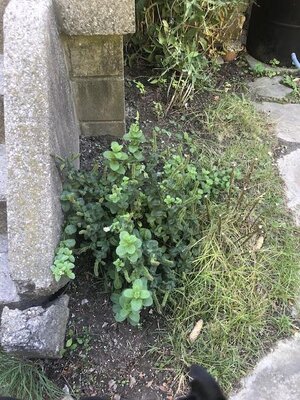
The transplanted spearmint plant is doing great. We cut down the goldenrod so it’s all alone now. We’ll leave the chives but get rid of the grass by next spring.
IMG_6594.jpeg

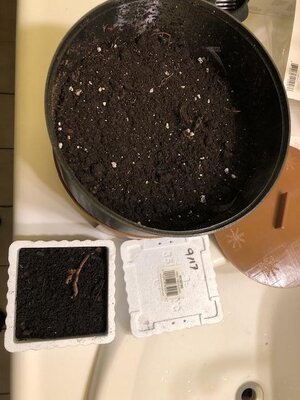
Added another 21.5 worms.IMG_6577.jpeg
 
20250929: Seed selection day

Leaning towards popping B2ACG Grease Monkey.

This way if G$ clones don’t make it I’ve at least got plants growing.

We’ll see if I can get this started today.

Edit: Started
78084077655__7F03F893-4A44-4F5D-B2C4-61EC6AB704DF.jpeg
 
Last edited:
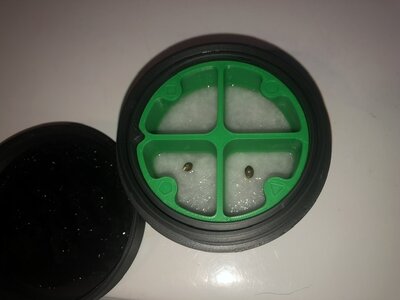
20250930: Grease Monkey (B2ACG)

IMG_6635.jpeg

Both seeds have cracked open in about 22 hours.
IMG_6638.jpeg

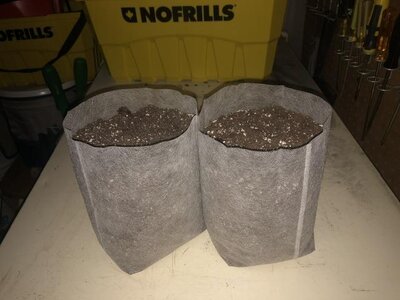
Getting the new grow bags ready with the cooked soil. Soil smells like my forest earth so I’m hoping that’s a good sign. It’s been cooking premixed for about two months. IMG_6637.jpeg

Bigger than a red cup but it worked well for the tester sunflowers.

Going to spray it with a little of the JMS I saved in a spray bottle. Might be to old but I recall Stonemason saying he used it to soak his soil so we’ll do that.

I usually flood a red cup and leave it until I see the seedling rise up. Not sure if I’ll be doing that or manually adding water as needed.

These are the first prize seeds I’ve popped. 🤞
 
Hey, I have my 12v fan with a transformer and I ordered a 12v timer $20. I have 3- 12" pizza boxes, My microplaner is in the freezer, I have vinyl gloves and parchment paper. I have a frozen water bottle to hold when I'm not microplaning my sht to keep hands cold, as I write this I remember I want turkey bags, cooking bags to work the hash in....Fridge is working well. timer should be here this week. I'll get it all working and start drying my hash....much longer a process than dry sifting I thinks, Margarita's are working well.lol
 
Back
Top Bottom