3D printers and the things growers and stoners can make with them

So currently it is not prohibited by federal law to manufacture firearms for personal use. As long as its not sold, traded, or transferred, its 100% legal to 3d print guns. Crazy isnt it?
Can’t print handguns or other restricted up here.

I know you can make/build a non restricted but not sure about printing or “ghost guns” or parts.

Parts for restricted or prohibited would be a Nono but again not sure about non restricted?
 
Not growing related but 3d printer related.
My father in law is a wicked nerd but i love the dude.
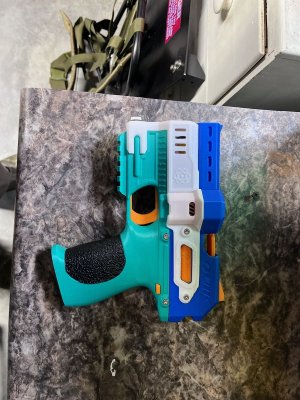
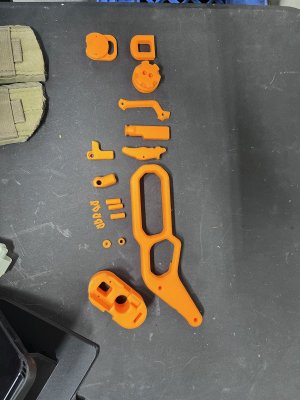
Hes currently printing dart guns for my wife and i to shoot the shit out of each other with🤣🤣

He also just finished printing 3 full scale and 3 80% scale proton packs from ghostbusters.

I can see this being my next project. Not for the wife though. There's some squirrels in the backyard who like to steal my tomatoes and olives before they get ripe and it's time for a reckoning. I don't wanna kill them but I do wanna pop 'em a few times when I see them checking out my veggies.🤠
 
I can see this being my next project. Not for the wife though. There's some squirrels in the backyard who like to steal my tomatoes and olives before they get ripe and it's time for a reckoning. I don't wanna kill them but I do wanna pop 'em a few times when I see them checking out my veggies.🤠
I used to use paint balls. Ran out a few years ago and no longer play.

Never had a squirrel issue for years. Can’t do it now though...new laws.
 
I used to use paint balls. Ran out a few years ago and no longer play.

Never had a squirrel issue for years. Can’t do it now though...new laws.

I had a blow gun that could shoot small paint balls or darts I'd use to tag the little bastards. I was spooky accurate with the thing up to about 30' so for a Summer there were some squirrels running around with yellow and blue paint splatter on their butts. I gave it up though because I'd lose darts and my dog stepped on one and it went thru his foot. He was fine like nothing was wrong, just walking around with a dart in his foot, so I pulled it out and cleaned it up but decided my blow gun days were done after that
 
I had a blow gun that could shoot small paint balls or darts I'd use to tag the little bastards. I was spooky accurate with the thing up to about 30' so for a Summer there were some squirrels running around with yellow and blue paint splatter on their butts. I gave it up though because I'd lose darts and my dog stepped on one and it went thru his foot. He was fine like nothing was wrong, just walking around with a dart in his foot, so I pulled it out and cleaned it up but decided my blow gun days were done after that
My last bouvier Bear hated them. He caught a few over the years so they stayed away. But he passed as the first lockdown started. They got bold. Willow is just getting to the stage she listens enough to be trusted to let out and chase but come back when called.

Then we’ll see about the tree rats.
 
I had a scope on my Tippman(?) custom SS barrel. Hit a squirrel in the head sunbathing in the “V” of the maple beside the house. About 15’-20’ out the window.

It slid out of the tree like melted butter and hit the ground 10+’ below. I couldn’t believe I had hit it. But ran outside but it was gone! Just gone. No yelling or running around.

I must have stunned it or knocked it out for a second. I was set to outdoor pressures so harder hitting. Never saw a squirrel in that tree until the next year. 🤣
 
Yeah I saw that too.

The technology will be everywhere someday just like computers took over.
I hope so! We got the communicators now I want the fabricator. Star Trek was our inspiration.
 
I decided to take screenshots of a new build and a do a little walk thru with Y'all on it....

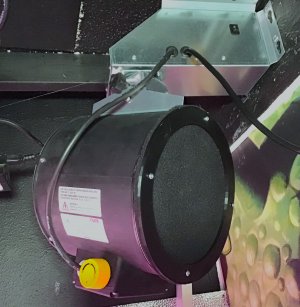
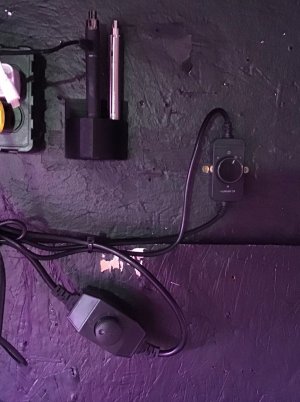
The problem needing a fix is a dangling inline speed control on my air scrubber. Adhesives simply wont work due to a rough and painted surface. Tried double sided tape and velcro, both failed. Could go buy little screw on cord clips but having a 3D printer, I can do better than that!
IMG_4485.JPG

So I'm going to design and print a cradle that will keep the speed controller attached to the wall and help keep it more organized.

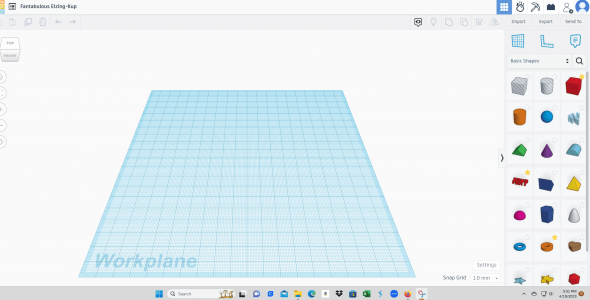
To start I go to Tinkercad, click on my profile, click new design, and it opens up a new work plane.
On this page you can see the name of the project in the upper left corner, a menu of starter shapes on the right side of the plane, and various buttons across the upper tool bar.
First thing to do is change the name to something recognizable in the upper left corner.
Everything is mouse controlled so it's all click and drag or click and type
tutorial1.png


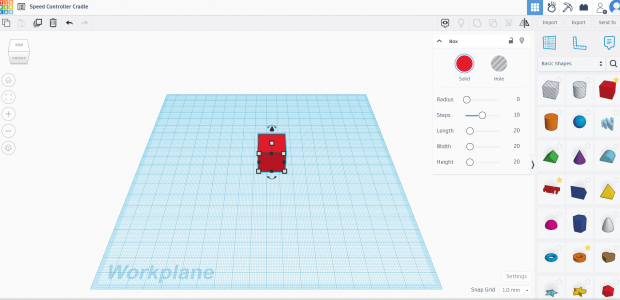
After changing the name, to start I click and drag the cube from the shapes menu onto the work plane. You see some basic shapes in the menu but that's just a small sample. There are hundreds of starter shapes to choose from but since this is a basic design, the cube and cylinder are all that's needed.
Looking at the cube there's 5 little white boxes which designate Height x Width x Depth. Above the cube is a little black cone. Clicking on that will raise or lower the project from the work plane. And the little curved arrows around the cube are to turn and flip it.
tutorial2.png

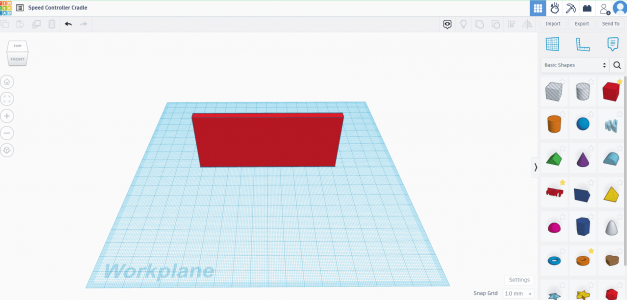
I click on the little white boxes and change the dimensions of the cube. I believe this one was 105mm x 35mm x 5mm
tutorial3.png

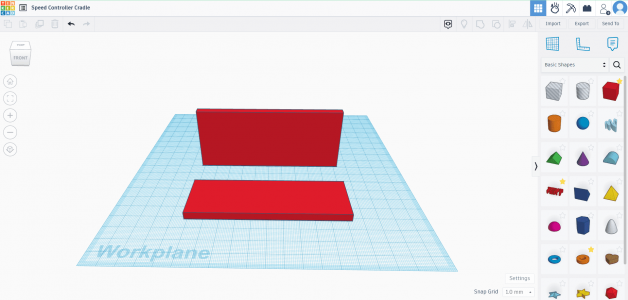
So that gives me the back. Now I'm going to do the same thing. Click and drag another cube onto the work plane and change it's dimensions.
tutorial4.png

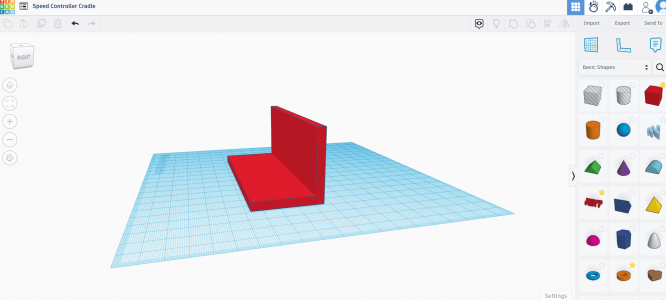
Now I'm going to move the base and join it up to the back wall
tutorial5.png


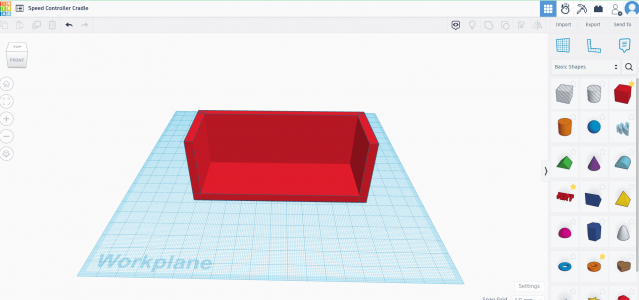
Next, the side walls. Same routine, however when needing two identical parts I only have to make one. After making it you can see in the upper left corner some buttons. The button that looks like stacked pages next to the trash bin is the duplicator button. Clicking that button will produce a mirror image of a part so I do not have to reshape two parts, just the one and then duplicate it.
tutorial6.png

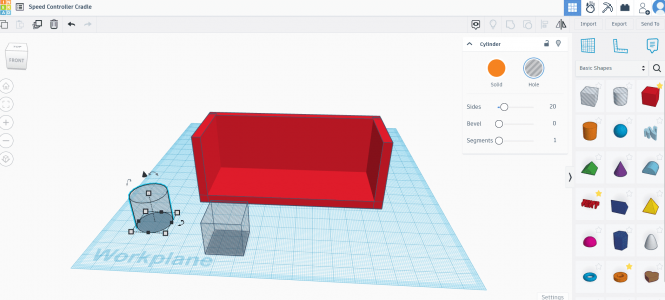
Now is where some magic happens. These next shapes I work with represent holes and is the way to cut holes or shapes into the project
tutorial7.png


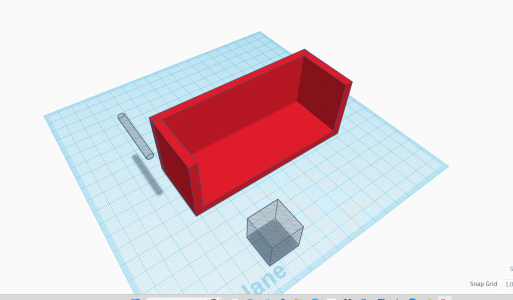
I have a cylinder hole and cube hole so for the cylinder which will be the hole where a screw will go thru to mount the cradle to the wall I reshape the cylinder, turn it on it's side, and elevate it up off the work plane
tutorial8.png

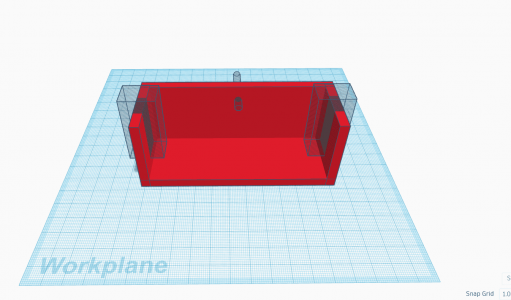
Next I do similar steps with the cube and move it into position but again since I need two, I only do one then click the duplicator button.
tutorial9.png


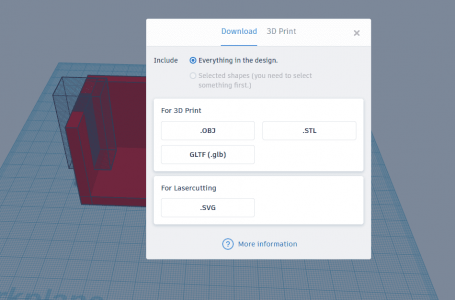
Looks crazy right? Well we're almost done! The model is complete and ready to export so I click on the export button in the upper right corner and it brings up a menu of what format I want the download. For this it's .STL
tutorial10.png

Next, on my computer tool bar I click on downloads and it will show me the new file. I click on the file to open and it will open the file with the Creality Slicer program installed in my pc.
And once open in the slicer here's how it looks
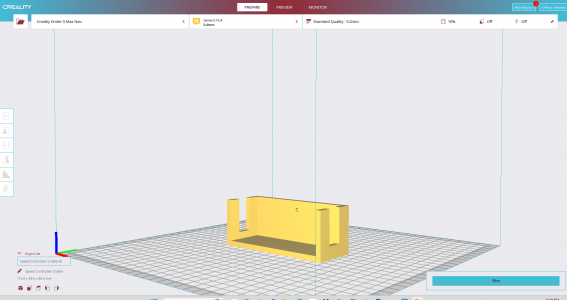
tutorial11.png

Now that it's in the slicer it becomes one object rather than a bunch of parts tied together. Within the slicer I can do a lot more...I can change it's size and multiply it. I can also click a drop down menu and change it's density, printing temp, how it adheres to the printer, and much more. But since this is a basic one off print with no further adjustments needed outside basic default settings it's ready to go.
So I click slice which turns the print into a G-code the printer can read which is kinda like a GPS road map for the printer to follow. After clicking slice then it's time to save the G-Code onto a micro SD card
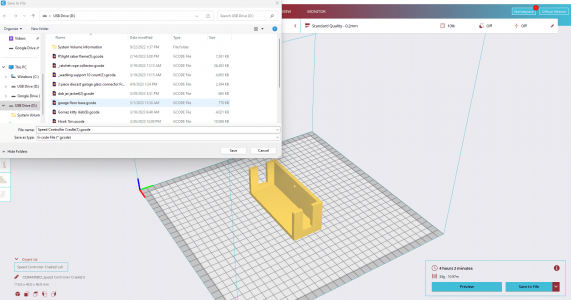
tutorial13.png

From there the SD card goes from the pc and into the printer. Hit print and it will show menu options from the card then I just find the project and click print again.
After 4 hours on the printer, I have my new cradle
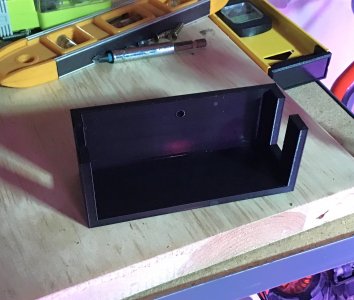
IMG_4484.JPG

Then after installation, the issue of a dangling speed controller is remedied!
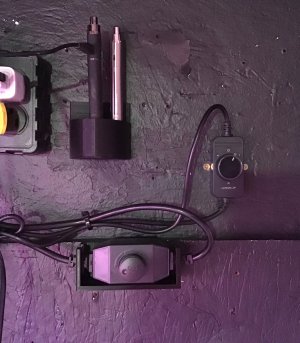
IMG_4486.JPG
 
No, I don't think the freedom is crazy. I think the govt is. I just don't trust that they will read the laws the same as I do from personal experience.

If that lower leaves his possession (say gets stolen) he's liable.

I used to do a lot of this kind of work on my milling machine. Quit many years ago when they got all serious about sending folks to jail.

View attachment 740

Start with a billet of 6061 and end up with an ar15 lower. And that's all I have to say about that (read in Forrest Gump's voice)
Damn red is there anything you don’t work with! Lol nice little machine - I was a journeyman well still am - before the concert , some were NMC but for the most part I made everything manually I’ve made it all - looks like you have too!
 
Damn red is there anything you don’t work with! Lol nice little machine - I was a journeyman well still am - before the concert , some were NMC but for the most part I made everything manually I’ve made it all - looks like you have too!
You don't want me touching a painting brush.

For the machining - same process and software as the 3D printing. Same with the laser cutter. And a friend runs a full machine shop with hydro cutters and other cool stuff. A large customer has an injection molding plant, and he would work with me on short run stuff. If a part can be described in software, I can build it.

I've thought about working with folks like @Bandit420 and putting together a library of parts with prices. Get enough orders for something, have it injection molded.

These twist locks would be an example.

A102E2A7-F75D-490F-AEE8-7E646A1713F0.jpeg
D166072D-BE7B-4B8F-8E74-9BDACE397F80.jpeg
C1D32455-027C-447F-B4AA-7645E19F5609.jpeg

Here's a link where SLG is using them in an RDWC

 
Last edited:
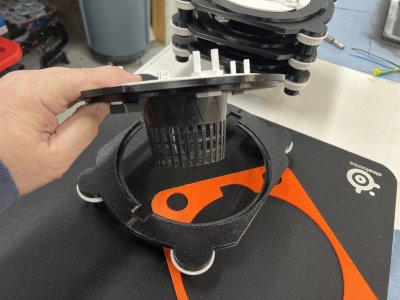
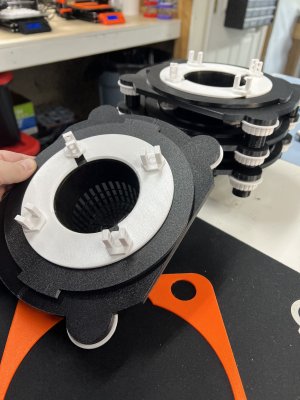
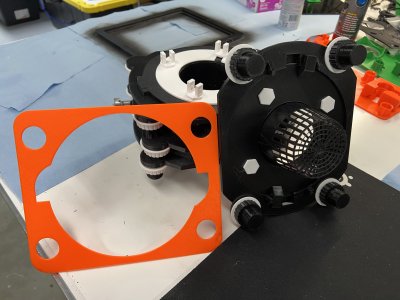
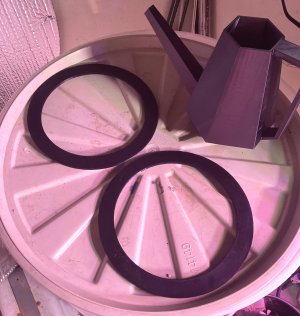
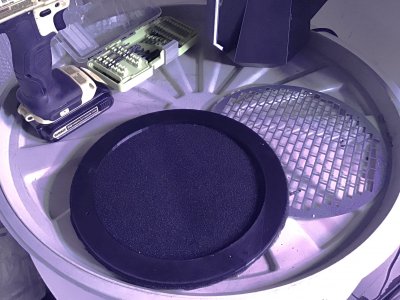
Very happy with my new dust, mold, & pollen filter for my main oscillating fan
Printed two rings then made a fliter sandwich with the two prints, hot gluing them together.
Next I used the fans grill for a template to drill holes and bought xtra long screws to make sure the bolts were long enough to go thru the new filter and fan grill to make it all secure

IMG_0301.JPG

IMG_4513.JPG

IMG_4515.JPG

View attachment IMG_4517.MOV
 
Very happy with my new dust, mold, & pollen filter for my main oscillating fan
Printed two rings then made a fliter sandwich with the two prints, hot gluing them together.
Next I used the fans grill for a template to drill holes and bought xtra long screws to make sure the bolts were long enough to go thru the new filter and fan grill to make it all secure

View attachment 1344

View attachment 1345

View attachment 1346

View attachment 1347
I have a few of those. The gear box blows up on them. Nice idea but they need to beef up the gears.
 
Very happy with my new dust, mold, & pollen filter for my main oscillating fan
Printed two rings then made a fliter sandwich with the two prints, hot gluing them together.
Next I used the fans grill for a template to drill holes and bought xtra long screws to make sure the bolts were long enough to go thru the new filter and fan grill to make it all secure

View attachment 1344

View attachment 1345

View attachment 1346

View attachment 1347

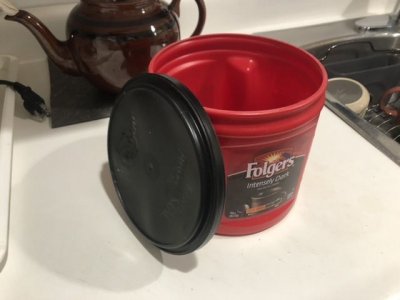
No printer so I use the centre of the coffee can lid to do the same. I cut out the middle and cover with a nylon stocking.

1811C0C2-82F3-4844-AC51-8F1A8F402767.jpeg

Not as pretty but until we get a printer...
 
You don't want me touching a painting brush.

For the machining - same process and software as the 3D printing. Same with the laser cutter. And a friend runs a full machine shop with hydro cutters and other cool stuff. A large customer has an injection molding plant, and he would work with me on short run stuff. If a part can be described in software, I can build it.

I've thought about working with folks like @Bandit420 and putting together a library of parts with prices. Get enough orders for something, have it injection molded.

These twist locks would be an example.

View attachment 1013
View attachment 1014
View attachment 1015

Here's a link where SLG is using them in an RDWC

Prolly already said but I’m a tool maker by trade - left the trade when cnc took over I can G code but not very good with master am and like software , made a little of everything over the years injection molds , progressive dies , special equipment, and the list goes on here’s just a few small car parts I tooled - also all the tooling on ford f150 Aframes in the 90’s everything from transfer dies to ball joint installer ! Those were the days - don’t miss the pressure at all! Lol
 

Attachments

  • IMG_6453.jpeg
    IMG_6453.jpeg
    1.4 MB · Views: 3
I prefer to oversize things like fans, pumps and lights if I can.
Running anything at 100% or near is rough on long life.
Having more than you need makes it easier to dial in IMO and promotes longer life and less of some tools side effects like heat.
 
I prefer to oversize things like fans, pumps and lights if I can.
Running anything at 100% or near is rough on long life.
Having more than you need makes it easier to dial in IMO and promotes longer life and less of some tools side effects like heat.
That’s the engineer in you sprinkled with knowing you are the guy that has to fix it if it breaks.
 
Prolly already said but I’m a tool maker by trade - left the trade when cnc took over I can G code but not very good with master am and like software , made a little of everything over the years injection molds , progressive dies , special equipment, and the list goes on here’s just a few small car parts I tooled - also all the tooling on ford f150 Aframes in the 90’s everything from transfer dies to ball joint installer ! Those were the days - don’t miss the pressure at all! Lol
All my stuff is toys really compared to what you ran. Bridgeport?
 
I prefer to oversize things like fans, pumps and lights if I can.
Running anything at 100% or near is rough on long life.
Having more than you need makes it easier to dial in IMO and promotes longer life and less of some tools side effects like heat.
One of my favorite phrases in growing gear is "Commercial Grade". Everything is heavy duty when it's CG. Even the plastics for things like trays, water tanks, and containers are thicker and sturdier.
My lights are commercial grade too and there's a big difference between their output, build quality, and parts used inside compared to similar lights. They weigh twice as much as LED of similar size as well because they use an oversized heat sink while others tend to cut that corner and go undersized
What lights do you use?
 
I prefer to oversize things like fans, pumps and lights if I can.
Running anything at 100% or near is rough on long life.
Having more than you need makes it easier to dial in IMO and promotes longer life and less of some tools side effects like heat.
You have to be careful sometimes. Too much oversized can also be a problem
 
All my stuff is toys really compared to what you ran. Bridgeport?
Anything with handles - of course Bridgeport was the best by far ! Especially before digital readouts - wow I’m old! Lol what took months to build was down to weeks with the inception of cnc and the advancement of wire burners ! Lasers wow the toys you guy play with today !
 
Back
Top Bottom