3D printers and the things growers and stoners can make with them

Bandit420

The Texican
Bud Builders Supporter
Joined
Apr 15, 2023
Messages
2,907
Reaction score
19,180
I'll start it off by saying if I and all my ADD, blurred vision, stoned and aging mind can figure out this stuff then I know you can to. At first it's overwhelming but then I realized it's all simple really once you understand a few things and go thru some trial and error. I'm fairly new to all of it but getting better with each new project.

My printer is a Creality Ender 3 Max Neo and I can make anything sized up to about 11"x 11"x 12"

I use the Creality Slicer program which is the same as Cura. I also have Creality Print on my PC but have not got into using it much

To make things that do not exist or to resize downloads of prints others have made I use Tinkercad which requires an account set up. Using it is free

To download files of existing things, I use Cults and Thingiverse.
Basically my process is download a file and put it on my desktop. From there I open up Tinkercad, start a new project, and hit the import button. It will import the download to my Tinkercad profile and from there I can resize it to exactly what I want.

This link is to my Tinkercad account where you can find all the things I've created and made public for anybody to take and remix or download as is to your computer.

Some of the things I've either designed from nothing, just working with shapes to make things, or taking a download and remixing it to the specs I need...

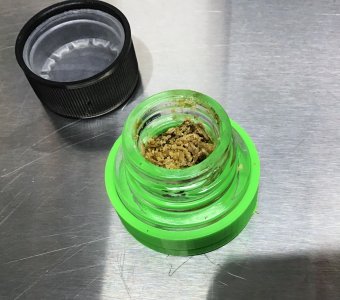
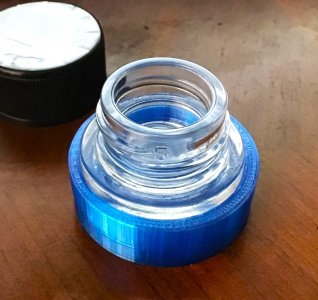
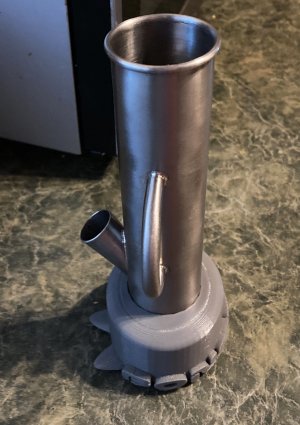
Vertical germinators

IMG_3702.JPG

IMG_4356.JPG

IMG_4380.JPG

IMG_4381.JPG


Seedling support stakes for stretchy sprouts

IMG_3713.JPG

SCROG hooks

IMG_3810.JPG

IMG_3822.JPG

Ratchet rope hanger organizers

IMG_4374.JPG

Inkbird CO2 monitor wall mount cradle

IMG_4373.JPG


Watering can

View attachment IMG_4360.MOV


Netcups

View attachment IMG_4336.MOV


To be continued....
 

Attachments

  • IMG_4239.JPG
    IMG_4239.JPG
    261.3 KB · Views: 5
  • IMG_4421.JPG
    IMG_4421.JPG
    553.8 KB · Views: 5
  • IMG_4459.JPG
    IMG_4459.JPG
    295.8 KB · Views: 3
  • IMG_0173.JPG
    IMG_0173.JPG
    752.4 KB · Views: 3
So cool.

I need go grab some pics of the ones I work on at the real job. $1.5M each. Not kidding.

svp-from-ejenson-april-202140*1200xx2736-1539-0-143.png


My part is the imaging system behind the blue panel.
 
Don’t have a printer yet but one thing I wanted to make was a caddy for my clips.

Seems easy enough unless I wanted a fancy dispenser with it.

They stack pretty well.
AFAB5932-6CD2-4E5C-98D5-5E358E033263.jpeg9761E30F-EF94-4E3A-BDFC-81C6F89123EB.jpeg

Not much any more but still a million dollar idea I’m sure.
 
Are those for LST?
Yes sir, and strong. I do larger older branches as they veg longer and need to be topped twice.

 
Cool! Let me think about it a bit. Wasn’t expecting anyone to be interested.
Actually, if you want to send me one, I'll design the tray, copy the part, and make them available to everyone and send you your part plus the tray back.

Something like a top load / bottom dispenser that could hang on the wall or maybe clip to a tent pole sounds about right, printed in white PETG for light resistance. They will always be in reach, and when you don't need the clip just pull them and put them back.
Cool. Saves doodles on graph paper.

DM me an addy. I’ll send 2. You pretty much got the idea. Clip onto SCROG, pocket, tent, etc.

Top load bottom feed. Or FIFO if a programmer. 🤣 only thing I hadn’t put much thought into is how to refrain from putting some backwards. It affects the way they stack.

Each pack holds 20 for $16. Too $$ to buy many but I have 60 so was trying to decide how many would be good per container. 20 is to small, but handy. 60 is probably to big for anything but a stationary unit. 30 seemed reasonable but that is as far as I got.

Now how long will it take for me to leave the property. That’s the real question.

Let me know if you need anything at all in the DM.

Zen
 
So cool.

I need go grab some pics of the ones I work on at the real job. $1.5M each. Not kidding.

svp-from-ejenson-april-202140*1200xx2736-1539-0-143.png


My part is the imaging system behind the blue panel.

What you building houses and cars?
I remember seeing a pic of your work bench with 3 printers on it. I thought to myself, why would he need 3? Maybe they have different features, some better than others, until I did an 89 hour job then realized ok, there's a reason to have 3 printers 😉


Don’t have a printer yet but one thing I wanted to make was a caddy for my clips.

Seems easy enough unless I wanted a fancy dispenser with it.

They stack pretty well.
View attachment 597View attachment 598

Not much any more but still a million dollar idea I’m sure.

That would be very ez to make. If Moe gets too busy or anything I could either print out my box with lid design, just remixed to fit that stack or better would be the idea of a wall mount dispenser where you pull one out from the bottom and the stack drops down then refill it from the top.
Measurements in MM are best and most accurate using a digital caliper. Measure the complete stack, Height x Width x Depth dimensions. From there it could be designed, choose a color, and even personalize it. Probably less than an hour to design on the 'puter and anywhere from 2-8 hours to print I'd imagine.
The clips themselves would be very ez to duplicate as well. The size could also be changed if smaller or larger clips would be needed.

Dispensers for things and little cradles or caddies, inserts to fit inside car consoles are really fun to make mostly because they solve little nagging issues in life and help keep things organized.

This is a dryer sheet dispenser I made to replace the box Bounty 200ct dryer sheets come in. The boxes tend to be flimsy and look a mess after a bit so this really tidies it up

IMG_4274.JPG


This is a wall mount terp pen charging station and cradle for 4 pens. Eventually I'll redesign this so the charge plug and wires are built into the cradle

IMG_4297.JPG


And a real problem solver here...Who hates losing a lighter in between the seats of your sled on a road trip? And not just a lighter it also holds two doobs, a terp pen, and 2 disposable vapes for those xtra long roadies:cool:

IMG_3696.JPG
 
I gotta be a little careful here, but the one I work on is essentially a digital injection molding machine. It uses true ABS (not the doctored stuff we get as filament for our little printers) and the layers are about 1/4 the width of a hair. Dimensional accuracy is 98% as good as injection. It is the 7th additive manufacturing process in a class of it's own. Serious engineering porn.

How did you do the longhorns in white?

Uggh. ABS might as well be a four letter word for me. I tried to use some ABS Pro and it just tore up my hot end. Clogged nozzles then finally jammed up gunk inside the aluminum shaft so I had to replace it. Then I did some research and found my printer was in now way capable of working with the stuff. Got word from Stoney to use TPU for that project and now I'm happy again but dang that ABS still gives me a frowny face.

On the longhorns I just pause the print, keep the PLA heated, and change out the spool. For that name plate I just waited until I started to see it forming the letters then made the swap. I also have some marker pens but if I can mold the color with the filament it looks a lot better.
I've also done 2 and 3 color prints on my netcups but have found it's best to not mix different brands of filament. Some just don't adhere to the next as well as they should so if I'm doing a multicolor print I make sure to use the same brand of filament for each color
 
I bought the Prusa MMU upgrade that did 5 colors. Took it right back off after it erased a few years off my life with all the stress.

Your way works good.

Also there is a way to put a pause in the gcode so you don't have to hang around for the perfect time to stop the print and change color.

The biggest problem with stopping and switching, especially with different brands is the cross-linking of the plastic suffers, and those spots become weak. I think it is better with PET than PLA, so I usually use PET when I need strength, or in our case UV resistance.
 
I can see the rabbit hole now....

Want one so bad. Son keeps dropping hints. He’s into making robot models. Gets a lot from Japan.

It's definitely a rabbit hole.
I got started because I wanted a base for a small bong. I found a usable base online but I had to order 40 of them in a bulk shipment from Canada. It was lijke $300 worth of bong bases. I asked around people I knew that had 3D printers and they all said it would be ez but they're people I work with and couldn't tell them it was for a bong.
Then last year for Black Friday amazon had a Tina2 printer on sale for only $80. It's a small printer for kids really, very entry level, and it could make things about 3"x3"x3" which was perfect for the bong base I needed.
Then I realized all the other things I could use that didn't exist. The size limit of the Tina2 killed some ideas then when Prime Day came around this year I splurged on a larger more grown up printer to do things I never considered before.
Right now I'm in the middle of a literal construction project building a mini museum garage for car models that will have front sliding glass doors. Now I'm 100s of hours into printing and designing this one of a kind mini building. Working on the roof section now then will come the flooring and interior stuff. The two roof panels printing now alone are 60 hour prints 😵
 
Actually, if you want to send me one, I'll design the tray, copy the part, and make them available to everyone and send you your part plus the tray back.

Something like a top load / bottom dispenser that could hang on the wall or maybe clip to a tent pole sounds about right, printed in white PETG for light resistance. They will always be in reach, and when you don't need the clip just pull them and put them back.
Dude I like the way you think !
 
I totally get off on having an idea, converting it into a design on the screen, and waking up the next morning to it in my hands.

Once you have one (or 3 or 5) you will never stop finding things to make with them. Never.
 
Not growing related but 3d printer related.
My father in law is a wicked nerd but i love the dude.
Hes currently printing dart guns for my wife and i to shoot the shit out of each other with🤣🤣

He also just finished printing 3 full scale and 3 80% scale proton packs from ghostbusters.
 

Attachments

  • IMG955047.jpg
    IMG955047.jpg
    81.8 KB · Views: 10
  • IMG955048.jpg
    IMG955048.jpg
    163.8 KB · Views: 11
  • IMG_5050.jpg
    IMG_5050.jpg
    158.1 KB · Views: 12
@Bandit420
I totally get off on having an idea, converting it into a design on the screen, and waking up the next morning to it in my hands.

Once you have one (or 3 or 5) you will never stop finding things to make with them. Never.
I have similar issues as most here do. So coolness and creative are a big plus. But at first I just wanted to be able to fix the items stores make disposable with cheap plastic parts.

Like the microwave handle clasp. I’ve had to disassemble it twice and glue with cloth and baking soda. (Cloth acts like a stiff bonding agent to hold sides together and soda is a filler that goes like cement for crazy glue.)

So I wanted a good, reasonably priced, printer. Times have changed as well as my circumstances but I still think a good reliable printer is the way of home improvements. Argh argh argh. (Know the reference? Tool Time)

But I have to take things apart to see how they work if I don’t know. New or old. Wifey hates it. But then I improve so many things she puts up with it.
 
Last edited:
Not growing related but 3d printer related.
My father in law is a wicked nerd but i love the dude.
Hes currently printing dart guns for my wife and i to shoot the shit out of each other with🤣🤣

He also just finished printing 3 full scale and 3 80% scale proton packs from ghostbusters.
Up here you are allowed to make nonrestricted but it’s a fine line.

I already mod my stuff like crazy. All legal but fun as hell unless you muck it up. Then $$$. 🤣
 
Good thing that is made of marshmallow and could never be fired IRL, cause that could get you in some serious trouble if you are not careful.
So currently it is not prohibited by federal law to manufacture firearms for personal use. As long as its not sold, traded, or transferred, its 100% legal to 3d print guns. Crazy isnt it?
 
Back
Top Bottom