Shaded
Organic Soil Wizard
- Joined
- Apr 15, 2023
- Messages
- 329
- Reaction score
- 2,680
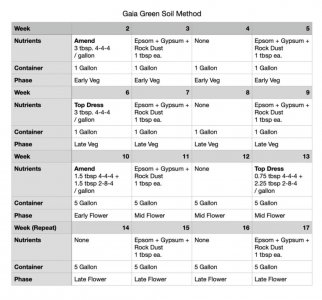
Hello and welcome to my very simple guide for growing some bomb ass weed with Gaia Green organic nutrients! Would you like to feed your plant once every 2 weeks and spend the rest of your time just watering? Then spark a joint and read on. This guide works for indoor, outdoors and on any other garden variety plants or fruiting plants that you might have.
So what makes this Shaded’s Method? Because when I first became interested in using Gaia Green ~2 years ago there was no information online in regards to cannabis specific guides, and following the label on the package led me to issues of all sorts. A few major deficiencies popped up for me and that’s how I refined my guide and added each of the trifecta supplements that I use in the recipe today. Gaia Green products are 100% organic dry amendments for cannabis use. They are a Canadian based company but they also sell their product in the USA as well. They have a wide variety of products to offer and you may find a specific use for some of them in your gardens, but for the sake of simplicity I am just going to focus on the required essentials that I use in this guide.
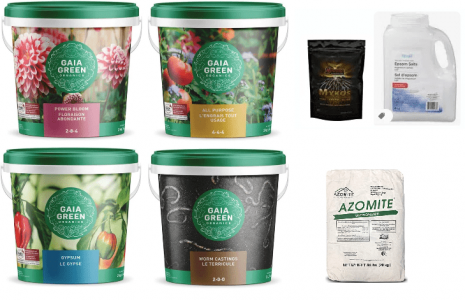
~~THIS GUIDE WILL ALSO WORK WITH ANY OTHER ORGANIC, DRY NUTRIENT LINES THAT HAVE THE SAME NPK RATIOS OF 4-4-4 AND 2-8-4~~
MACRONUTRIENT FEED GUIDE (Gaia Green 4-4-4 or 2-8-4)
Seedling phase week 1-2:
Congratulations, you've germinated a seed and plopped it into a nursery container or solo cup. NO nutrients are being added to the growing medium. Earth worm castings & cotyledons provide more than enough nutrition for the first 2 weeks of a seeds life. You may even find that you don’t need to add EWC during this phase. The Trifecta is optional during this phase but not necessary.
-at this point I would transplant into a 1 gallon container-
Early veg phase weeks 2-6:
Amend or top dress 3 tablespoons of All Purpose 4-4-4 per gallon of growing medium (eg. 3 tablespoons of 4-4-4 for a 1 gallon container)
Amend or top dress 1 cup of EWC
-at this point I would transplant into a 5 or 7 gallon container-
Late veg phase if required weeks 6-10:
Amend or top dress 3 tablespoons of All Purpose 4-4-4 per gallon of growing medium (eg. 15 tablespoons of 4-4-4 for a 5 gallon container)
Amend or top dress 1 cup of EWC
Early flower phase, 1 week before flipping to 12/12:
Amend or top dress 3 tablespoons using a 50/50 ratio of All Purpose 4-4-4 and Power Bloom 2-8-4 per gallon of growing medium (eg. 7.5 tablespoons of 4-4-4 and 7.5 tablespoons of 2-8-4 for a 5 gallon container)
Amend or top dress 1 cup of EWC
Mid flower phase, week 3 of flower:
Amend or top dress 3 tablespoons of All Purpose 2-8-4 per gallon of growing medium (eg. 15 tablespoons of 2-8-4 for a 5 gallon container)
Amend or top dress 1 cup of EWC
Late flower phase, week 7 of flower:
This is where you need to determine if you are growing an indica or a sativa. Your indica plants should be very close to being ready at this point, whereas your sativa plants may look like they need another 4 weeks or longer. I would recommend following the below guide based on the type of plant you are growing.
Indica: apply a half strength “Mid flower phase” top dress (eg. 7.5 tablespoons of 2-8-4 for a 5 gallon container)
Sativa: apply a full strength “Mid flower phase” top dress (eg. 15 tablespoons of 2-8-4 for a 5 gallon container)
-harvest-
This is the basic feed schedule and this is a FULL STRENGTH feeding regiment meaning you are pushing your plant pretty hard. Certain strains and different growing environments may mean that you might only need to use 2/3 of what I have here for amounts. I recommend starting off with 2/3 of what is listed and increasing to full amounts if you're certain that your plants can handle it.
MICRONUTRIENT FEED GUIDE (Epsom, Gypsum, Azomite aka the Triforce)
I start adding the triforce of micronutrients after my first transplant, unless I am seeing strange deficiencies pop up on my young seedlings which is very rare but not impossible and then I’ll start sooner. So pretty much from week 2 until the end of harvest I am adding the triforce every 2 weeks. The amount that I use varies from pot size to pot size but generally I use the following guidelines:
1 tablespoon of each every 2 weeks for a 1 gallon container
2 tablespoons of each every 2 weeks for a 5 gallon container
3 tablespoons of each every 2 weeks for a 7 gallon container
Pretty much once you get started you are either top dressing macronutrients in 4 week blocks or adding micronutrients every 2 weeks, and then you just water your plants. Good luck and happy growing!
__________________________________________________________________________________________________________________________________________________________
Mycorrhizae
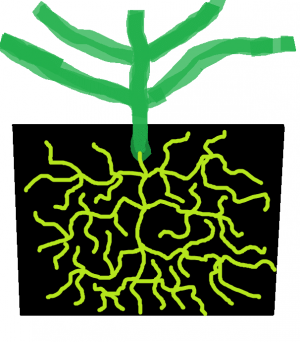
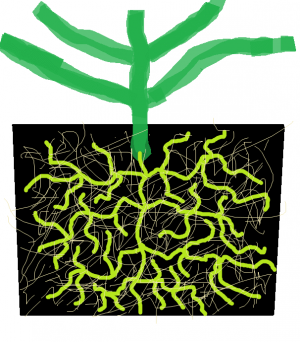
I generously dust the root ball EVERY time I transplant and I also add a couple scoops into my soil mix any time I amend some soil to be going into a new container. Do not underestimate your rhizosphere and the role it plays in nutrient uptake. Look for high prop/g or propagules per gram.
Epsom Salts - Magnesium Sulfate
MUST BE PLAIN UNSCENTED. LEDs drastically increase the demand for Mg and this helps cover that demand. Overall plant health and nutrient uptake seems to improve when added to the mix.
Gypsum - Calcium Sulfate
Decreases soil salinity and improves soil structure while also providing Calcium and Sulfate. Make sure you use micronized or powdered, not granular forms.
Azomite or Rock Dust Blend - Micronutrients and Humic Acid
Used primarily to supplement micronutrients that may be lacking. Overall plant health and lushness improved once added to the mix.
Make sure you use micronized or powdered, not granular forms.
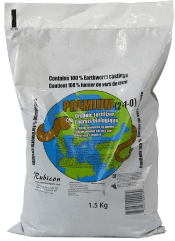
Earth Worm Castings
Worm poop aka black gold. These guys are the work force of your soil, they break down the nutrients and allow the plant to easily uptake them. Think of them like mailmen delivering mail to your house. Without them you wouldn't get mail. Catch my drift?
GENERAL TIPS AND TRICKS:
-ALWAYS wear a particulate mask when applying or mixing any of these products you do not want to inhale this stuff
-gloves or some sort of hand protection is recommended
-I like to use a smaller container to pre-mix my dry amendments with some of the base soil when it’s time to top dress, this makes much less mess when adding to containers
-I like to leave 3-4” of space to the top of my pot when transplanting into the final containers because you will be top dressing and adding more soil mass each time
-this guide is a just a guide, you will need to monitor your plants and correct any deficiencies that pop up
-earth worm castings are not optional you NEED microbial life for nutrient availability otherwise you will run into issues and it doesn’t matter how much you’ve fed your plant
-there are 16 tablespoons in 1 cup
-remember to have fun

 www.gaiagreen.com
So what makes this Shaded’s Method? Because when I first became interested in using Gaia Green ~2 years ago there was no information online in regards to cannabis specific guides, and following the label on the package led me to issues of all sorts. A few major deficiencies popped up for me and that’s how I refined my guide and added each of the trifecta supplements that I use in the recipe today. Gaia Green products are 100% organic dry amendments for cannabis use. They are a Canadian based company but they also sell their product in the USA as well. They have a wide variety of products to offer and you may find a specific use for some of them in your gardens, but for the sake of simplicity I am just going to focus on the required essentials that I use in this guide.

~~THIS GUIDE WILL ALSO WORK WITH ANY OTHER ORGANIC, DRY NUTRIENT LINES THAT HAVE THE SAME NPK RATIOS OF 4-4-4 AND 2-8-4~~
MACRONUTRIENT FEED GUIDE (Gaia Green 4-4-4 or 2-8-4)
Seedling phase week 1-2:
Congratulations, you've germinated a seed and plopped it into a nursery container or solo cup. NO nutrients are being added to the growing medium. Earth worm castings & cotyledons provide more than enough nutrition for the first 2 weeks of a seeds life. You may even find that you don’t need to add EWC during this phase. The Trifecta is optional during this phase but not necessary.
-at this point I would transplant into a 1 gallon container-
Early veg phase weeks 2-6:
Amend or top dress 3 tablespoons of All Purpose 4-4-4 per gallon of growing medium (eg. 3 tablespoons of 4-4-4 for a 1 gallon container)
Amend or top dress 1 cup of EWC
-at this point I would transplant into a 5 or 7 gallon container-
Late veg phase if required weeks 6-10:
Amend or top dress 3 tablespoons of All Purpose 4-4-4 per gallon of growing medium (eg. 15 tablespoons of 4-4-4 for a 5 gallon container)
Amend or top dress 1 cup of EWC
Early flower phase, 1 week before flipping to 12/12:
Amend or top dress 3 tablespoons using a 50/50 ratio of All Purpose 4-4-4 and Power Bloom 2-8-4 per gallon of growing medium (eg. 7.5 tablespoons of 4-4-4 and 7.5 tablespoons of 2-8-4 for a 5 gallon container)
Amend or top dress 1 cup of EWC
Mid flower phase, week 3 of flower:
Amend or top dress 3 tablespoons of All Purpose 2-8-4 per gallon of growing medium (eg. 15 tablespoons of 2-8-4 for a 5 gallon container)
Amend or top dress 1 cup of EWC
Late flower phase, week 7 of flower:
This is where you need to determine if you are growing an indica or a sativa. Your indica plants should be very close to being ready at this point, whereas your sativa plants may look like they need another 4 weeks or longer. I would recommend following the below guide based on the type of plant you are growing.
Indica: apply a half strength “Mid flower phase” top dress (eg. 7.5 tablespoons of 2-8-4 for a 5 gallon container)
Sativa: apply a full strength “Mid flower phase” top dress (eg. 15 tablespoons of 2-8-4 for a 5 gallon container)
-harvest-
This is the basic feed schedule and this is a FULL STRENGTH feeding regiment meaning you are pushing your plant pretty hard. Certain strains and different growing environments may mean that you might only need to use 2/3 of what I have here for amounts. I recommend starting off with 2/3 of what is listed and increasing to full amounts if you're certain that your plants can handle it.
MICRONUTRIENT FEED GUIDE (Epsom, Gypsum, Azomite aka the Triforce)
I start adding the triforce of micronutrients after my first transplant, unless I am seeing strange deficiencies pop up on my young seedlings which is very rare but not impossible and then I’ll start sooner. So pretty much from week 2 until the end of harvest I am adding the triforce every 2 weeks. The amount that I use varies from pot size to pot size but generally I use the following guidelines:
1 tablespoon of each every 2 weeks for a 1 gallon container
2 tablespoons of each every 2 weeks for a 5 gallon container
3 tablespoons of each every 2 weeks for a 7 gallon container
Pretty much once you get started you are either top dressing macronutrients in 4 week blocks or adding micronutrients every 2 weeks, and then you just water your plants. Good luck and happy growing!
__________________________________________________________________________________________________________________________________________________________
Mycorrhizae
I generously dust the root ball EVERY time I transplant and I also add a couple scoops into my soil mix any time I amend some soil to be going into a new container. Do not underestimate your rhizosphere and the role it plays in nutrient uptake. Look for high prop/g or propagules per gram.
Epsom Salts - Magnesium Sulfate
MUST BE PLAIN UNSCENTED. LEDs drastically increase the demand for Mg and this helps cover that demand. Overall plant health and nutrient uptake seems to improve when added to the mix.
Gypsum - Calcium Sulfate
Decreases soil salinity and improves soil structure while also providing Calcium and Sulfate. Make sure you use micronized or powdered, not granular forms.
Azomite or Rock Dust Blend - Micronutrients and Humic Acid
Used primarily to supplement micronutrients that may be lacking. Overall plant health and lushness improved once added to the mix.
Make sure you use micronized or powdered, not granular forms.
Earth Worm Castings
Worm poop aka black gold. These guys are the work force of your soil, they break down the nutrients and allow the plant to easily uptake them. Think of them like mailmen delivering mail to your house. Without them you wouldn't get mail. Catch my drift?
GENERAL TIPS AND TRICKS:
-ALWAYS wear a particulate mask when applying or mixing any of these products you do not want to inhale this stuff
-gloves or some sort of hand protection is recommended
-I like to use a smaller container to pre-mix my dry amendments with some of the base soil when it’s time to top dress, this makes much less mess when adding to containers
-I like to leave 3-4” of space to the top of my pot when transplanting into the final containers because you will be top dressing and adding more soil mass each time
-this guide is a just a guide, you will need to monitor your plants and correct any deficiencies that pop up
-earth worm castings are not optional you NEED microbial life for nutrient availability otherwise you will run into issues and it doesn’t matter how much you’ve fed your plant
-there are 16 tablespoons in 1 cup
-remember to have fun

HOME PAGE | Gaia Green Organics
High-quality organic fertilizers that produce amazing results.
 www.gaiagreen.com
Last edited:


