Home Office/Man Cave Closet Build

tobh

Royale with Cheese
Bud Builders Supporter
Joined
May 22, 2023
Messages
2,224
Reaction score
9,275
Alright, this ain't what y'all think it is. I'm talking a real closet build, not growing some pots in your mama's spare bedroom type closet.

The requirements are pretty simple:
  • It's gotta look good. Not over the top extravagant but craftsman level, man's man type style
  • Plenty of lighting
  • Well thought out organization capacity
  • Extracurricular activity space(s)
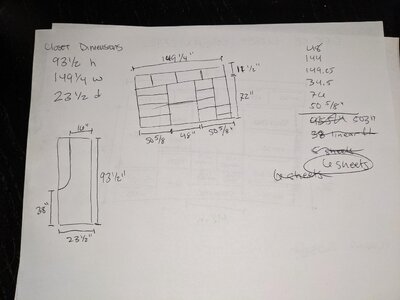
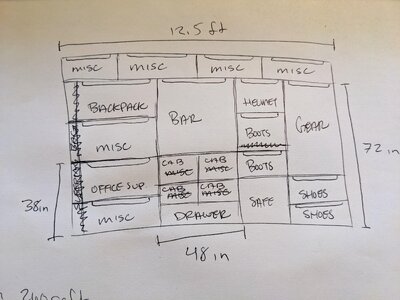
I've drawn up a sketch of the initial concept, and I'm looking for input from other dudes about what you might add/take away.
PXL_20240810_022651077.jpg

Pretty self explanatory, but must say don't judge me. I have more pairs of motorcycle boots than I do normal shoes. I'm also a bit of a shoe officianado and have some rather nice kicks that I'd like to put on display (dress shoes, specifically), and keep safe from the kids and dog. The backpack section is my backpacking gear that lives in, you guessed it, my 70L pack that I'm damn proud of the journeys we've been through together. The top section misc cubbys are predominantly for the ever waxing and waning collection of jars filled with cannabis and memorabilia. Gear is motorcycle gear. Safe is for a damn near impenetrable floor safe (yet to be acquired, but picked out).

My plan is to build this out with 1/2" plywood, stain everything a darker red color (like a darker oak/cherry color, to match the flooring that will be going in), and seal it up with polyurethane for a nice high gloss, durable finish. I want to edge everything out with an ornate, decorative trim. This is where the inspiration for this post comes into play. The section above the bar will be 18" deep, and where the bar top will be and below will be 28" deep. The center section itself will be 4ft wide, the other two will take up the remaining space in the closet.

So, I want to curve the center verticals on each side of the bar somewhat drastically to make that transition smooth, but I know nothing about bending/curving wood. Cutting the curve in the plywood is easy enough, but the trim is where this gets... complicated. Additionally, I'm thinking about under the bar, instead of cabinets and a drawer, putting a beverage fridge under there. Every cubby will have LED lighting (nice warm white, not too intense), and those lights will be tied into the room's light switch so when the room light are on, the closet is lit up. The horizontal trim pieces will primarily be there to hide the lights, but also add that little bit of extra finishing touch where other men will be struck with a sense of "fuck, that guy has good taste," and the only woman in my life will shake her head at doing something so impressive she thinks it's dumb.

So, what kind of trim would y'all run? How would you transition between vertical and horizontal runs? What else would you add/remove? What's your dream home office/man cave/study closet entail?
 
Last edited:
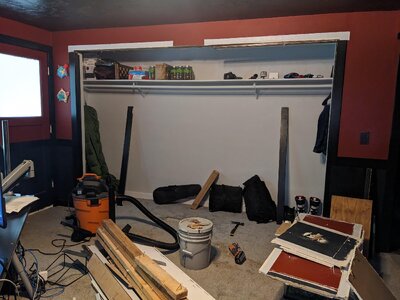
Demo done. The wall I was concerned about, was in fact, non-load bearing. Studs came out a bit easier than anticipated.

Now to get to drawing up the official plans and getting all the measurements so I can hit the lumberyard this week for the plywood.
PXL_20240811_235047056.jpg
 
Nice~!
I would have hidden compartments on the sides if you are going to just fill the opening.
Make the wall piece in one section removeable and use the shelf above and below to cover the seam.
Makes it invisible and you have to remove shelf to open it up.
I wasted not 1 inch when I made my own kitchen cabinets.
Space is the name of the game.
DSC_0842 - Copy.JPG
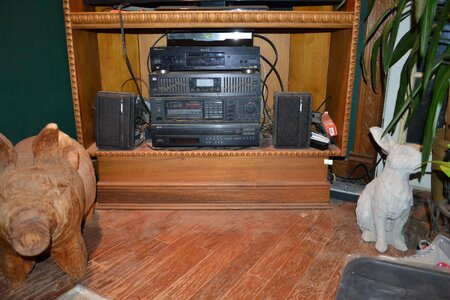
This is my TV stand I built.
DSC_0843 - Copy.JPG
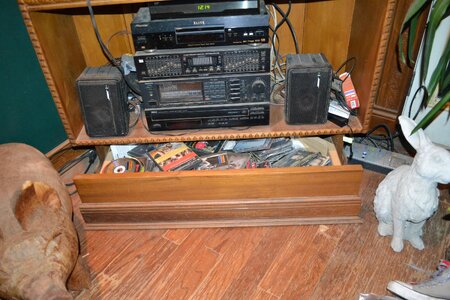
The drawer in the base rolls on balls like a drawer.
NO WASTED SPACE.:cool:
 
Nice~!
I would have hidden compartments on the sides if you are going to just fill the opening.
Make the wall piece in one section removeable and use the shelf above and below to cover the seam.
Makes it invisible and you have to remove shelf to open it up.
I wasted not 1 inch when I made my own kitchen cabinets.
Space is the name of the game.
View attachment 68530
This is my TV stand I built.
View attachment 68531
The drawer in the base rolls on balls like a drawer.
NO WASTED SPACE.:cool:
I was thinking about that. Hidden compartments would be great for a variety of reasons. Good call out, as I go through the planning now I'll sketch some in and work out how to make em seamless
 
Base math done. Primary build material will be 1/2" plywood. So long I managed my cuts properly, I should be able to squeeze all this out of six sheets.

I'll run horizontals on the wall with 1x2 furring strips to offer support to the shelves. With 2 1/4" trim on the edges, they shouldn't be visible so should end up with a relatively seamless install. For hidden compartments I'll keep the bottom shelves floating and figure out some creative way to keep them secure, maybe magnetic door latches.

The verticals on each side of the bar will be curved to create a surface that's 23 1/2" deep. The rest of the shelves will be 16", so they'll be inset and keep the bar as the primary focal point.

PXL_20240812_010114331.jpg
Further playing with shapes says I could likely do this with three sheets. Still gonna pick up six because I rather be positive I have room for error and I'll use the leftovers in another closet sooner than later.
 
Last edited:
well, impulse got the best of me lol just ordered this guy to go under the bar. gonna add a couple additional sections on each side for shelving for glassware. figuring out how to run the wires for all the lights is gonna be challenging, as will be hiding the ballast(s). will likely end up using those trimmable LED strips unless i can find reasonably priced T5 replacements that will work for all the different dimensions.
Screenshot_2024-08-11_19-26-56.png
 
@steamroller on those horizontal moulding strips, did you miter the ends at all or did you cut them flush? I'm going to be trying to find some comparable moulding as what you used on that cabinet but I've only worked with builder grade materials (primarily quarter round, both MDF and PVC) so am stepping into unknown territory for how to make it look properly finished.
 
Nice~!
I would have hidden compartments on the sides if you are going to just fill the opening.
Make the wall piece in one section removeable and use the shelf above and below to cover the seam.
Makes it invisible and you have to remove shelf to open it up.
I wasted not 1 inch when I made my own kitchen cabinets.
Space is the name of the game.
View attachment 68530
This is my TV stand I built.
View attachment 68531
The drawer in the base rolls on balls like a drawer.
NO WASTED SPACE.:cool:
Nice Job. I loved shop class in school we built stuff like this. i wish i would have got me some lathes and saw etc. I had a friend who recently passed away his garage was filled with all of that and we had fun making stuff when i use to live in San antonio.
 
shop classes in HS are my fondest memory of those times, it paved the way for the things i do and build to this day. we had such a cool metal shop with lots of amazing tools. even bridgeport mills!!
 
14/2 wire, j-box, outlet, and outlet cover plate acquired. gonna start cutting holes to fish the wire so all the drywall and paint work can be done before the flooring goes in. figure let the concrete get messy since it's gonna get cleaned very thoroughly, anyways, and better to deal with it getting a little worse for the wear than kicking myself later for screwing up the new flooring right after it's installed.

progress pics to come! i know y'all wanna see an amateur-level sparky make an easy job 10x harder than it should be haha
 
shop classes in HS are my fondest memory of those times, it paved the way for the things i do and build to this day. we had such a cool metal shop with lots of amazing tools. even bridgeport mills!!
Shop classes?

I wish they fuckin taught us this shit when I was in high school.

I was in some classes I did not give a fuck about, and then said fuck it and dropped out, in short.
 
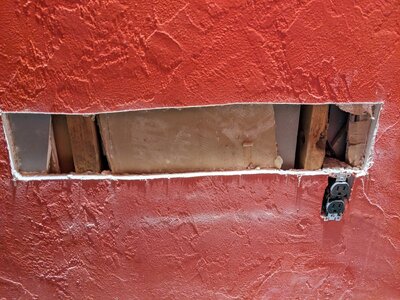
It's shit like this that really grinds my gears. Wall cavities filled with scrap drywall. What should take 30 minutes to do becomes an hour long ordeal because of dealing with this shit.PXL_20240817_003200265.MP.jpg
 
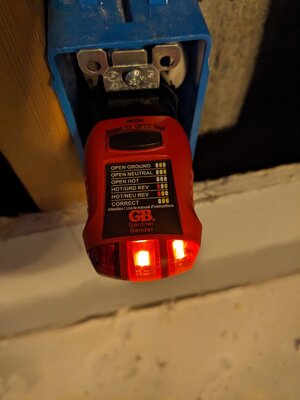
It's ran through the closet, gotta decide how I'm gonna tie into the outlet in the hallway now. Have it dressed up temporarily, will pull the outlet off again before I patch the drywall. Progress...PXL_20240817_010733341.jpg
 
^^^ there goes your google rating!!!! :D

Shop classes?

I wish they fuckin taught us this shit when I was in high school.

I was in some classes I did not give a fuck about, and then said fuck it and dropped out, in short.

this was in the 80's, you probably would have liked school back then. we got away with so much shit in metal shop i don't know how we all still have eyes!!!
 
thats some shit with the stuffed walls... i deal with that stuff man. in a lot of older homes.. i always carry a small bore camera to look behind walls first. you never know what you're gonna find. i found a hammer in a wall already!!!
 
Just gonna say drywall dust on raw concrete is not easy to clean especially if you plan on sealing the concrete.
 
shop classes in HS are my fondest memory of those times, it paved the way for the things i do and build to this day. we had such a cool metal shop with lots of amazing tools. even bridgeport mills!!

Best part of metal shop was getting high in the welding stations and using the exhaust to suck up the smoke.
And making bowls for bongs and pipe on the lathes was pretty cool too.
We had the coolest shop teacher ever too. Mr Parker and would let us pretty much do anything we wanted.

My game room/man cave has morphed a few times.
Started out as a den with a huge aquarium and it was kinda fancy.
Then it became more a of place to hang memorabilia and R2D2 lived in there.
Next it was an actual game room for Xbox and stuff.
Then covid happened and now it's my wife's WFH office but I also do all my 3D printing in there and the diecast garage sits on my desk now but soon I'm gonna carve out space for my cloning tent
 
Just gonna say drywall dust on raw concrete is not easy to clean especially if you plan on sealing the concrete.
See my comment about making an easy job 10x harder than it should be lol I'm just gonna throw a 6mil plastic vapor barrier down instead of going all out and sealing the concrete at this point. Still gonna clean the concrete like I intend to eat off of it but not to the extent that sealing would require.
 
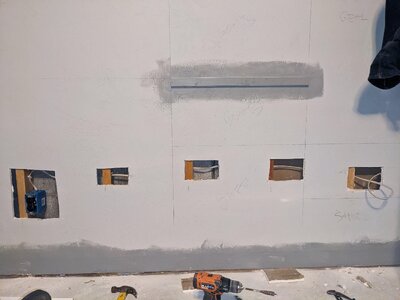
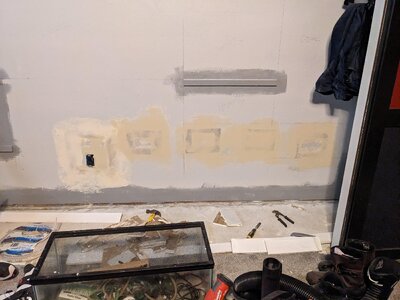
Progress. Probably could've saved some effort just by cutting one big strip across and tapping in a solid piece of drywall, but California patches are arguably just as strong and will disappear just fine once texturing and paint is done.

Disregard the mess, work area will be cleaned up after I get back from the monster truck show I'm taking the kids to.
PXL_20240817_190528812.jpg
 

Attachments

  • PXL_20240817_190528812.jpg
    PXL_20240817_190528812.jpg
    581.2 KB · Views: 2
Best part of metal shop was getting high in the welding stations and using the exhaust to suck up the smoke.
And making bowls for bongs and pipe on the lathes was pretty cool too.
We had the coolest shop teacher ever too. Mr Parker and would let us pretty much do anything we wanted.

My game room/man cave has morphed a few times.
Started out as a den with a huge aquarium and it was kinda fancy.
Then it became more a of place to hang memorabilia and R2D2 lived in there.
Next it was an actual game room for Xbox and stuff.
Then covid happened and now it's my wife's WFH office but I also do all my 3D printing in there and the diecast garage sits on my desk now but soon I'm gonna carve out space for my cloning tent
Sick

Itching to get my hands on a 3d printer.
 
Progress. Probably could've saved some effort just by cutting one big strip across and tapping in a solid piece of drywall, but California patches are arguably just as strong and will disappear just fine once texturing and paint is done.

Disregard the mess, work area will be cleaned up after I get back from the monster truck show I'm taking the kids to.
View attachment 69325
Did you mesh tape the seams or did you make butterflies for all the holes?
 
Did you mesh tape the seams or did you make butterflies for all the holes?
Butterflies. I hate mesh tape with a passion, and find doing this style of patches to be much more structurally stable and easier to float out seamlessly. Had I done the right thing and just cut a strip out, I would've used paper tape on the seams as if I was doing a fresh tape job.
 
Butterflies. I hate mesh tape with a passion, and find doing this style of patches to be much more structurally stable and easier to float out seamlessly. Had I done the right thing and just cut a strip out, I would've used paper tape on the seams as if I was doing a fresh tape job.
I also prefer butterflies to tape when I'm patching holes. I find I don't have skim out the edges as far and I get a flatter blend.
 
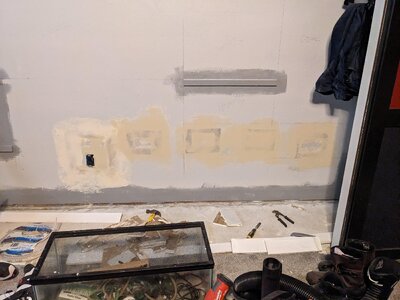
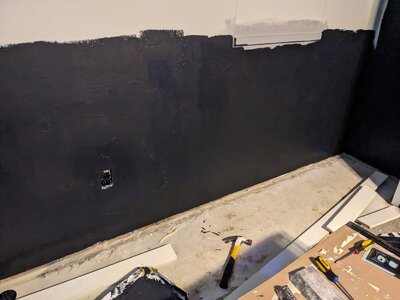
Thought I had a bit more paint to do the first coat in the whole closet but turns out I only had enough to cover the bottom half. All good. I'll just do a first coat on the top half to start, then second coat the full closet at the same time. Paint is still drying, but once it's done, shouldn't be able to tell I cut way too many holes for this project.
PXL_20240822_233208606.jpg
 
Back
Top Bottom