3D printers and the things growers and stoners can make with them

Finally got the printer working again. Gave him an ultimatum. Few hours later he made this bread/chip clip.
View attachment 98144

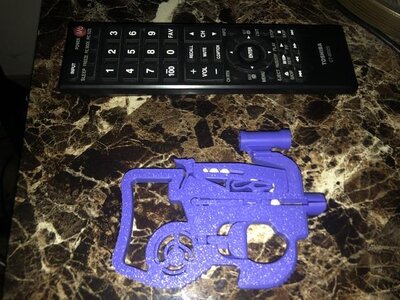
He also made a BB gun, it’s almost two dimensional. Fits in the palm of your hand.

Great to hear Man!!!🥳
What was the issue?
Some days when mine is fucking up I want to set it on fire but gotta admit when I fix it I do get the warm and fuzzies for beating a problem.

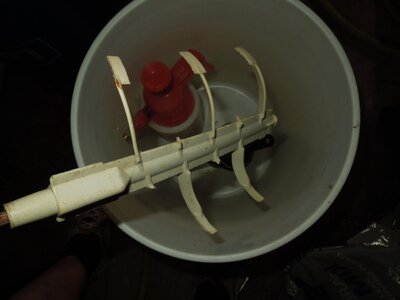
My latest endeavor is converting a ball style compost tumbler into a soil mixer.
Downloaded these mixers for paint and resized them...may also resize another set for bubble hash later...At this size and as durable as I made them it was around a 32 hour print for each one

IMG_1180[1].jpeg

IMG_1182[1].jpeg
 
Great to hear Man!!!🥳
What was the issue?
Some days when mine is fucking up I want to set it on fire but gotta admit when I fix it I do get the warm and fuzzies for beating a problem.

My latest endeavor is converting a ball style compost tumbler into a soil mixer.
Downloaded these mixers for paint and resized them...may also resize another set for bubble hash later...At this size and as durable as I made them it was around a 32 hour print for each one

View attachment 98159

View attachment 98160

i print those paint mixers all the time.. of coarse not that stout, mine print in a couple hours, just for paint.. there're like $8 at my local store!
 
Great to hear Man!!!🥳
What was the issue?
Some days when mine is fucking up I want to set it on fire but gotta admit when I fix it I do get the warm and fuzzies for beating a problem.
He said he had the spacer on backwards and extruder issues. It’s been running over night and since he got home from work.

Grin from ear to ear while he explained how he fixed it. 🤣

My latest endeavor is converting a ball style compost tumbler into a soil mixer.
Downloaded these mixers for paint and resized them...may also resize another set for bubble hash later...At this size and as durable as I made them it was around a 32 hour print for each one

View attachment 98159

View attachment 98160
Cool. I have a small one but it sits on rollers to spin it.

I didn’t know you could make things that strong, or is this the prototype?
 
He said he had the spacer on backwards and extruder issues. It’s been running over night and since he got home from work.

Grin from ear to ear while he explained how he fixed it. 🤣


Cool. I have a small one but it sits on rollers to spin it.

I didn’t know you could make things that strong, or is this the prototype?

Haha it usually is something so simple like that but can shut down a printer and make you wanna throw it out the window.
That's cool though man because it just teaches him to double check and have more attention to detail which is a skill not many people have learned in life.

The mixers were such a filament hog there was no room to make a prototype. Both mixers took nearly an entire 2kg spool but I may make another bigger set, maybe as large as my printer will allow but first I'll see how these work.
I had totally redone the shaft of the thing so I only printed out a small ring to make sure it would fit the tumbler and once it fit I started the big print.
Stoney taught me the key to making something strong is the outer shell but you have to adjust those settings in the slicer.
For that one I made all outer surfaces 1.5mm thick but still only used 10% infill. Those thick walls are what really makes the print take so long.
That outer layer gives it the sturdiness so you have to adjust top and bottom as well as outer walls to all be thicker than the usual very thin skin a slicer recommends in the settings
 
He’s back to printing over night and when he gets home from work. So I guess it’s working good again.

He also found that the table he had the printer on was moving ever so slightly. Because printing on the kitchen island had almost no imperfections. Now it’s on the floor on a rubber mat and tests/prints look much better. Less stringing. So a new table that fits in the tent is on his list. No room for a large table or we’d just put up on that.
 
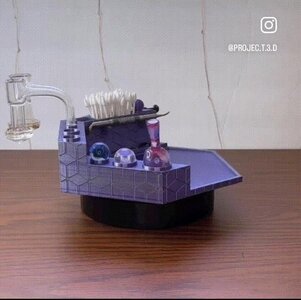
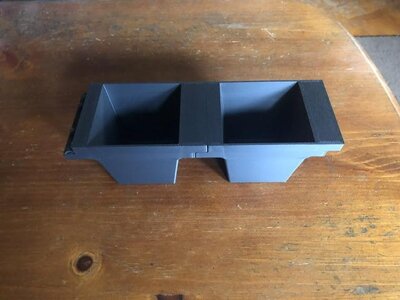
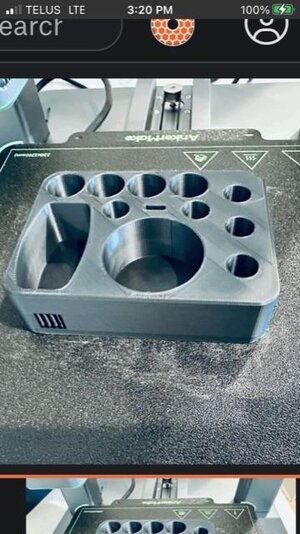
Saw this and thought our local Rat Pack might find it handy. I haven’t tried dabs yet but this station looks handy. Spins too.
IMG_3721.jpeg
View attachment IMG_3714.webp


Hope one of you finds it useful.
 
Last edited:
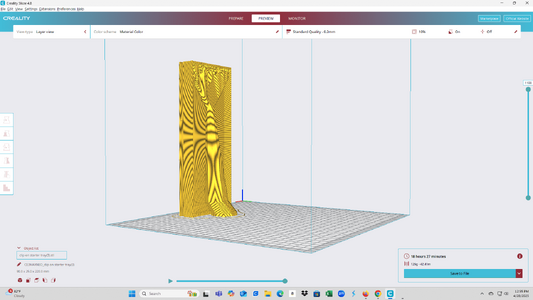
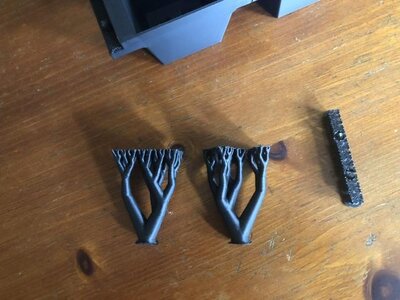
I've had my printer for a few years now and recently learned about Tree Support.
Then as I was clicking buttons on my slicer program, I found all the good stuff that will help me improve or actually be able to print some things, one of those being tree supports.
My life will never be the same again if this works. I'll know in about 18 hours or so 😋

Screenshot 2025-04-28 125619.png
 
I've had my printer for a few years now and recently learned about Tree Support.
Then as I was clicking buttons on my slicer program, I found all the good stuff that will help me improve or actually be able to print some things, one of those being tree supports.
My life will never be the same again if this works. I'll know in about 18 hours or so 😋

View attachment 99230

My son uses them. I thought it was part of his models as it’s on a few of his buildings walls. Looked like ruins. He explained it was a support. Cool idea.
 
Saw this and thought our local Rat Pack might find it handy. I haven’t tried dabs yet but this station looks handy. Spins too.
View attachment 98916
View attachment 98915


Hope one of you finds it useful.
That's awesome
 
Sons printing some window pots for me. I’m hoping to get four I can setup and have ready with flowers soon. Surprise my wife.
IMG_3802.jpegIMG_3801.jpeg

These are the tree supports it makes. They are big enough son will save them for his game. Make them into trees or burned out from war. IMG_3804.jpeg
 
Damn, I love how members here on this forum are fucking motivated, intelligent, and inventive. Not the bullshit stoner vibe every person tries to portray us to be. Hell, we are very creative, positive, entrepreneurial and problem solvers. Sure, we get lit, but we don't quite. Carry on!!!
 
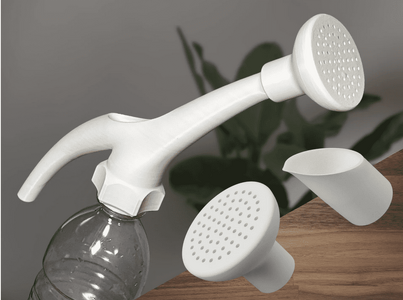
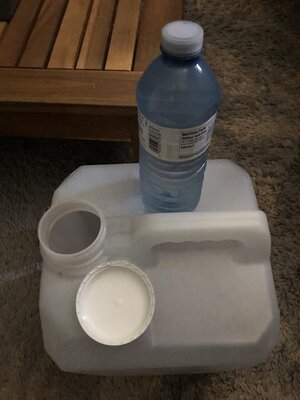
Since I'm the guy who bought and 3D printer and decided I'd never buy a watering can as long as I have a printer....Here's a new watering can file I found that turns a common water bottle into a watering can.

Screenshot 2025-05-05 114034.png

 
Since I'm the guy who bought and 3D printer and decided I'd never buy a watering can as long as I have a printer....Here's a new watering can file I found that turns a common water bottle into a watering can.

View attachment 100071

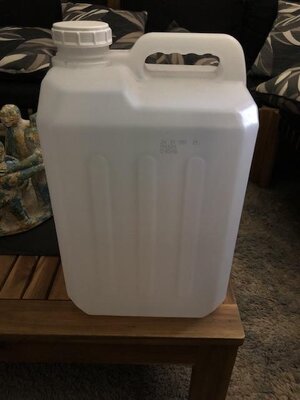
You happen to come across one that will fit a 3 gallon jug? Want to use this for my veggies.
IMG_3881.jpegIMG_3882.jpeg

TIA
 
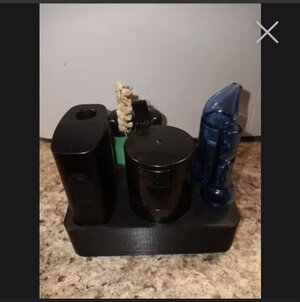
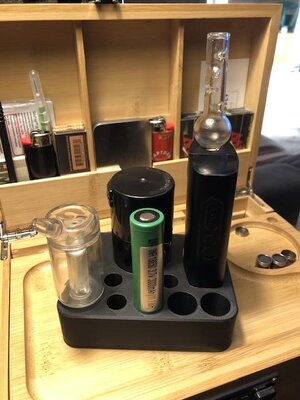
I’ve been looking for a vape accessory stand off/on for a bit. So far, sadly, this is the best I’ve found for the Lobo so far. @Bandit420

IMG_3887.jpg

Batteries and some accessories.

This one’s similar but no charging hole. IMG_3886.jpeg

 
You happen to come across one that will fit a 3 gallon jug? Want to use this for my veggies.
View attachment 100765View attachment 100766

TIA

To make that you'll want you or your son to have an account at Tinkercad


First download the STL file to your computer.
Next, upload the file to Tinkercad. Start by pushing the create buttons then hit import on the menu toolbar.
The object will appear on your workplane.
From there, you can slice off the threaded part and create your own or resize it. You could also make the spout longer or shorter but yeah Tinkercad will allow to resize or change most STL files.

I’ve been looking for a vape accessory stand off/on for a bit. So far, sadly, this is the best I’ve found for the Lobo so far. @Bandit420

View attachment 100771

Batteries and some accessories.

This one’s similar but no charging hole. View attachment 100772


This will be something I make from nothing on Tinkercad, using all the different shapes to create an object.
This is how the VG came to be and I've also made caddies for other vapes and tools...

Here's my Peak docking station

IMG_1360[1].jpeg


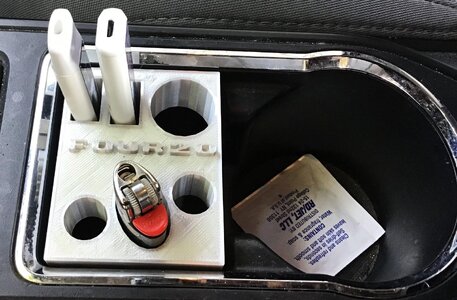
And a caddy I've changed up a few times for my truck console.


IMG_3696.JPG


I have a list of probably around 10-11 objects I have to sit down at the computer, open up tinkercad, and get to work on them.
I start with nothing and just work in shapes and use my digital caliper to make measurements needed to make the new object useful.
Things like bathroom and medicine cabinet cabbies, carrying cases for vapes, brackets and hooks...All kinds of stuff custom made by working the shapes on Tinkercad.
I plan to start next week on my projects but probably won't get around to the vape caddies until I'm on Summer vacation in late June.

It's hard to explain but once you start playing on Tinkercad it clears up fast.
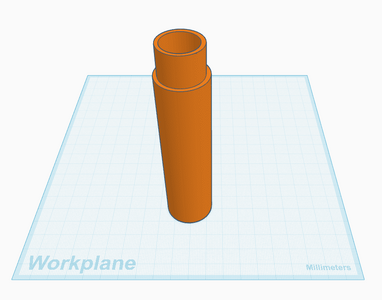
For example here's the final product of the standpipe I designed for flood & drain on the computer screen ready to send it to the slicer and print it

Screenshot 2025-05-09 145136.png

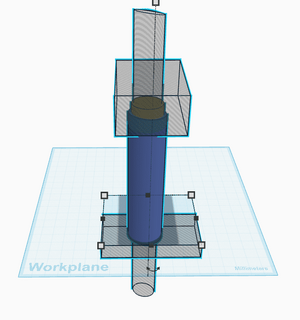
But here it is under construction using all the shapes and sizing them. Where the shape is transparent creates a void or in many of my uses, I use them like a saw and cut into shapes or to drill holes in a solid shape

Screenshot 2025-05-09 145229.png
 
To make that you'll want you or your son to have an account at Tinkercad


First download the STL file to your computer.
Next, upload the file to Tinkercad. Start by pushing the create buttons then hit import on the menu toolbar.
The object will appear on your workplane.
From there, you can slice off the threaded part and create your own or resize it. You could also make the spout longer or shorter but yeah Tinkercad will allow to resize or change most STL files.


This will be something I make from nothing on Tinkercad, using all the different shapes to create an object.
This is how the VG came to be and I've also made caddies for other vapes and tools...

Here's my Peak docking station

View attachment 100781


And a caddy I've changed up a few times for my truck console.


View attachment 100780


I have a list of probably around 10-11 objects I have to sit down at the computer, open up tinkercad, and get to work on them. I start with nothing and just work in shapes and use my digital caliper to make measurements needed to make the new object useful.
Things like bathroom and medicine cabinet cabbies, carrying cases for vapes, brackets and hooks...All kinds of stuff custom made stuff by working the shapes on Tinkercad.
I plan to start next week but probably won't get around to the vape caddies until I'm on Summer vacation in late June.

It's hard to explain but once you start playing on Tinkercad it clears up fast.
For example here's the final product of the standpipe I designed for flood & drain on the computer screen ready to send it to the slicer and print it

View attachment 100782

But here it is under construction using all the shapes and sizing them. Where the shape is transparent creates a void or in many of my uses, I use them like a saw and cut into shapes or to drill holes in a solid shape

View attachment 100783
i need to start learning how to do this specifically the software/design.

Need to play with it
 
i need to start learning how to do this specifically the software/design.

Need to play with it

Yeah man you don't even need a printer. Anybody here can open that site and start an account.
Make things!!!!
After you make something go to it's home page and make the file public. From there me or anybody else with a printer can take a look at it and maybe make it happen or at least tell you what it will take to make it happen like choice of filament, color, size, time etc.
had to start with the pyramid, did a 5inch base 1:1813 scale of the giza pyramid for a desktop trinket lol, to start getting familar with it.
 
had to start with the pyramid, did a 5inch base 1:1813 scale of the giza pyramid for a desktop trinket lol, to start getting familar with it.

rabbit hole!!!!!!!!!!!!!!!!!! hahahahahaha


heres something i drew last night, you can copy it to your account and then start to upgroup the object and kinda get an idea of steps needed to get things the way you want. this can be done with any public model.

 
rabbit hole!!!!!!!!!!!!!!!!!! hahahahahaha
definitely
heres something i drew last night, you can copy it to your account and then start to upgroup the object and kinda get an idea of steps needed to get things the way you want. this can be done with any public model.
copied it over, mulling it over.


if you click on my name in tinkercad it will take you to all my public designs, feel free to copy/modify/change whatever ya want!!!

Is there a phone app I can use or is a PC needed? 🤔 Suppose I could look. Duh.

He has the Bambu app on his phone too.

I know he’s able to do some things on his Steamdeck but I don’t know if he’s connected his PC to his phone to share data.
 
Back
Top Bottom