This is Vertical Germination

Bandit420

The Texican
Bud Builders Supporter
Joined
Apr 15, 2023
Messages
2,333
Reaction score
15,653
This thread is dedicated to Stak. The OG of VG🖖

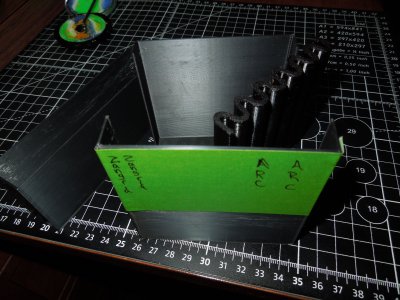
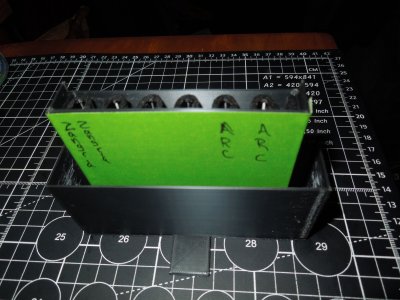
These are instructions on how to use the 3D printed vertical germinator and other DIY versions such as a media disc case or ziplock baggie and a magnet.

Vertical germination is nothing more than the paper towel technique stood up on end. But there's certain things that can get improved performance because there's an ocean wide gap between what works and what performs at a high level

So why go vertical?
get the most efficiency possible from the energy released by a seed upon germination
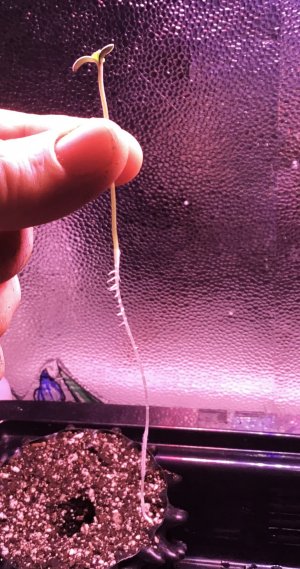
straight tap roots with no pig tails
no helmet heads due to consistent and even moisture
eliminate the need for seed starting mix, seed starting pots, rapid rooters, or other peat plugs
Live look in at what's going on with germination. No guessing when will it pop.
The day they're planted is the same day heads are above the surface. No guessing when they will emerge
Consistent and balanced starts from day 1
Understand more about the role of gravity and stored energy inside a seed during germination and using it to your advantage
Very high success rate


To start, I prefer bottled Spring water. It's better than my tap with no flouride, chloramines, or other bullshit. Just good clean water that gives me outstanding results every time so for me spring water is equal part works great and tradition.
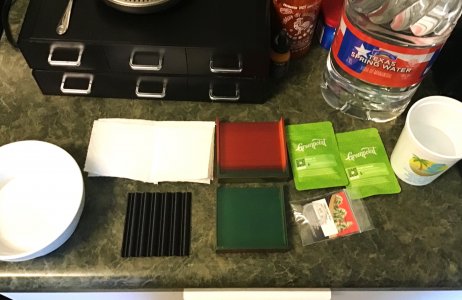
Other supplies...
a vertical germinator or DVD case
a shallow dish of water to hold the germinator and provide water for the paper to wick upwards
paper towels
seeds
grow light
heat mat is optional but I use always use one
IMG_5245.JPG

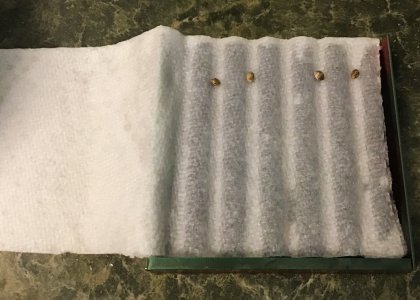
To start, take a paper towel and fold it in half twice then cut to fit the corrugated insert. You want the layers of paper to be at least two layers thick on each side of the seeds.

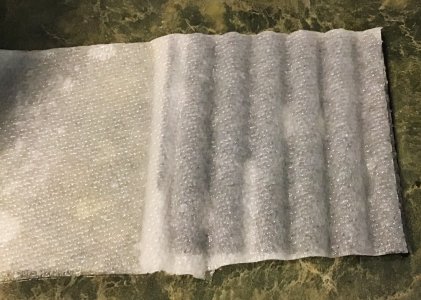
Put half the paper on the plastic and get it wet. Then using your fingers work it into the channels so you have well defined lanes. These lanes are what will keep your tap root growing straight.
IMG_5247.JPG

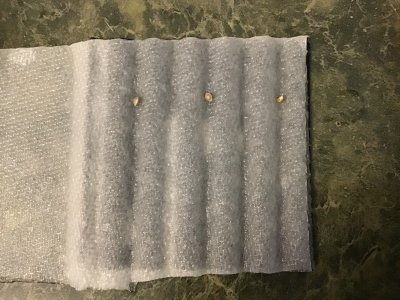
Next, add your seeds by placing one seed per channel
IMG_5249.JPG

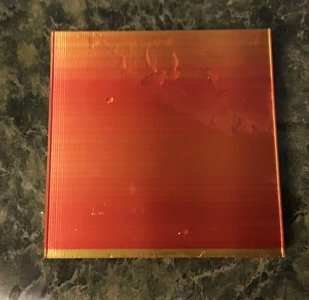
Fold the other half of paper over the seeds and moisten well. Then put the inside cover over the insert, covering the paper and seeds
IMG_5252.JPG

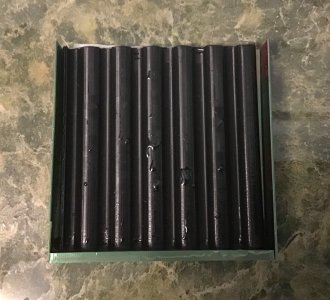
Flip it over to expose the other side and do the same thing
IMG_5253.JPG

IMG_5254.JPG

If the insert is loose you can add a few more layers of paper to kind of stuff it so there's no play.
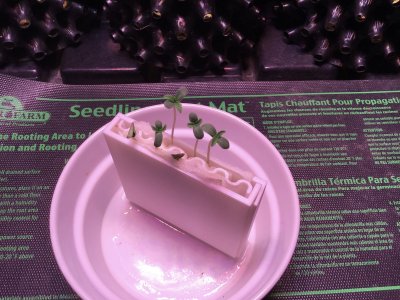
Stand the VG on end in a shallow dish with about 1/2" water in the bottom
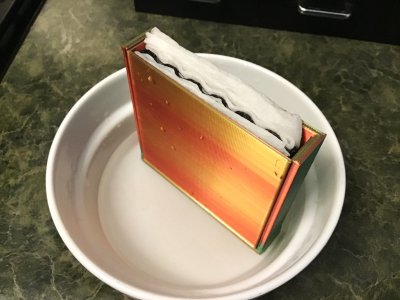
IMG_5255.JPG


Next I put it into position under light and on a heat mat.
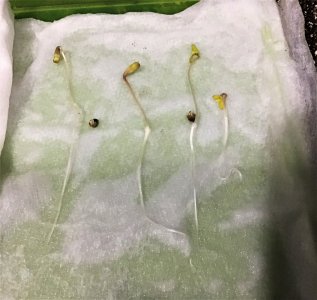
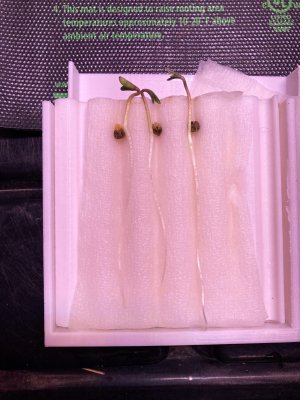
Over the next 24-48 hours these beans will pop open. The very first thing they will do is orientate themselves to determine which way is up.
By having the seed suspended and with the help of gravity pulling from below and light above, they will figure that out and grow straight and efficiently.
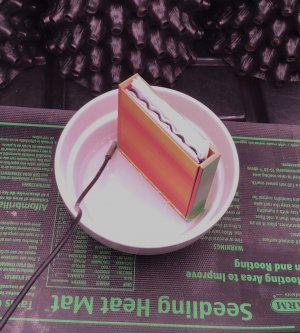
IMG_5258.JPG


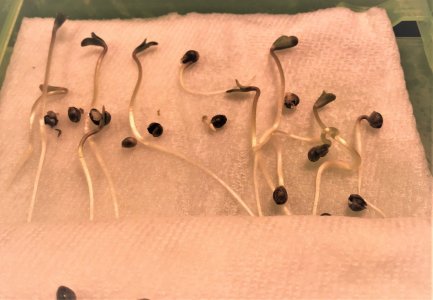
If you've ever popped beans in a shallow dish and seen how the tap root coils, that's a live look at the tap trying to figure out which way is up. If it cannot, it grows in a pig tail. Pig tails are something to avoid.

This technique basically duplicates direct sowing but comes with the advantage of being able to see the sprout and know if it's a dud so you don't have to dig it up or sit there wondering what's going on under the surface. Imagine direct sowing into a transparent medium. That's about what you get doing this.

The paper towel wick also provides perfect moisture. Not drowned but moist and no chance of drying out which drying out at the surface is why people get helmet head sprouts and have to do surgery to remove them.

There's no need for nutes at this stage either. Between the release of stored energy and environmental nitrogen, nutes are covered.

As this progresses over the next few days I'll update every step of the way into planting. And even though I'm using soil, this will work in anything. Coco, bare root, soil less, rockwool, etc.

✌️
 
Last edited:
i can detest it works best with pennsylvania water!!! haha

.
.
seriously though, before 3d printers it was done in cd and dvd cases with paper towels standing up in a jug of water for a rez. this worked well but Bandit's idea of the wavy center piece was the game changer in VG. this one piece made it from working good to working flawless in my experience.

turns out i have been using mine wrong this whole time, i only wrapped paper towel around the center piece and never sandwiched it in towels just one side and it still popped em out perfect.

🙃

And that corrugated insert was inspired by the airpot root guidance system using those nozzles to guide roots into being air-pruned!

I think the progression here speaks for itself

Xbox game case results

doing-it-like-an-animal-2.jpg

vg1.jpg

It works but you get crossovers and some don't grow arrow straight.

And then with the 3D printed design

IMG_0196.JPG

That's what I mean by when something works vs something that performs ;)
 
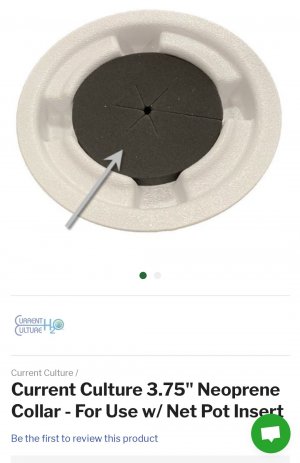
First time i saw this i thought of these for my current culture lids.

Would i need a bigger germinator to use these ?

View attachment 15417

Nope. You should just be able to open up the collar and slide the sprout in with it's head above the collar and let her rip. Handle like you would a clone but being a seedling it's gonna be fragile so take care when handling. They're tuff little sprouts but still good to use caution and handle with care
 
Nope. You should just be able to open up the collar and slide the sprout in with it's head above the collar and let her rip. Handle like you would a clone but being a seedling it's gonna be fragile so take care when handling. They're tuff little sprouts but still good to use caution and handle with care
I saw a picture somewhere that had some pretty good top growth but there wasn't a picture of the tap root.

Would it be better to be taller for a longer tap root with more top growth?
 
I saw a picture somewhere that had some pretty good top growth but there wasn't a picture of the tap root.

Would it be better to be taller for a longer tap root with more top growth?

Probably one of these pics...

IMG_3702.JPG

IMG_4381.JPG

IMG_4380.JPG

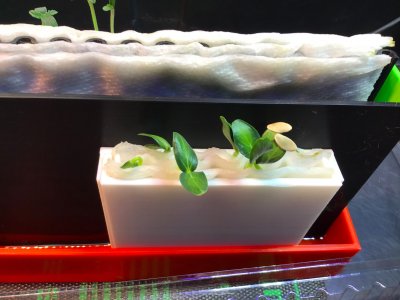
Yeah so even though it's only 100mm tall, the open top design was another breakthru in doing this because it allows the sprout to develop a bit better and get it trained on the light early.
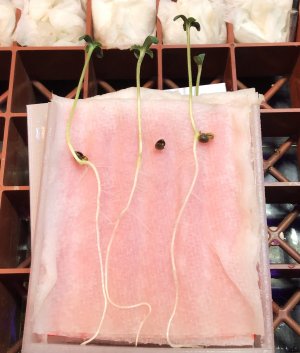
However, once a sprout gets around 70mm long the tap root starts to branch out and fishbone. At that point it can start to grab onto the paper. It's no big deal if a few feeders tear away but not something to make a habit of IMO. I've also broken the tip off a tap a few times and it's didn't hurt the sprout but still something I try to avoid.
If you still want a taller VG, that can be done in a slicer program. Simply click on the project and add 10-20mm to it's height and you'll be golden.

Right here is about the ideal size of sprout I like to deal with and about as far as I let them grow in the VG

IMG_3705.JPG
Will you be offering these to BB members ? For sale of course.

The goal has always been to make them free to everybody. I got a couple creepy solicitations back at THCF from some guys with $ in their eyes and wanting to sell them for me but I've always felt they should be free and open sourced.
They are a prize in the contests so that's one way to get one. Another way for those without a printer can download the file and take it to a place that offers 3D printing like a public library. Or if one of the many people here with a printer want to print and ship them that's another way. Right now there's a backlog on my printer weeks deep so I won't be able to print any for maybe 3-4 weeks from now due to current projects taking so long to print.
 
Take this a step farther and explain why we don’t want those “pig tails”. I know, but others are just shocked when trying to explain the whole tap root and no “snaking” or “coiling”.
Thanks! 🥰 I am linking your post from The Corner. 🙂
 
Last edited:
Take this a step farther and explain why we don’t want those “pig tails”. I know, but others are just shocked when trying to explain the whole tap root and no “snaking” or “coiling”.
Thanks! 🥰 I am linking your post from The Corner. 🙂

For the most part, it's a delay and slows progress.
A sprout finding which way is up should happen in a matter of minutes to hours after opening. If you're seeing a pig tail then the sprout is still trying to figure out which way is up so an act that should take hours is taking a day or even longer. This can take a normal seedling stage at 10 days and extend it to 2-3 weeks.
There's also a weakening of a twisted up sprout. Perhaps due to wasted energy but a pigtail sprout is more susceptible to problems and limps into life while a long straight tap hits the ground running.

The other part to it is you want that tap diving deep at the start and branching out, not twisting around trying to find it's way south. With roots spread out thru the column of medium there's less chance of dry or over saturated zones. Food and water uptake thru the entire column of medium will be balanced and not depleted in the upper parts while the lower parts remain loaded with food and water
 
The goal has always been to make them free to everybody. I got a couple creepy solicitations back at THCF from some guys with $ in their eyes and wanting to sell them for me but I've always felt they should be free and open sourced.
They are a prize in the contests so that's one way to get one. Another way for those without a printer can download the file and take it to a place that offers 3D printing like a public library. Or if one of the many people here with a printer want to print and ship them that's another way. Right now there's a backlog on my printer weeks deep so I won't be able to print any for maybe 3-4 weeks from now due to current projects taking so long to print.
I will be printing one for the July winner.

I'd probably print more at that same time at some nominal price to cover costs and shipping. I'd have to look into what they would cost to ship but I think they could just go USPS for a few bux for folks in the US anyhow.

Maybe sell them at $20 delivered and put the leftover towards the August contest?
Sell them on ebay and amazon 👊🏼
 
Great write up bandit. I have never gotten in to all the science and varying methods of germination. Dropping a bean in moist soil has always just been basic and simple for me. Nearly 100% germ rate over all these years.
 
I will be printing one for the July winner.

I'd probably print more at that same time at some nominal price to cover costs and shipping. I'd have to look into what they would cost to ship but I think they could just go USPS for a few bux for folks in the US anyhow.

Maybe sell them at $20 delivered and put the leftover towards the August contest?
I sent one of the prototypes to Steamroller a while back and yeah I used a USPS priority service mailer envelope. I wanna say it was less $6 + a little bit of bubble wrap for protection.
International just depends. Canada probably not much more than US prices but Australia gets very expensive. I could see it being $20-$40 shipping there. Asia and Europe will be a little less
 
I will be printing one for the July winner.

I'd probably print more at that same time at some nominal price to cover costs and shipping. I'd have to look into what they would cost to ship but I think they could just go USPS for a few bux for folks in the US anyhow.

Maybe sell them at $20 delivered and put the leftover towards the August contest?
Can i order one with the extra height package? No hurry sometime mid 2024 works
 
I will be printing one for the July winner.

I'd probably print more at that same time at some nominal price to cover costs and shipping. I'd have to look into what they would cost to ship but I think they could just go USPS for a few bux for folks in the US anyhow.

Maybe sell them at $20 delivered and put the leftover towards the August contest?
I’d buy one!
 
I sent one of the prototypes to Steamroller a while back and yeah I used a USPS priority service mailer envelope. I wanna say it was less $6 + a little bit of bubble wrap for protection.
International just depends. Canada probably not much more than US prices but Australia gets very expensive. I could see it being $20-$40 shipping there. Asia and Europe will be a little less
His postage was more than $6.
I could have sent him $25+ and he would have barely broke even.
My man Bandit wanted nothing as he stated.
Some say they want it for all and make it happen.
My man Bandit~!:cool:
 
Absolutely!

And if anybody wants to work with me on re-engineering it so it opens like a book with hinges I'm all ears ;)

two small round nubs on the inner piece and two matching holes on the outer piece and it should hinge great. i could help out with that if ya needed.
i haven't looked at your current design at all, when you gave it to me it was still work in progress so i took the opportunity to learn more about tinkercad and modified that one you gave me and never printed your final version. ours ended up being almost identical, we both make the inner section more stout and you thickened yours and i went the other route and mine is thinner walls...

DSCN0828.JPG

DSCN0829.JPG

when i tinkered yours i added a fourth piece the rez.

my printer is sometimes turned off so i'd be happy to pay it forward and print some!!

☠️
 
Absolutely!

And if anybody wants to work with me on re-engineering it so it opens like a book with hinges I'm all ears ;)
Do one as a print in place to see if you can get the hinges to work without having to print the pieces separately!!! 😛

Is it possible to print it so that the res dish has a see through water level?
 
I sent one of the prototypes to Steamroller a while back and yeah I used a USPS priority service mailer envelope. I wanna say it was less $6 + a little bit of bubble wrap for protection.
International just depends. Canada probably not much more than US prices but Australia gets very expensive. I could see it being $20-$40 shipping there. Asia and Europe will be a little less
Sending a card to US with seeds in foam. $2 stamp

My first attempt sending same as small package. $10

Only difference was the first one I sent to G$ I put the seeds in a SD/SIM card case. It wouldn’t go through the post office slot. (She could have pushed.) 😝
 
two small round nubs on the inner piece and two matching holes on the outer piece and it should hinge great. i could help out with that if ya needed.
i haven't looked at your current design at all, when you gave it to me it was still work in progress so i took the opportunity to learn more about tinkercad and modified that one you gave me and never printed your final version. ours ended up being almost identical, we both make the inner section more stout and you thickened yours and i went the other route and mine is thinner walls...

View attachment 15631

View attachment 15632

when i tinkered yours i added a fourth piece the rez.

my printer is sometimes turned off so i'd be happy to pay it forward and print some!!

☠️
Love the green/black combo. My Jeep YJ was black with that green on headlights and other things like CB 102” whip antenna.

Res is excellent add-on. 👍
 
Do one as a print in place to see if you can get the hinges to work without having to print the pieces separately!!! 😛

Is it possible to print it so that the res dish has a see through water level?

seeds aren't in there long enough to need to check levels. i've never needed to "top off" or anything.
 
Back
Top Bottom