- Joined
- Apr 15, 2023
- Messages
- 3,823
- Reaction score
- 24,629
This thread is dedicated to Stak. The OG of VG
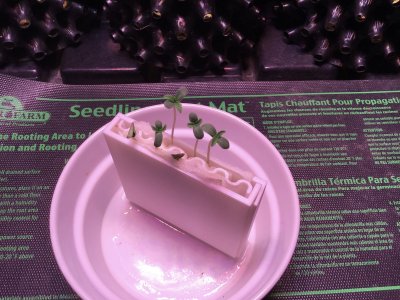
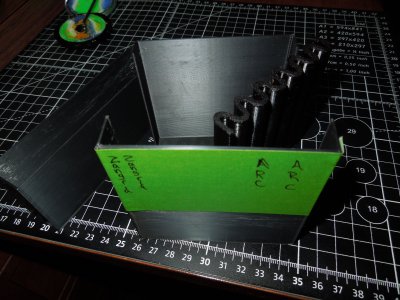
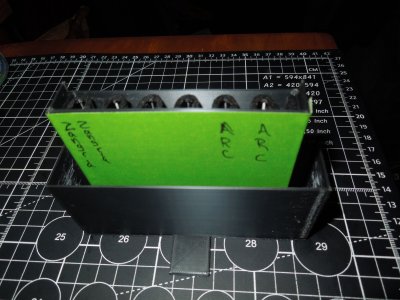
These are instructions on how to use the 3D printed vertical germinator and other DIY versions such as a media disc case or ziplock baggie and a magnet.
Vertical germination is nothing more than the paper towel technique stood up on end. But there's certain things that can get improved performance because there's an ocean wide gap between what works and what performs at a high level
So why go vertical?
get the most efficiency possible from the energy released by a seed upon germination
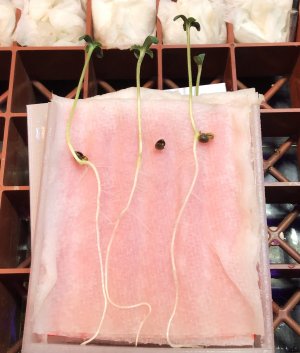
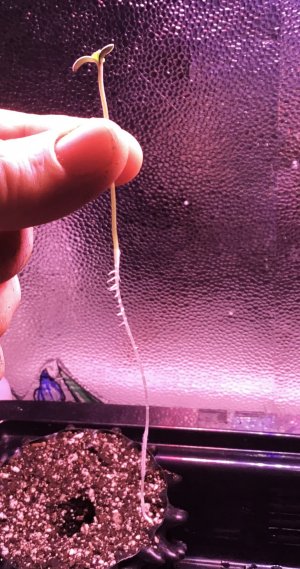
straight tap roots with no pig tails
no helmet heads due to consistent and even moisture
eliminate the need for seed starting mix, seed starting pots, rapid rooters, or other peat plugs
Live look in at what's going on with germination. No guessing when will it pop.
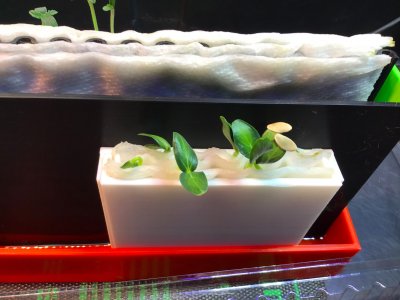
The day they're planted is the same day heads are above the surface. No guessing when they will emerge
Consistent and balanced starts from day 1
Understand more about the role of gravity and stored energy inside a seed during germination and using it to your advantage
Very high success rate
To start, I prefer bottled Spring water. It's better than my tap with no flouride, chloramines, or other bullshit. Just good clean water that gives me outstanding results every time so for me spring water is equal part works great and tradition.
Other supplies...
a vertical germinator or DVD case
a shallow dish of water to hold the germinator and provide water for the paper to wick upwards
paper towels
seeds
grow light
heat mat is optional but I use always use one
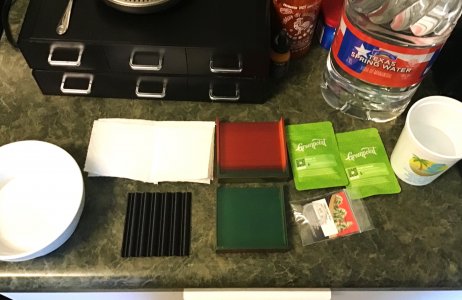
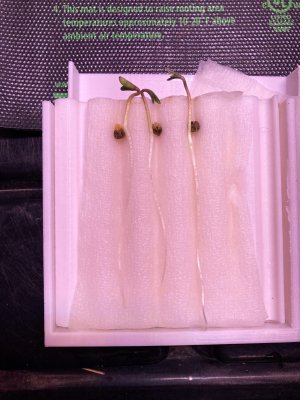
To start, take a paper towel and fold it in half twice then cut to fit the corrugated insert. You want the layers of paper to be at least two layers thick on each side of the seeds.
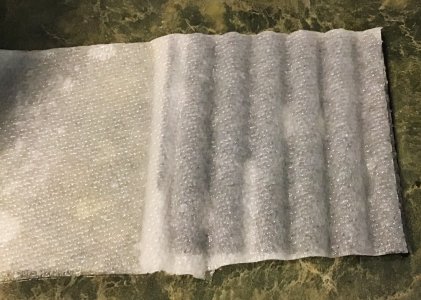
Put half the paper on the plastic and get it wet. Then using your fingers work it into the channels so you have well defined lanes. These lanes are what will keep your tap root growing straight.
Next, add your seeds by placing one seed per channel
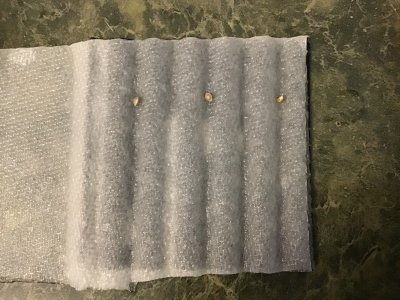
Fold the other half of paper over the seeds and moisten well. Then put the inside cover over the insert, covering the paper and seeds
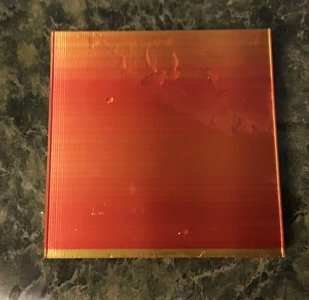
Flip it over to expose the other side and do the same thing
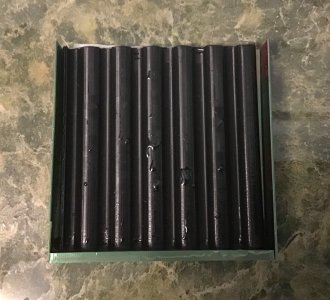
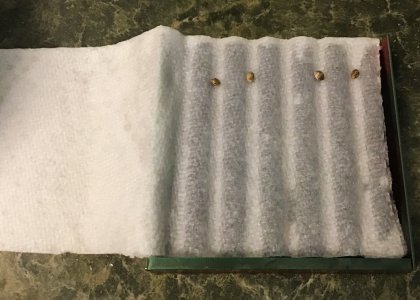
If the insert is loose you can add a few more layers of paper to kind of stuff it so there's no play.
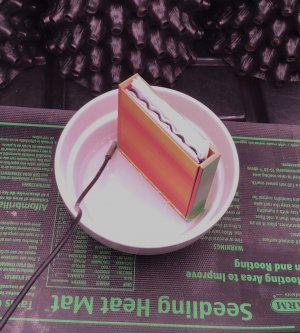
Stand the VG on end in a shallow dish with about 1/2" water in the bottom
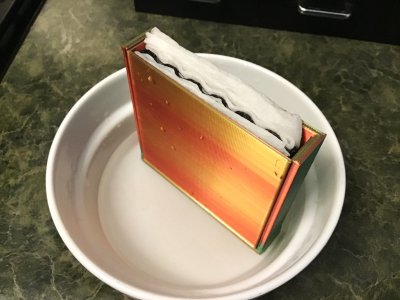
Next I put it into position under light and on a heat mat.
Over the next 24-48 hours these beans will pop open. The very first thing they will do is orientate themselves to determine which way is up.
By having the seed suspended and with the help of gravity pulling from below and light above, they will figure that out and grow straight and efficiently.
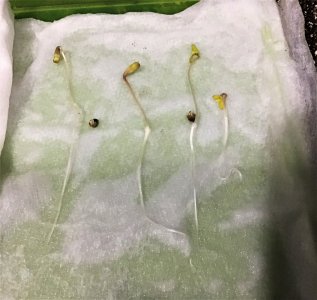
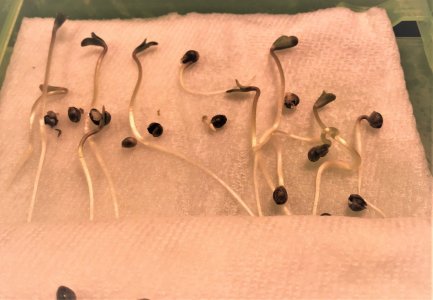
If you've ever popped beans in a shallow dish and seen how the tap root coils, that's a live look at the tap trying to figure out which way is up. If it cannot, it grows in a pig tail. Pig tails are something to avoid.
This technique basically duplicates direct sowing but comes with the advantage of being able to see the sprout and know if it's a dud so you don't have to dig it up or sit there wondering what's going on under the surface. Imagine direct sowing into a transparent medium. That's about what you get doing this.
The paper towel wick also provides perfect moisture. Not drowned but moist and no chance of drying out which drying out at the surface is why people get helmet head sprouts and have to do surgery to remove them.
There's no need for nutes at this stage either. Between the release of stored energy and environmental nitrogen, nutes are covered.
As this progresses over the next few days I'll update every step of the way into planting. And even though I'm using soil, this will work in anything. Coco, bare root, soil less, rockwool, etc.

These are instructions on how to use the 3D printed vertical germinator and other DIY versions such as a media disc case or ziplock baggie and a magnet.
Vertical germination is nothing more than the paper towel technique stood up on end. But there's certain things that can get improved performance because there's an ocean wide gap between what works and what performs at a high level
So why go vertical?
get the most efficiency possible from the energy released by a seed upon germination
straight tap roots with no pig tails
no helmet heads due to consistent and even moisture
eliminate the need for seed starting mix, seed starting pots, rapid rooters, or other peat plugs
Live look in at what's going on with germination. No guessing when will it pop.
The day they're planted is the same day heads are above the surface. No guessing when they will emerge
Consistent and balanced starts from day 1
Understand more about the role of gravity and stored energy inside a seed during germination and using it to your advantage
Very high success rate
To start, I prefer bottled Spring water. It's better than my tap with no flouride, chloramines, or other bullshit. Just good clean water that gives me outstanding results every time so for me spring water is equal part works great and tradition.
Other supplies...
a vertical germinator or DVD case
a shallow dish of water to hold the germinator and provide water for the paper to wick upwards
paper towels
seeds
grow light
heat mat is optional but I use always use one

To start, take a paper towel and fold it in half twice then cut to fit the corrugated insert. You want the layers of paper to be at least two layers thick on each side of the seeds.
Put half the paper on the plastic and get it wet. Then using your fingers work it into the channels so you have well defined lanes. These lanes are what will keep your tap root growing straight.

Next, add your seeds by placing one seed per channel

Fold the other half of paper over the seeds and moisten well. Then put the inside cover over the insert, covering the paper and seeds

Flip it over to expose the other side and do the same thing


If the insert is loose you can add a few more layers of paper to kind of stuff it so there's no play.
Stand the VG on end in a shallow dish with about 1/2" water in the bottom

Next I put it into position under light and on a heat mat.
Over the next 24-48 hours these beans will pop open. The very first thing they will do is orientate themselves to determine which way is up.
By having the seed suspended and with the help of gravity pulling from below and light above, they will figure that out and grow straight and efficiently.

If you've ever popped beans in a shallow dish and seen how the tap root coils, that's a live look at the tap trying to figure out which way is up. If it cannot, it grows in a pig tail. Pig tails are something to avoid.
This technique basically duplicates direct sowing but comes with the advantage of being able to see the sprout and know if it's a dud so you don't have to dig it up or sit there wondering what's going on under the surface. Imagine direct sowing into a transparent medium. That's about what you get doing this.
The paper towel wick also provides perfect moisture. Not drowned but moist and no chance of drying out which drying out at the surface is why people get helmet head sprouts and have to do surgery to remove them.
There's no need for nutes at this stage either. Between the release of stored energy and environmental nitrogen, nutes are covered.
As this progresses over the next few days I'll update every step of the way into planting. And even though I'm using soil, this will work in anything. Coco, bare root, soil less, rockwool, etc.
Last edited:


