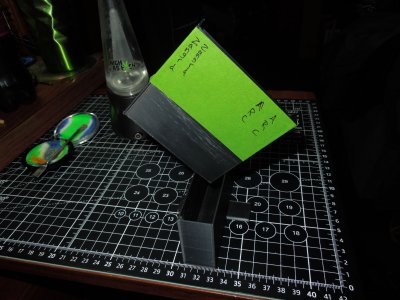
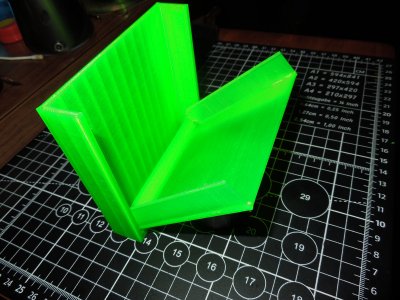
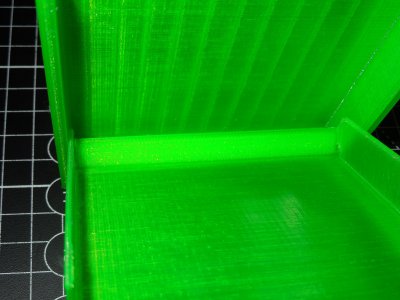
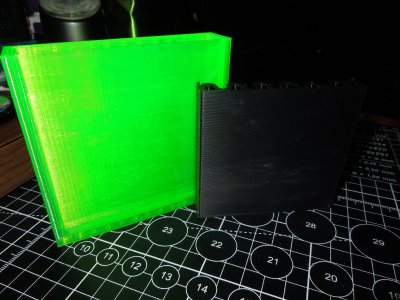
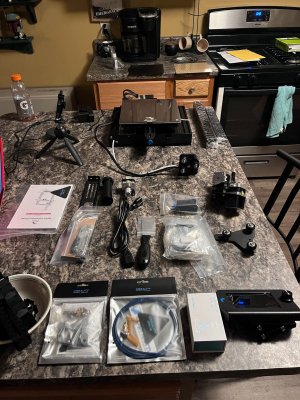
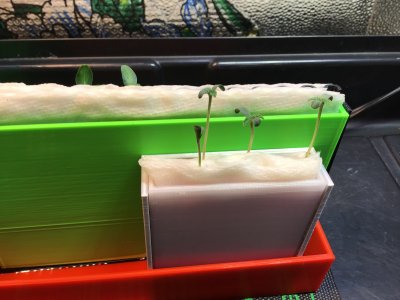
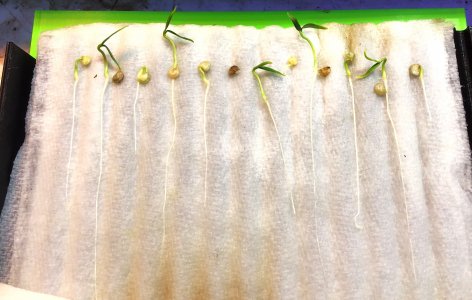
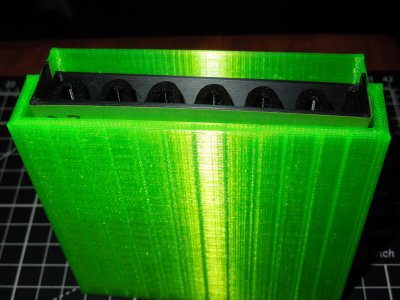
This is Vertical Germination

Love the green/black combo. My Jeep YJ was black with that green on headlights and other things like CB 102” whip antenna.

Res is excellent add-on. 👍

i have that color filament but that there is just painters tape so i could label the seeds.... that's Steamrollers idea, the tape!!

we need to get wipe board filament to print them from and label in dry erase!!!
 
i have that color filament but that there is just painters tape so i could label the seeds.... that's Steamrollers idea, the tape!!

we need to get wipe board filament to print them from and label in dry erase!!!
Dry erase markers might work as is. Depends on plastic. I use along with sharpie. Do a test on scrap.
 
Dry erase markers might work as is. Depends on plastic. I use along with sharpie. Do a test on scrap.

yeah i tried sharpie on the first one. the way these type printers layer the material it leaves grooves as a texture making it tough to write on neatly and almost impossible to rub off.

i ended up throwing the first one away it looked so bad from the silver sharpie when i tried wiping it off it just rubbed in the grooves and smeared the whole side...

use tape!
 
two small round nubs on the inner piece and two matching holes on the outer piece and it should hinge great. i could help out with that if ya needed.
i haven't looked at your current design at all, when you gave it to me it was still work in progress so i took the opportunity to learn more about tinkercad and modified that one you gave me and never printed your final version. ours ended up being almost identical, we both make the inner section more stout and you thickened yours and i went the other route and mine is thinner walls...

View attachment 15631

View attachment 15632

when i tinkered yours i added a fourth piece the rez.

my printer is sometimes turned off so i'd be happy to pay it forward and print some!!

☠️

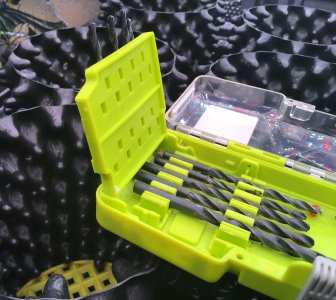
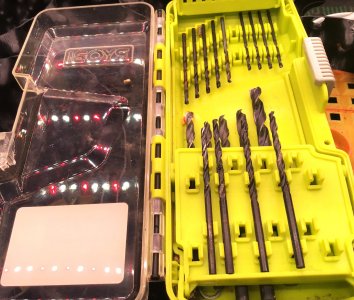
In my twisted mind, I look at my Ryobi drill bit kit and see a vertical germinator. :unsure:
Kinda.
I want something like these hinges but the geometry is beyond me. I could play with shapes and test prints but it would probably take me a year of R&D to have these types of hinges on the VG

IMG_5267.JPG

IMG_5269.JPG

In other news...we got action!

IMG_5271.JPG

IMG_5272.JPG
 

looks really awesome man!!!! a quick tip: when it's full of beans and ya wanna check em, you can set it in the rez crooked and let it drip a minute before dripping water all over your lap... believe me i know! hehe

DSCN0831.JPG

In my twisted mind, I look at my Ryobi drill bit kit and see a vertical germinator. :unsure:
Kinda.
I want something like these hinges but the geometry is beyond me. I could play with shapes and test prints but it would probably take me a year of R&D to have these types of hinges on the VG

View attachment 15658

View attachment 15659

In other news...we got action!

View attachment 15661

View attachment 15662

I'm on it bro!!! printing out a test piece now...

DSCN0834.JPG
.
.

are those your haze seeds popped already?
 
looks really awesome man!!!! a quick tip: when it's full of beans and ya wanna check em, you can set it in the rez crooked and let it drip a minute before dripping water all over your lap... believe me i know! hehe

View attachment 15664


I'm on it bro!!! printing out a test piece now...

View attachment 15665
.
.

are those your haze seeds popped already?
Thanks for the tip man, appreciate it lol. As far as the germinator goes, it was like 20 something hours of printing cause im running things slow right now til i figure it out better lol.
I was looking at lst clips on tinkercad and just happened to come across yours so thats next on the list lol.
 
Thanks for the tip man, appreciate it lol. As far as the germinator goes, it was like 20 something hours of printing cause im running things slow right now til i figure it out better lol.
I was looking at lst clips on tinkercad and just happened to come across yours so thats next on the list lol.

yeah i like to run it a little slower, especially the first layer. i run my first layer at 15mm/sec snail pace then once the foundation is done i let er rip up to 70mm/sec for the rest.

man i never tried those lst clips yet. i printed some at that size and some at 200% bigger, but haven't used em yet... i'll be keeping an eye out!!
Ive been running it at 50 speed and 100 flow, seems to be working fine.
My problem is if i go faster than 50, the extruder starts skipping 🙄
 
Ive been running it at 50 speed and 100 flow, seems to be working fine.
My problem is if i go faster than 50, the extruder starts skipping 🙄

whenever my extruder skips like that it means my nozzle/hotend is a little clogged, the more it gets clogged up the quicker it will skip. the last time i cleaned mine three colors of filament came out of the hotend.
 
@Stoneyluv
I dont think the tube was inserted all the way into the hot end.
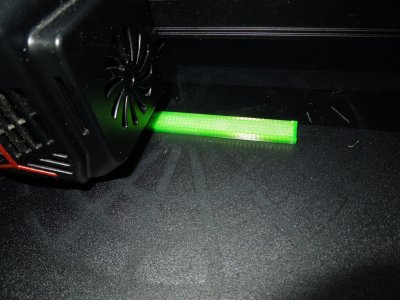
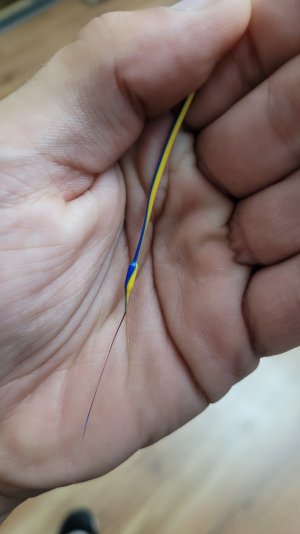
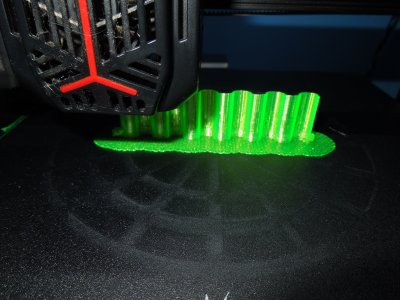
The extruder would skip and this was the filament i pulled out. View attachment 15730

great find man, i can hear my extruder skip quicker than i hear the fire alarm!! i'll be like, what? what's that?? dirty little nozzle!!! hahaha

sometimes after i put the safety clip on the tube fitting i gotta push the tube in another couple millimeters yet after the safety clip almost like making space for the clip pulls the tube away a little.

good work!
Yeah the nozzle was pretty shitty too. Burnt my thumb and middle finger knuckle in the process lmao, that shit is hot jsyk 🤣
 
Yeah the nozzle was pretty shitty too. Burnt my thumb and middle finger knuckle in the process lmao, that shit is hot jsyk 🤣

i don't mean to laugh but the first time i changed mine i loosened it with the wrench then grab it with my fingers to spin it out!! yeah i was the bigger nozzle in that situation!!! haha
 
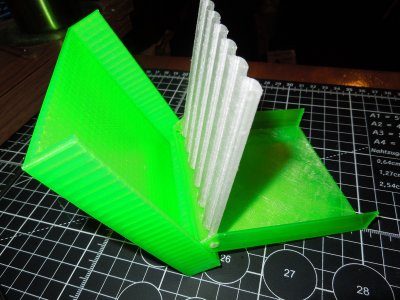
brother Bandit, i hope this is something like you're thinking... hinged!

DSCN0835.JPG

DSCN0836.JPG

i went opposite of what i said, holes went on the inside and nubs on the outside that way you can't see anything from the outside. it was fun to do, i even learned a slick way to make symmetrical nubs like that.

i haven't looked at your model since i printed one, so i didn't understand MoeRed's joke about the pink filament... well it ain't pink no Moe:LOL:


ya know yours is bigger, what is it with you texas guys, huh?!?! :ROFLMAO::ROFLMAO:

DSCN0837.JPG

☠️
 
Heck, I can't even figure out phone usage properly and these new fangled 3D printers are way above my head, I can't catch up, keep tryin though,Cheers SSgrower
Honestly with stuff like this it’s 90% setup. Once set you do a run or two, tweak, change and do the next project.

Real fun starts when you experiment. 😝
 
Guys I love the reservoir idea and it fixed a concern I had about tipping but in stead of a tab or foot how about a half moon or quarter moon?

Won’t snag or catch on things. Looks cleaner/more polished IMO. Shouldn’t take up any more space. Similar to the raft setting IYKWIM.
 
looks really awesome man!!!! a quick tip: when it's full of beans and ya wanna check em, you can set it in the rez crooked and let it drip a minute before dripping water all over your lap... believe me i know! hehe

View attachment 15664


I'm on it bro!!! printing out a test piece now...

View attachment 15665
.
.

are those your haze seeds popped already?
Yes Sir!
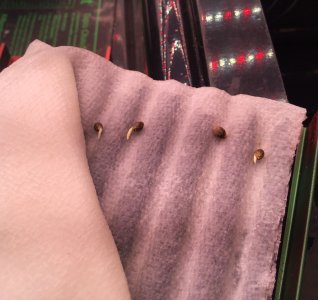
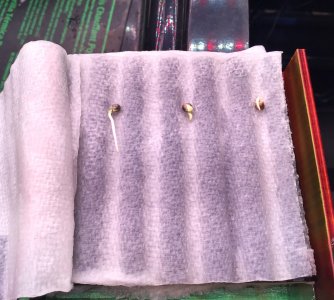
All 3 haze, 2 Oreoz, and 1 Frozen Custard opened up in 24 hours🥳

@Stoneyluv
I dont think the tube was inserted all the way into the hot end.
The extruder would skip and this was the filament i pulled out. View attachment 15730

Printer boogers!!! Ewwwwww!!🤮
Yeah the nozzle was pretty shitty too. Burnt my thumb and middle finger knuckle in the process lmao, that shit is hot jsyk 🤣
My thumb is so callused over now I can't even tell when I get burned anymore unless I smell it :cool:
brother Bandit, i hope this is something like you're thinking... hinged!

View attachment 15758

View attachment 15759

i went opposite of what i said, holes went on the inside and nubs on the outside that way you can't see anything from the outside. it was fun to do, i even learned a slick way to make symmetrical nubs like that.

i haven't looked at your model since i printed one, so i didn't understand MoeRed's joke about the pink filament... well it ain't pink no Moe:LOL:


ya know yours is bigger, what is it with you texas guys, huh?!?! :ROFLMAO::ROFLMAO:

View attachment 15760

☠️

Hahaha getting close!! Very close!
Can the corrugated panel be put in there on a hinge too so it turns like pages in a book? That's where I stumble and get brain lock

I'd like to try and eliminate the need to flip the panel over when wanting to use both sides and if it works, seriously make VG books with up to 3 corrugated panels inside.
Like this version can pop 12 seeds if every channel is used but for comfort and spacing I think it's more around 8-10. Every additional panel is another 12 seeds and so on. So say you wanna do peppers and you want to start 20 seeds you can do it in a super compact package unlike seed starting trays that take up lots of flat space. And then use multiple VG so really you could start well over 100 seeds, an entire veggie & flower garden, in a very small space

This is where I was with the veggies earlier this year. The hinge woulda been a game changer because I started tinkering with the XXL for volume. And it still worked great, popped over 20 seeds in a 3"x6" footprint but it can be refined. The hinges and book idea is the way to go IMO

IMG_4378.JPG

IMG_4405.JPG
 
If the separate reservoir is used to wick water onto the paper towel and doesn't really need to be replenished due to the short germinating period why not print the hinge point of the "door" of the germinator to open higher so that you create a reservoir at the bottom of the germinator? This way you eliminate having to print a separate reservoir. The corrugated sleeve can be pulled out to check on progress. You could print a base to keep the germinator from tipping over that is incorporated into the reservoir portion of the germinator.

Untitled.jpg
 
If the separate reservoir is used to wick water onto the paper towel and doesn't really need to be replenished due to the short germinating period why not print the hinge point of the "door" of the germinator to open higher so that you create a reservoir at the bottom of the germinator? This way you eliminate having to print a separate reservoir. The corrugated sleeve can be pulled out to check on progress. You could print a base to keep the germinator from tipping over that is incorporated into the reservoir portion of the germinator.

View attachment 15784

Original rez idea is actually for it to be a box with lid design to double both as the reservoir and a storage/carrying case.
Steamroller has the unfinished prototype of that design. The bottom is good to go but I've yet to start the top of the box
 
Guys I love the reservoir idea and it fixed a concern I had about tipping but in stead of a tab or foot how about a half moon or quarter moon?

Won’t snag or catch on things. Looks cleaner/more polished IMO. Shouldn’t take up any more space. Similar to the raft setting IYKWIM.

yeah great minds think alike, when i first drew it up i had half moon tabs but it didn't fit the top of my modem as well as i wanted so i put the squares on to then make a saddle to wrap around my modem. but that all changed when i stopped using my modem for germing, i never changed it back but if you wanted you could just hit back a few changers on my design and a previous layer already has the half moons on it, just save and slice from there.

you gotta understand that rez was not supposed to be seen by anyone, it was my very first thing i drew on tinkercad. and it certainly wasn't made for bandits newer size VG, i was actually shocked it fit now that i printed bandots new size and looked at it... i mean shit, my VG fits inside of his VG and closes!!! haha

DSCN0838.JPG

Yes Sir!
All 3 haze, 2 Oreoz, and 1 Frozen Custard opened up in 24 hours🥳


Printer boogers!!! Ewwwwww!!🤮

My thumb is so callused over now I can't even tell when I get burned anymore unless I smell it :cool:


Hahaha getting close!! Very close!
Can the corrugated panel be put in there on a hinge too so it turns like pages in a book? That's where I stumble and get brain lock

I'd like to try and eliminate the need to flip the panel over when wanting to use both sides and if it works, seriously make VG books with up to 3 corrugated panels inside.
Like this version can pop 12 seeds if every channel is used but for comfort and spacing I think it's more around 8-10. Every additional panel is another 12 seeds and so on. So say you wanna do peppers and you want to start 20 seeds you can do it in a super compact package unlike seed starting trays that take up lots of flat space. And then use multiple VG so really you could start well over 100 seeds, an entire veggie & flower garden, in a very small space

This is where I was with the veggies earlier this year. The hinge woulda been a game changer because I started tinkering with the XXL for volume. And it still worked great, popped over 20 seeds in a 3"x6" footprint but it can be refined. The hinges and book idea is the way to go IMO

View attachment 15779

View attachment 15780

i can put nubs and holes in the center piece to attach to one of the covers pretty ez. you won't be able to get under it anymore to put a paper towel because it will be hinged to a cover. i gotta print one of your new center pieces out so i can take measurements first. but once i have the measurements in should only take me a few minutes to draw it in.

but bro in my opinion if you want multiple hinged center pieces it should be started over from scratch. i can't think of a way to stuff more inside there with a single hinge point. but if i drew it all up it probably wouldn't resemble your VG at all other than having a wavy center section(s).

if i were king and it were mine, i would make a base/tray/rez whatever ya wanna call it and put the wavy centers submerged part way down into that base then two separate sides that hinges to the ends of the base to clamshell cover it all. you would have to make bigger bases and bigger doors for different amounts of wavy sections.

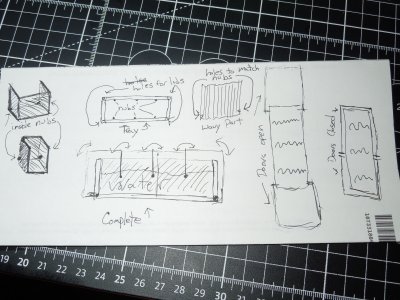
this is my crazy pinky and the brain drawing...

DSCN0840.JPG

but it's super ez to sit back and say do it this way or do it that way once the first creative idea comes out. it's never gong to please everyone and i'm not so sure you would even benefit from a built in rez, well maybe if it had a port for your temp probe to attach... we can do that though!!

so i'm not sure how far ya wanna take it man but a revision 2 could have less limits.

🙃
 
Bandit, I worked on it a little more.... how this for starters?

DSCN0841.JPG


View attachment DSCN0842.MOV

some more tinkering and i will have it better. and i think i can make multiple center pieces without changing your design at all. give me a few days and i'll have a prototype.

what do ya think man? what could use changing?

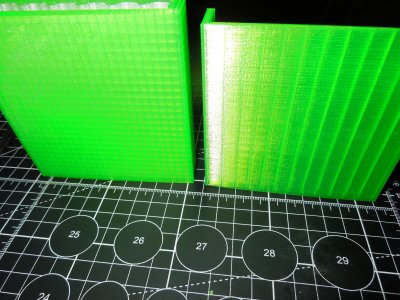
I had an issue printing the cover yesterday, it kept lifting from the bed. i don't know if it's because i made the bottom smaller for clearance or not but i had issues two prints in a row so i rotated the covers flat and printed them that way. i made the texture look different and speeded up the printing by a few hours total. flat printed on the left...

DSCN0843.JPG

yeah so disregard my other post man, i think we can make this an xtra lrg size with multiple center sections. it should use the same body and the same centers, just the cover would change i think... i'll tinker around with it this week and see.

so whach ya think brother? honest, you won't hurt my feelers!
 
Bandit, I worked on it a little more.... how this for starters?

View attachment 15982


View attachment 15983

some more tinkering and i will have it better. and i think i can make multiple center pieces without changing your design at all. give me a few days and i'll have a prototype.

what do ya think man? what could use changing?

I had an issue printing the cover yesterday, it kept lifting from the bed. i don't know if it's because i made the bottom smaller for clearance or not but i had issues two prints in a row so i rotated the covers flat and printed them that way. i made the texture look different and speeded up the printing by a few hours total. flat printed on the left...

View attachment 15984

yeah so disregard my other post man, i think we can make this an xtra lrg size with multiple center sections. it should use the same body and the same centers, just the cover would change i think... i'll tinker around with it this week and see.

so whach ya think brother? honest, you won't hurt my feelers!

Love it man and you nailed it! Now it all stays together for ez storage.
I'll print one out this week and give it a try. I have a bunch of diecast garage parts ready to print too so I'll get it in there somewhere.

Have you tried printing on rafts? I started off using no adhesion support then to skirt and I'd have issues but now using rafts every print comes out perfect with no warp or peel
 
Have you tried printing on rafts? I started off using no adhesion support then to skirt and I'd have issues but now using rafts every print comes out perfect with no warp or peel
I noticed that same thing. None or brim would warp or fk up, but raft seems to print perfect every time? I dunno.
 
Love it man and you nailed it! Now it all stays together for ez storage.
I'll print one out this week and give it a try. I have a bunch of diecast garage parts ready to print too so I'll get it in there somewhere.

Have you tried printing on rafts? I started off using no adhesion support then to skirt and I'd have issues but now using rafts every print comes out perfect with no warp or peel

yeah, ready for print?!?!?! i found out it was much easier to just redraw the panels so i could manipulate the sizes easier. i didn't realize when you copied a drawing it doesn't give you the previous layers. here i told zen to go back on my rez and that isn't even possible.. learn something new everyday.

I changed the position of the center piece for clearance and that made it stick up. the ez way would have been to shorten it but i didn't want to make it smaller so i made the body and cover a little taller. if i remember correctly it was 5mm so the overall height went up. i wasn't sure if you made this so you could print it on you smaller printer too, so if this is a deal breaker let me know we can adjust.

so since you won't see old layers anyway then here use these links.. i suggest the special bandit base ;)


OR


and


here is your wavy piece..


and this is mine, a little thinner and prints in an hour...


you can compile them all in one design then in your profile and link it from there. everything on my profile that is smokey and the bandit are your parts with nubs and holes and nothing else changed, everything that is stoney and the bandit is your design cleaned up a tad and tolerances and sizes changed a little. all the parts are mix and match plug and play with each other though. minus your original body and cover are still the shorter size in case you wanted it 100mm max.

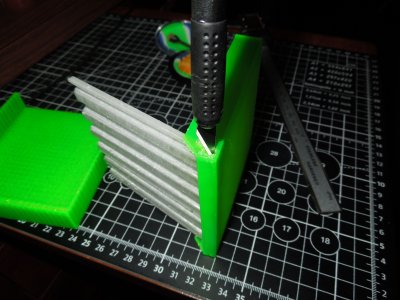
it assembles easiest if you insert the center piece into the cover first then put that assembly into the base. i had to clean up my holes a little with a xacto knife from the petg sagging a hair. the more you waller out the hole the looser and freer the parts will be. the nubs are 4mm and the holes are 4.20mm so they fit kinda tight to start.

DSCN0844.JPG

also, here is a new copy of my rez. i made it bigger to fit the new size and used @Zen_seeker suggestions on the feet...


I noticed that same thing. None or brim would warp or fk up, but raft seems to print perfect every time? I dunno.

you guys are right, thanks for the reminder. when i started used one every time till i got the hang of it. i never used a full raft though, just a simpleraft but yeah perfect solution and i'm using it right now for a prototype on my wavy piece.

but.... BUT.....

when i printed it out flat and left the bed texture on the pieces, look what happens....


View attachment DSCN0846.MOV

might be worth printing flat.... i know any i print will be!! :)

.
.
thanks again guys for the raft idea, best looking center section i printed so far...

DSCN0847.JPG

🙃:)🙃
 
Back
Top Bottom