3D printers and the things growers and stoners can make with them

I ran 6" last time and this round I've got a 4" in there. I'm still keeping it an inch under the pot. I can't close the gap without leaking where my plumbing enters.

Are you thinking a larger air gap would be better?
I’d leave it there. More water better.
 
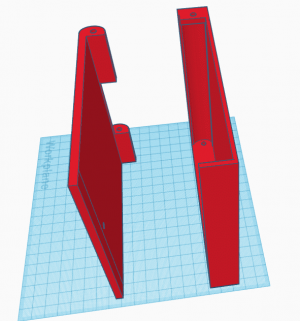
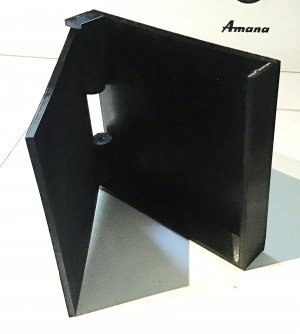
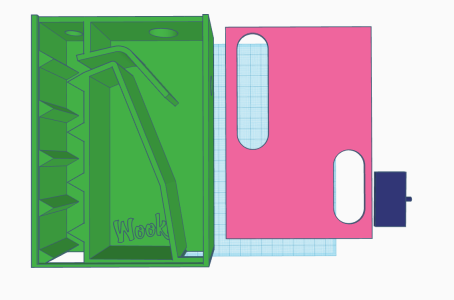
Stopped print at 20% to check measurements and angles. Very close but not there yet so I did some trimming and completed the whole idea.
Covers are on the printer now and it's a 22 hour print.

covers

vg covers.png

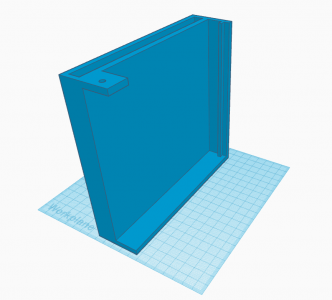
hinged insert

hinged VG insert.png

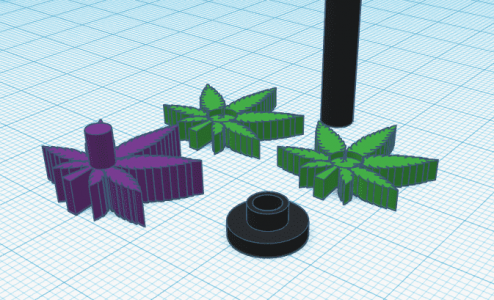
hinge pin w/ caps & knob w/ back plate for the door

hinge pin and knob.png
 
Sounds like it. I’ve had awesome luck with these

View attachment 25433
View attachment 25434
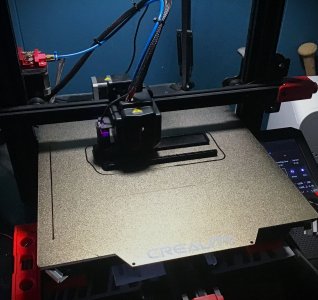
Top is pei bottom is powder coat.

That white part is the top part of a twist lock system in PETG

If it warps I can’t use it. I can predictably print these one after another. My printers have been running non stop for several days now.

@GoodShit97 if that print is pla I can give you some some advice.

Clean your plate with acetone.
If you decide to get your printer going I’ll walk you thru the rest.

The weird thing is my new PEI magnetic sheet looks like your powder coat

IMG_5646.JPG

I love what this thing is doing for my prints now. So clean on the base layers!😋

I ordered two other types of glass beds but will send them back. I didn't realize I could simply flip my existing glass over and have a brand new surface I'll keep clean 🫠
 
The weird thing is my new PEI magnetic sheet looks like your powder coat

View attachment 25950

I love what this thing is doing for my prints now. So clean on the base layers!😋

I ordered two other types of glass beds but will send them back. I didn't realize I could simply flip my existing glass over and have a brand new surface I'll keep clean 🫠
That's the same plate i have and so far i hate it 😒
Gotta get my glass plate from my FIL and try that out.
 
The weird thing is my new PEI magnetic sheet looks like your powder coat

View attachment 25950

I love what this thing is doing for my prints now. So clean on the base layers!😋

I ordered two other types of glass beds but will send them back. I didn't realize I could simply flip my existing glass over and have a brand new surface I'll keep clean 🫠
I see what you mean there.

My PEI sheets are flat as glass and produce a high gloss finish on the base layer. The powder coat is less grippy, and in my case is textured.

PEI will take Acetone from time to time to "refurbish" the surface. Makes it sticky again, which is helpful on PLA warping off the bed. But for me PETG sticks to it so hard I damn near damage the surface when I try to remove it.

What I find is that on the textured surface, PETG will pop right off when cool, but sticks hard when hot.

There's probably a million other surfaces out there, but what I got here is so repeatable I haven't tried any others. Textured PEI does sound interesting tho.

Yeah this PEI is textured like a powder coating and it's been awesome so far.
It's a flexible magnetic sheet that's in two parts. The bottom magnet has adhesive to cling to the top of the glass bed and the top part sticks to the bottom as they magnetize to each other.
If a print sticks to the bed which was my big problem, sometimes almost thinking I need a mallet to beat a print off the bed, the top part comes off and can be flexed to pop the print off.
But that hasn't been an issue at all so far. After cooling PLA just slides off like it was never stuck to the bed and the bed stays clean with no residue unlike my glass.
Best of all I don't need brims or rafts with this bed.

I have a three pack of Tobh's floraflex caps on now and these were always a bit of a mess on the first layers even with a brim but now I can print with no brim and they look a lot cleaner than they did on glass.
We'll see how ez they come off after cooling but I doubt it'll be an issue having the flexible bed now.
So yeah, I am super freaking happy with this upgrade!

View attachment IMG_5647.MOV
 
that's the kind of bed my printer came with and i use.

i feel it has its pros and cons... overall i hate it. wears out too easy, parts stick to hard, leaves a ghost image of everything you previously printed and shows on the next print afterwards. very hard to remove thin failed prints. prints can never be smooth, they either have the bed texture or top layer ugly look, and ironing seems to make the top layer look even worse IMO.

the good side, it's nice to be able to remove the print bed and bend it off the parts. and they're fairly cheap to replace, on prime day i can get them for $8 for my size.

i've always been jealous of the glass beds you guys have... i've never used a glass and it sounds like maybe the grass isn't any greener.

we'll see what Bandit thinks in a month from now and if he experiences any of the difficulties i have with it.
 
Bandit, i'm curious what bed temp you are running?

i use 60* for all petg and pla+ and tpu.
 
that's the kind of bed my printer came with and i use.

i feel it has its pros and cons... overall i hate it. wears out too easy, parts stick to hard, leaves a ghost image of everything you previously printed and shows on the next print afterwards. very hard to remove thin failed prints. prints can never be smooth, they either have the bed texture or top layer ugly look, and ironing seems to make the top layer look even worse IMO.

the good side, it's nice to be able to remove the print bed and bend it off the parts. and they're fairly cheap to replace, on prime day i can get them for $8 for my size.

i've always been jealous of the glass beds you guys have... i've never used a glass and it sounds like maybe the grass isn't any greener.

we'll see what Bandit thinks in a month from now and if he experiences any of the difficulties i have with it.

The good thing about the glass is it can be flipped so you pretty much get two beds in one but yep all those same issues still apply.
I had two new glass beds here but sent them back. One was what I already have and one was coated with carborundum which is supposed to increase hold and have easier removal but the coating can come off and embed into prints. IDK if the carborundum is on both sides though.
Both looked and felt like what I already have and I wanted radical change from that.

Not realizing I installed the PEI wrong, I think that mistake might be a good thing. My glass is still on the bed but I put the PEI on the glass instead of taking the glass off and attaching the PEI to the metal plate. I was wondering about temp maybe being lost so without checking actual temp I went ahead and am running bed temps at 70 for PLA and 80 for PETG. Before I was at 60 and 70.
When hot, nothing is coming off this bed and it sticks like it's cemented down. But once cool it slides off like a greasy egg on teflon. There's no stick at all after cooling.
I did have to reset z offset and level on the printer settings after though with the added thickness but in doing that I also think I have the best leveling on this printer since I've owned it dialing in as much as possible manually and not relying so much on the autolevel now
 
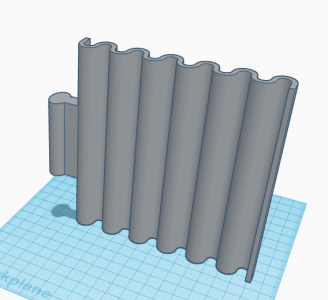
Next gen VG in the works

This is the econo base model measuring in at 7" wide x 6.5" tall x 1.5" deep. Each wall is 5mm thick and hinges are 20mm diameter with 4.5mm pins.
Hinged corrugated insert is on the printer now and it too is heavy duty grade


IMG_5656.JPG

The fully loaded package comes with optional heating on the back plate and a custom rez 🔥

heated vg.png

I'll make the files available in the coming days with all parts together in one file but due to the size and if you're not comfortable using support generators, I highly recommend printing each plate with it's backside down on the bed so you'll need to use the copy & paste feature on Tinkercad to separate all the parts into their own file and gcode.
But if warping is an issue then printing vertical is the way but the print may get sloppy on the overhangs unless you generate support.
Total print time not including a personalized rez will be around 35-45 hours. The rez I'm making almost doubles that.
 
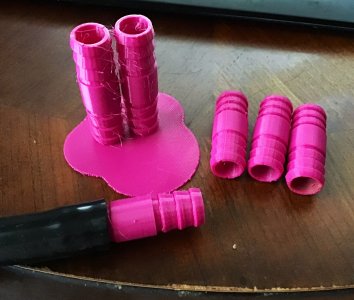
1/2" barbed tubing and hose connectors now available. 🤙
Can be resized for 1/4" spaghetti lines or enlarged for 3/4" & 1"

Kinda surprised there wasn't a ton of downloads for these so I made one from a T download and sliced it up and remixed it to straight line connector. Perfect fit for Hydrofarm polypro tubing, no ziptie required.
Print standing up, 100% density, PETG, on a raft for best results


IMG_5744.JPG
 
Last edited:
1/2" barbed tubing and hose connectors now available. 🤙
Can be resized for 1/4" spaghetti lines or enlarged for 3/4" & 1"

Kinda surprised there wasn't a ton of downloads for these so I made one from a T download and sliced it up and remixed it to straight line connector. Perfect fit for Hydrofarm polypro tubing, no ziptie required.
Print standing up, 100% density, PETG, on a raft for best results


View attachment 27444

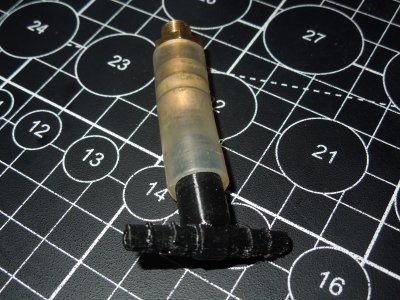
i honestly don't know how we got anything done before 3d printers!!!! i couldn't even begin to add up all the money it has saved me in stupid little parts like that!!

a while back i needed a special size air fitting and they just don't sell them this size...

DSCN1306.JPG
 
i honestly don't know how we got anything done before 3d printers!!!! i couldn't even begin to add up all the money it has saved me in stupid little parts like that!!

a while back i needed a special size air fitting and they just don't sell them this size...

View attachment 27454

Spot on man!
A long time ago I saw a seed separator that was vacuum powered and did an awesome job. I found it again and they sell them for over $1K and nothing home grower size. This is almost the kinda project where a 3D printer pays for itself and will be super ez to print

seed sorter.png
 
Spot on man!
A long time ago I saw a seed separator that was vacuum powered and did an awesome job. I found it again and they sell them for over $1K and nothing home grower size. This is almost the kinda project where a 3D printer pays for itself and will be super ez to print

View attachment 27650
something like this would be god-tier for bucking seeds off branches

get to marketing all the 3D projects, lol.
 
Spot on man!
A long time ago I saw a seed separator that was vacuum powered and did an awesome job. I found it again and they sell them for over $1K and nothing home grower size. This is almost the kinda project where a 3D printer pays for itself and will be super ez to print

View attachment 27650
Dude thats wicked cool and perfect for a home growers needs. Ive only ever seeded 1 plant and man without one of these idk if ill ever do it again... what a pain in the ass plucking seeds is...
 
Spot on man!
A long time ago I saw a seed separator that was vacuum powered and did an awesome job. I found it again and they sell them for over $1K and nothing home grower size. This is almost the kinda project where a 3D printer pays for itself and will be super ez to print

View attachment 27650
The video of that hooked up to shop vac has me worried about all but the seeds.
I would use it if I were producing seeds but not for cleaning what I smoke.
I would think trichs would/could get sucked up or just stuck inside the giant.
Never seen one before, pretty cool.
I think I still use a tray because that and a card is how we used to clean pot.
HA I lived and smoked before most even heard of sinse~!:ROFLMAO::oops::rolleyes:

Already ahead of you on that 😋

So this will be a mini separator, maybe 1/4 that size if not smaller and I have some ideas about the vacuum.

As far as the zig zag and the whole interior, I'll be lining it with either silicone sheets cut to fit or parchment paper so the inside is slicker than snot and wont grab trichs.

On the vacuum I'm thinking nothing more powerful than 1hp and something more like either a PC fan or a small dustbuster style vacuum with a 25 micron screen so it's not sucking up material.

After the sorting all the stuff that's not seed will get bagged and squished into rosin or tumbled to remove kief from the veg matter then squish the kief
 
I have Kief needs "Squishing" you have How To advise Bandit? SS
 
@SSgrower
We squish with presses [NugSmasher/Dabpress ]
I use the Nugsmasher XP.
 
I have a dabpress 12 ton

When i tumble flower for kif it yields a return of about 15%
Then you press that 15% return as kif it returns about 80% rosin
I take that kif and press it into a brick. (My preference)
 
Sweet, when I get the mola I will get a press for small amounts as I see some don't dab very much and I am a flower guy. No commercial intent, just personal use. SSgrower
 

Attachments

  • ks-kyung-nie31AKyPHI-unsplash(1).jpg
    2.3 MB · Views: 5
I have a dabpress 12 ton

When i tumble flower for kif it yields a return of about 15%
Then you press that 15% return as kif it returns about 80% rosin
I take that kif and press it into a brick. (My preference)
I too prefer flower and hash, but i feel you can never go wrong with a good dab lol
 
What do you do with the press after your done squeezing the oil out of it? Do you reuse it for anything?
 
@SSgrower
We squish with presses [NugSmasher/Dabpress ]
I use the Nugsmasher XP.

This morning I decided to take a major leap and submitted the form to put my OG into the buy back loyalty program. It's in great condition and looks like it will get me $450 in store credit.
XP was my initial choice on the upgrade but with the black friday sale that just dropped I'm going all in and looking to get the Touch. 😵‍💫
 
NICE~!
Love buy back loyalty nug smasher has.
I look at like a buying a fine diamond.
I love the 4X6 plates.
You'll squish a ton with that. 👊
 
This morning I decided to take a major leap and submitted the form to put my OG into the buy back loyalty program. It's in great condition and looks like it will get me $450 in store credit.
XP was my initial choice on the upgrade but with the black friday sale that just dropped I'm going all in and looking to get the Touch. 😵‍💫
Ill give ya 450 for it🤔🤣 lol jk my wife would kill me.
I cant touch a nugsmasher for what they cost lol. I was looking at a dabpress brand a while back tho lol.

Nugsmashers buyback program does look like a good deal tho.
 
NICE~!
Love buy back loyalty nug smasher has.
I look at like a buying a fine diamond.
I love the 4X6 plates.
You'll squish a ton with that. 👊

The Touch had me at "Extraction Brain"😋
4"x6" plates will have me spoiled too.

Looks like this is gonna happen. They opened the ticket and I sent them pics then I got a call and email back.
Also found a better code than their blackfriday code. Instead of 12% off with that one, code 15OFF is worth 15% off.

So the way this works best is when they have a sale like this BF or the 15 off.
You have two options...
Buy the new press now with the sale code then send the old unit back and they'll refund that 80% trade in value to your card.

The next option is to send the old press back now and wait for the new discount code for your trade in then buy the new press.
However you can only use one code at a time and if you use the buy now pay later financing the refund come in the value of store credit.

I took the first option buying the new press first with a sale code then will wait for a refund to my card later after I send the old unit back. That's the only to get both trade in value and a coupon to work together.

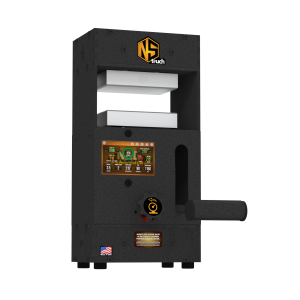
Before the price slash sale this was a $4000 press. After the slash it's a $2400 press. After the coupon and trade in, my out of pocket cost is $1581
I probably could've got the XP for $400-$500 out of pocket and been happy but dang..A $4000 12 ton digital w/ 4"x6" plates for under $1600 is just too good to pass up!

So yep...she's mine!!!!
NugSmasher-Touch_Camera_Front-Left.png

Ill give ya 450 for it🤔🤣 lol jk my wife would kill me.
I cant touch a nugsmasher for what they cost lol. I was looking at a dabpress brand a while back tho lol.

Nugsmashers buyback program does look like a good deal tho.

I just told my wife thanks for such an awesome Xmas gift she doesn't know she bought me yet. 😋

Yep the buyback program and lifetime warranty is considerable in this choice. If not for that warranty, I doubt I woulda gone for the digital upgrade.
These things are already built like tanks but I'm always skeptical of electronics and heat so that warranty gives me piece of mind.
And the folks at NS are incredibly ez to work and communicate with.
 
Back
Top Bottom