3D printers and the things growers and stoners can make with them

i printed my first one out in pieces as well.... don't rush it.

raise your bed temp up a little to help that filament to stick to the bed... 60-65* for pla if you still have issues slow your print speed down a tad 70mm/sec is a little fast for that caliber of printer using pla. you can run those speeds with a hotter material such as petg or abs.
Yeah i found that speed thing out the hard way lol

Since i reset for the 40th time, speed is 65 now, bed temp went up to 60 as well, flow is at 90. So far only warping is the issue now.
 
Collecting data for son and I. When we’re ready to pull the trigger I’m hoping to see what you guys @Bandit420 would suggest. Or if one of you upgrades and wants to sell the old model. (Sounds like people collect rather than resell. 🤣)

I hear power bills tend to climb rather sharply once you’ve setup and get rolling. 😝
It comes down to expectations and size of wallet. What is your budget including startup supplies?
 
On the warping, can you add a brim in the slicer? Also try to put a huge box over it to keep drafts down and air temps high.

Also, looks like a textured powder coated sheet. Do you have any slick sheets? I find PLA sticks way better, these kinds of bed plates work best with PETg.
 
I saw something on the net talking about all in one printing where you print all the pieces at once even though they are moving parts. Is this hard to do? What program do you use to program the printer? I have a little bit of experience in SolidWorks and Rhinoceros.
 
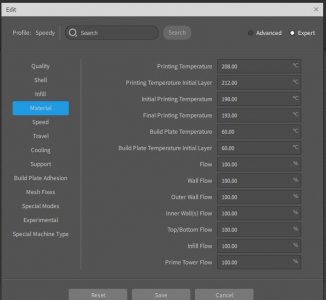
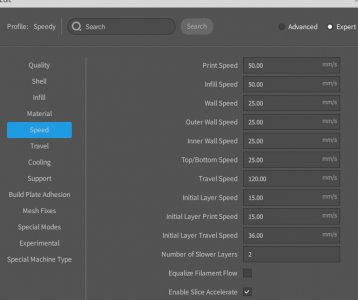
if any of this helps these are some of my quick print pla settings...

View attachment 15210

View attachment 15211


you leveled the bed after you moved the printer to your house, right?

🙃

Yeah i leveled it, those settings mean nada to me right now lol. Im just messing with the ones on the printer, idk what you've got going on there lmao.

On the warping, can you add a brim in the slicer? Also try to put a huge box over it to keep drafts down and air temps high.

Also, looks like a textured powder coated sheet. Do you have any slick sheets? I find PLA sticks way better, these kinds of bed plates work best with PETg.
I can add a brim yes, i can't remeber what the name of this sheet is, the only other one i have for it is a glass sheet but its not here, its at my FILs still.

Print failed as i knew it would from the warping. Cought on the head and drug it across the bed... oh well.
Now i cant get it to stop sticking to the nozzle. 🤷🏻🤦🏻
Ill figure it out eventually
 
Also, looks like a textured powder coated sheet. Do you have any slick sheets? I find PLA sticks way better, these kinds of bed plates work best with PETg.
It is a P.E.I sheet.
Its all thats ever been on it since my fil started using it.
 
It comes down to expectations and size of wallet. What is your budget including startup supplies?
Ah, it’s like that.

No budget. For me it’s a want I hope will make repair parts and probably cool items of use. Some fun. Thinking vape parts or tent gimmicks. Seed germinator for sure. 🤣

For son it’s all about his model robots. Making add-ons, terrain, parts, etc.

After talking with G$ it sounds like the Neo with bigger table is nice but at higher cost. After that it really jumps but better quality printers. Give or take a bit.

And that’s as far as this ever got.

It just seems they’ve been around long enough to be practical, functional, and cost effective. But still a PITA for initial setup and familiarizing yourself with things.

As noted a Black Friday or sale day would probably be best bet with Neo being current best bang for the buck.
 
We can all relate

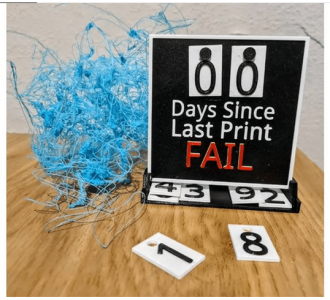
print fail.png


I'll have to look at my settings but other than Z offset mine are pretty much factory default on the printer.
I know I print at 100 on the printer speed, 50mm/second on the slicer, and lately I've been using raft adhesion for reliability and precision.
A raft will waste a little filament and add time to the print but it does help a ton in getting a good start with no warp.

Fan speed at zero would be a concern for me. I'll have to look at mine but I think I run the fans at 100% and have print cooling enabled

In the slicer the only things I change are print temp, infill density, wall thickness, adhesion, and infill pattern. There's a ton more in there to mess with but I don't understand much of it so I don't mess with it. If my prints were coming out all wonky I'd deep dive those settings but factory default has been kind to me.

Keep a lot of nozzles on hand and maybe even a spare hot end. I've had my issues with hot ends and nozzles but can honestly say all the fuck ups were something I did wrong, made a bad problem worse, and not the fault of the printer.

Different filaments can be a dream to work with and others pure nightmares. TPU has given me the most troubles but I think I'm finally getting it to work well

Double check designs in the slicer settings too. That's where most of my errors happened and I didn't catch it before I started the print.
There will be moments of frustration and moments where you feel like you've conquered the world with these things. Once you get it dialed in you wonder how you ever got along without one.
 
Last edited:
I can already see myself going through at least 3 rolls before i figure this out.
 
I saw something on the net talking about all in one printing where you print all the pieces at once even though they are moving parts. Is this hard to do? What program do you use to program the printer? I have a little bit of experience in SolidWorks and Rhinoceros.
Yeah you can print multiple objects at the same time then assemble them into something or say you want to print out an entire chess set at once, you can as long as it will all fit on the workplane.

Printers come preprogrammed I suppose with it's own control pad with some settings adjustment options. The interface between computer and printer is typically micro SD card.
But you download a slicer program to your PC and on the slicer is where you tinker all the settings for what you're printing.
You basically download a file, upload it into the slicer, adjust settings, save it to SD card, move SD card to printer and select from the menu to print the object
I mean parts that are movable within other parts being printed at the same time. I read that it's hard to do because the space you need to leave between the parts is not easy.

 
I mean parts that are movable within other parts being printed at the same time. I read that it's hard to do because the space you need to leave between the parts is not easy.

Yeah those projects are common & popular. Depends on the size and what it is then using a high quality filament and settings dialed in well would print the same as a solid object. I think those are popular for little toys and gadgets from most of what I see on Thingiverse and Cults. I haven't found a need to make any PIP pieces though. Possibly for a gear assembly but would be just as ez to print gears separate too so it just depends which would be easier and faster
 
All of my issues were because of a loose hot end. I took the cover off to make aure the boden tube was fully inserted and found the hot end wobbly. Tightened that back up and now im 82% through 1 piece of the vertical germinator, printing great 👊🏼👍🏻
 
Note to self...
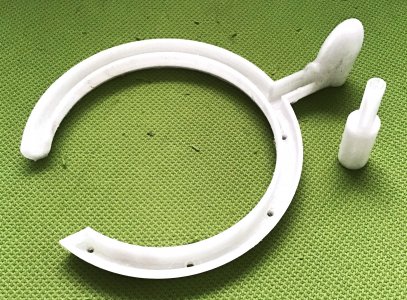
When making a drip irrigation ring, it's a good idea to make sure the "fill in holes" box in the slicer settings is not checked.
So yeah..My printer just spent the last 23 hours making a solid drip ring🤦‍♂️

So after that initial fuck up this project is coming along and is one I'm pretty excited about. Kinda taking drip irrigation hydro old school. Very old school. Like ancient Rome aquaduct old school:cool:

This will be an air lift powered irrigation system and rather than a drip ring, I'm working on an aquaduct really.
I downloaded a pretty good airlift ring design off Cults and took it into my garage on tinkercad.
From there, I resized and took the top off the ring to make it a channel. That's gonna make it super ez to keep clean.
After the initial print I liked what I got but still needs work. I resized it again, increased dripper holes to 3.5mm diameter and beefed it up around the bends.
Final version is on the printer now and should be done in about 9 hours.
I'm using food grade PETG filament, 240 at the nozzle, 70 on the bed, infill density at 100%, and speed at 100%

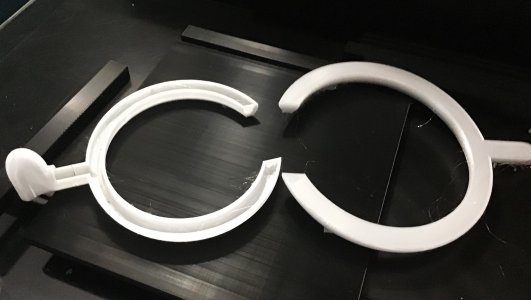
The fuck up is on the right. I was wondering why an 8 hour print was taking a whole day and it never turned into a channel so I cut if off at 60% to figure out what happened. I knew it was in the slicer somewhere after doing a preview check so after some searching I realized there's a little check box that says "Fill in holes" and it was checked🫤

IMG_5273.JPG

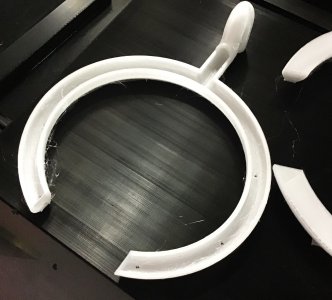
An almost usable prototype. Final version is printing now🤘

IMG_5274.JPG
 
Last edited:
Note to self...
When making a drip irrigation ring, it's a good idea to make sure the "fill in holes" box in the slicer settings is not checked.
So yeah..My printer just spent the last 23 hours making a solid drip ring🤦‍♂️

So after that initial fuck up this project is coming along and is one I'm pretty excited about. Kinda taking drip irrigation hydro old school. Very old school. Like ancient Rome aquaduct old school:cool:

This will be an air lift powered irrigation system and rather than a drip ring, I'm working on an aquaduct really.
I downloaded a pretty good airlift ring design off Cults and took it into my garage on tinkercad.
From there, I resized and took the top off the ring to make it a channel. That's gonna make it super ez to keep clean.
After the initial print I liked what I got but still needs work. I resized it again, increased dripper holes to 3.5mm diameter and beefed it up around the bends.
Final version is on the printer now and should be done in about 9 hours.
I'm using food grade PETG filament, 240 at the nozzle, 70 on the bed, infill density at 100%, and speed at 100%

The fuck up is on the right. I was wondering why an 8 hour print was taking a whole day and it never turned into a channel so I cut if off at 60% to figure out what happened. I knew it was in the slicer somewhere after doing a preview check so after some searching I realized there's a little check box that says "Fill in holes" and it was checked🫤

View attachment 15782

An almost usable prototype. Final version is printing now🤘

View attachment 15783
Awesome!
 
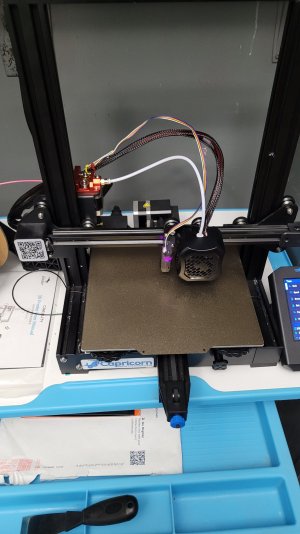
Need to order a bowden tube replacement on Thursday. This one is has a tiny kink in it and its just causing issues.
 
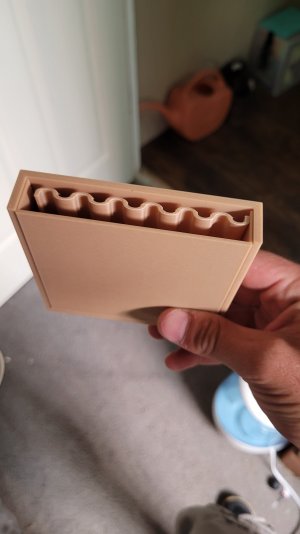
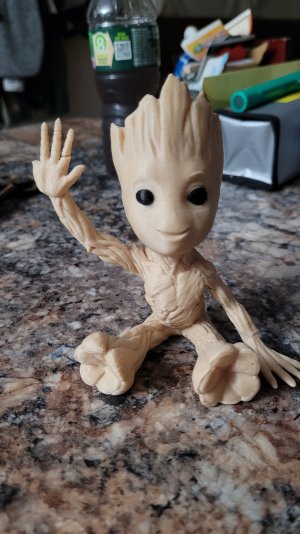
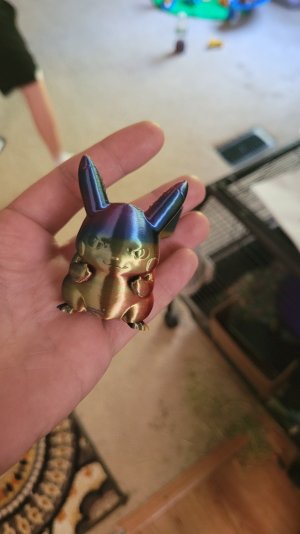
I made both of these today.
Pikachu for my oldest and groot for my youngest. I dropped groot getting him of the printer so hes busted in 3 places and i never did find his pinky.
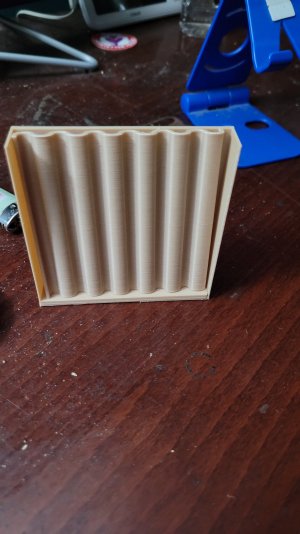
So once i get a new tube he wants groot reprinted. 20230730_204614.jpg20230730_190052.jpg
 
135mm drip channel is nails!!!
Also designed an adapter so it fits on the GH waterfarm air lift tube

IMG_5278.JPG

The drip ring, the open channel ring design, and adapter are all on tinkercad and available to the public as of today!


Turns out im just 3d printer retarded and got lucky my first run....


Cant make this fucken thing do a god damn thing now. Trying to adjust esteps but now it just sits there and does nothing....

I hate technology. Give me sticks and stones ill be fucken fine.
 
Turns out im just 3d printer retarded and got lucky my first run....


Cant make this fucken thing do a god damn thing now. Trying to adjust esteps but now it just sits there and does nothing....

I hate technology. Give me sticks and stones ill be fucken fine.
I totally get that frustration. Sometimes I wanna punch mine and throw it out the window and other times I wonder how I live without it.
When I have a break down and get it back up and running, I go back almost like the day I unboxed it and go thru all the set up and leveling, setting Z offset etc.
Sometimes it can just be really shitty filament too so if I have repeated issues that don't make any sense I'll change to another filament and it will work.
Im trying to reset esteps... thats all and i had the hot end at 200, bed at 50.
And the extruder did nothing.

For some reason esteps was at 145, i guess it needs to be 100, but i cant get it to feed 1mm of filament, yet alone 100mm of filament. Ready to smash it so im just giving it back to my fil before i do smash it cause i have a horrible fucken temper...

Ive smashed 1000s of dollars worth of cell phones, a 300 dollar printer wouldnt be anything 🤣🤣
 
Back
Top Bottom