3D printers and the things growers and stoners can make with them

I get it on the clones or seedlings lately. Never used to. Not a problem so far. Just sits on the top soil when in red cups under low light. Seems to disappear when up potted and lights turned up.

Can it be a problem?
It hasn't seem to actually be one yet for me, and of course I flood the CLEAR totes on the ones that sit on top in lid.

I just rinse it out and wipe it down every couple of days.

Supposedly if it does build up badly it can hamper o2/gas exchange and nutrient uptake.

But if you're also turn and burning grows, short veg times.

Don't think it fuckin matters or has enough time to build up enough to cause harm.
 
It hasn't seem to actually be one yet for me, and of course I flood the CLEAR totes on the ones that sit on top in lid.

I just rinse it out and wipe it down every couple of days.

Supposedly if it does build up badly it can hamper o2/gas exchange and nutrient uptake.
I’ll keep an eye on it. Never gets bad but it’s been a strange year.

I flood the red cups each feeding then dump the runoff. That seems to help too.
 
algae can become a problem, but for most cannabis grower's timelines it doesn't have the chance to be. i just don't like seeing it, that stuff is gross looking. plus, i have this massive fear of getting grey algae which i've seen many a grower toss entire systems because of. that shit IS bad and it's almost, if not is, impossible to get rid entirely once it's gained a foothold.
 
algae can become a problem, but for most cannabis grower's timelines it doesn't have the chance to be. i just don't like seeing it, that stuff is gross looking. plus, i have this massive fear of getting grey algae which i've seen many a grower toss entire systems because of. that shit IS bad and it's almost, if not is, impossible to get rid entirely once it's gained a foothold.
Never even heard of "grey algae" until today.
Shit looks gross and now i have that fear of getting it🤣
 
Never even heard of "grey algae" until today.
Shit looks gross and now i have that fear of getting it🤣
fwiw i've only seen it impact RDWC systems. it might impact other deep water culture setups, or maybe even NFT systems but anything with a physical media (soil, coco, rockwool, etc) seems to have a bit better chance of avoiding it. the fear still lives in the back of my mind though haha
 
fwiw i've only seen it impact RDWC systems. it might impact other deep water culture setups, or maybe even NFT systems but anything with a physical media (soil, coco, rockwool, etc) seems to have a bit better chance of avoiding it. the fear still lives in the back of my mind though haha
Well im definitely glad you brought it up because at some point in the future i will be going to RDWC so its good info to know.
 
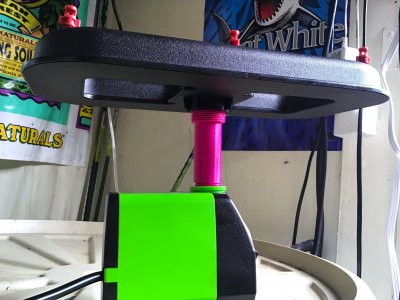
Ez Clone rebuild with aftermarket 800GPH pump.
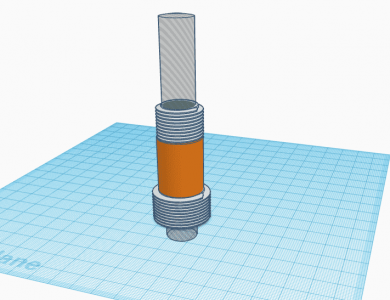
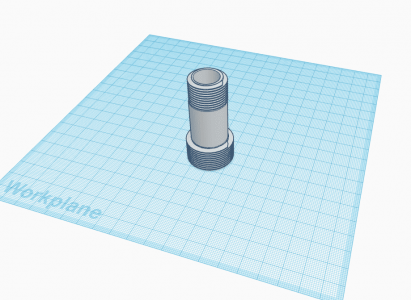
Had to 3D print a standpipe to fit the pump to manifold...
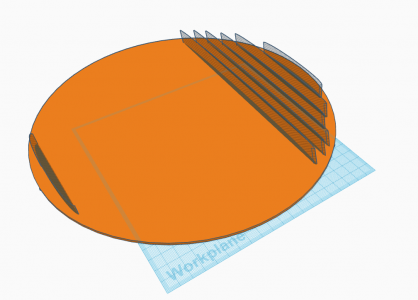
Assembled on Tinkercad using four parts...Two resized metric thread plugs (28mmx28mm & 21.5mmx21.5mm), tube (21.5mm x 30mm), and cylinder hole 15mmx15mmx100mm set below the workplane and well above the assembly for a complete custom tube. All stacked up on top of each other to make it one part.

ezc.png

After grouping all parts, it's ready for the slicer...

ez clone standpipe.png


Using PETG, printed at 100% density, and after 2.5 hours of print time, I have my hot pink standpipe and am ready to cut clones!!!
I've already made this part public so if anybody needs a new standpipe for an aerocloner, here it is!


IMG_5415.JPG
 
Last edited:
On the printer now....

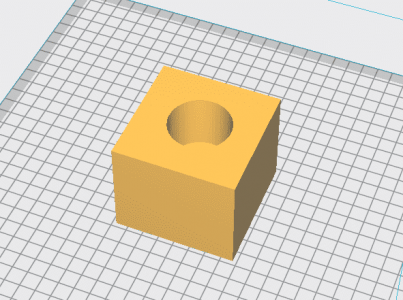
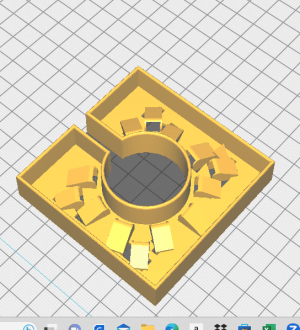
75x75x65 rockwool block simulator model. This will help me nail the specs on the adapter sleeve

rwsim.png


And a 75x75x15 Floraflex knock off. Peg holes filled and it's ready to go. Just gotta see if it prints clean before mass production of printing 4 at a time 😋

rwsim2.png
 
On the printer now....

75x75x65 rockwool block simulator model. This will help me nail the specs on the adapter sleeve

View attachment 20163


And a 75x75x15 Floraflex knock off. Peg holes filled and it's ready to go. Just gotta see if it prints clean before mass production of printing 4 at a time 😋

View attachment 20164
Nice. I was going to say is there any way you can make the weep holes raise from the top? underneath is going to compromise the stability. I'm assuming your design is flipped upside down.
 
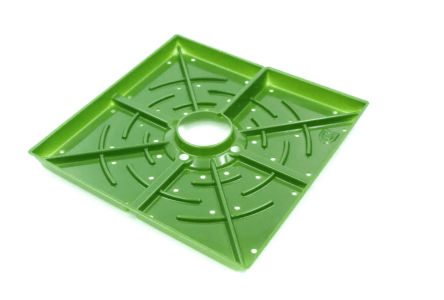
@Bandit420 nice! Have you used your prototype? I had built one without those little "hoods", just holes, and got pooling in the corners as mentioned. I think this is a better design to be inspired by since each sector will be watered independently even if it is not perfectly level:
1693984627984.png

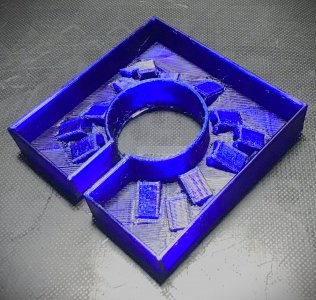
I am getting some pooling thought. The water doesn't drain 100% so I assume it could be improved. I might give it a shot as CAD practice...
 
that's wild man. surprisingly fast too!

Getting there. Slowing it down to around 60-75% will be my next move but it's there.
Holes are so large & random it'll be ez to fully saturate a rw block this size in less than 3 minutes with a steady drip. Faster with steady flow.
I think these walls are 15mm high. I can make them taller to prevent overflow if you think that could be an issue

IMG_5421.JPG
 
@Bandit420 nice! Have you used your prototype? I had built one without those little "hoods", just holes, and got pooling in the corners as mentioned. I think this is a better design to be inspired by since each sector will be watered independently even if it is not perfectly level:
View attachment 20259

I am getting some pooling thought. The water doesn't drain 100% so I assume it could be improved. I might give it a shot as CAD practice...

No I just started to make these two days ago. I am working on a round matrix design though.. It's in it's infancy ;)

matrix.png
 
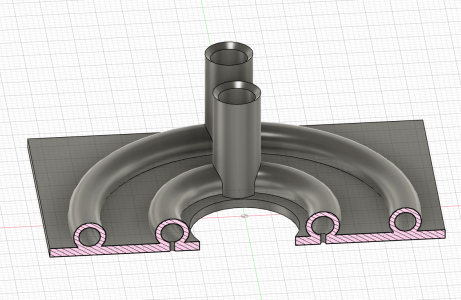
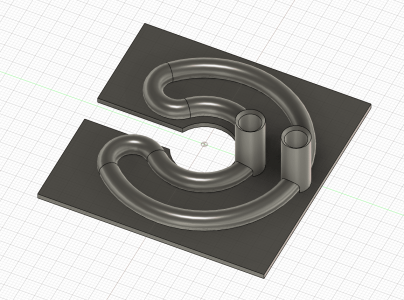
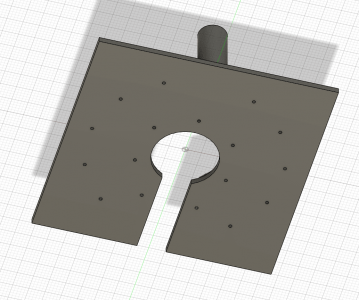
How about this for a thought experiment: No open channels => no worries about flow distribution or pooling. An double hydro halo with medium cover. No side walls required. It would be interesting to try this in combination with a fleece maybe.

I use fusion360 in case anybody wants the files...


1694018270925.png

1694017797491.png
1694017837116.png
 
I have some of the floraflex caps, if it would be helpful for dimensions of the plastic itself. like, trough depth and whatnot...
 
I have some of the floraflex caps, if it would be helpful for dimensions of the plastic itself. like, trough depth and whatnot...
Whatcha think about how this is going?

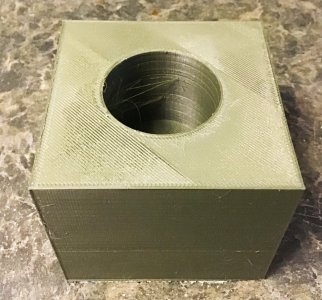
My rockwool simulator block is the 3x3x2.5 like yours. I used your measurements then rounded up for even numbers. I even made it rockwool green😋

IMG_5441.JPG

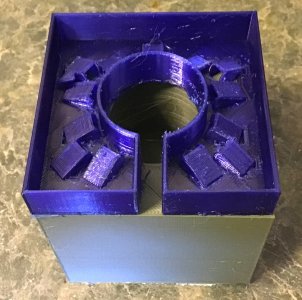
And here's how the cap fits. Each little vent thing is an hole so I think this would get great saturation

IMG_5442.JPG

Things around here will be busy over the weekend but hopefully by midweek next week I can start on the adapter sleeve
 
dude i totally would've sent you a block, you didn't need to print one! lol that looks pretty damn good though
 
dude i totally would've sent you a block, you didn't need to print one! lol that looks pretty damn good though

All good brother! It was pretty ez to make and gives me the dimension I need.
I'm getting back in the design chair this week after about a month away. Got this and a few other projects I need to work on but got too busy.
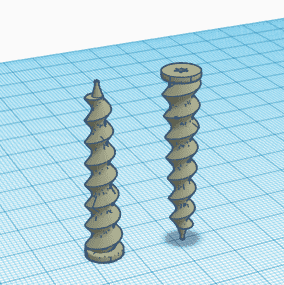
I have a different idea about the spikes that may work better but I was thinking that instead of the fat floraflex style spikes I can make longer skewer type spikes that will slide thru the cap and into the rockwool
 
that's actually not a bad idea. now, i'm not sure if it's possible to do this, but would you be able to barb the spikes, similar to fish hooks?

one of the fundamental design flaws i found with the floraflex spikes was that they had a tendency of only stabilizing the platter on the horizontal plane. if there was any kind of flex from the irrigation line, the platter would still raise up effectively defeating the purpose of having the damn thing flat on the cube.

i'm not sure if barbs would even work to eliminate that problem though, given the fact that rockwool deforms around the spike and doesn't return to its original shape, so maybe screw threads might be better? take advantage of the behavior of the wool and get the spikes to "lock" in place, giving stability to the platter. just spitballing ideas here.

How about this?

barbed nails.png
 
Not to be a smart ass but I wonder if these would work.
these were exactly what i was thinking of! most of the ones i've seen are bulky bastards, though. not that it really matters on the smaller blocks, they're literally only meant as an "entrance" for the plant to build its root system in the larger block or slab underneath.
 
Not to be a smart ass but I wonder if these would work.
That's pretty much what this is but I can make it for pennies. $14 worth of filament could make thousands of them. Plus this is being made with food grade plastic to avoid BPAs in the root zone.
These custom spikes are also smaller with an 8mm diameter and 40mm length.
 
I would think the spikes so close to the corners of the cube may start to disintegrate the cube at insertion point.
 
@tobh
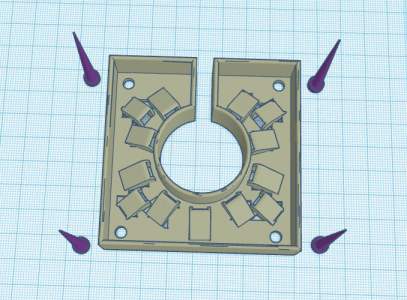
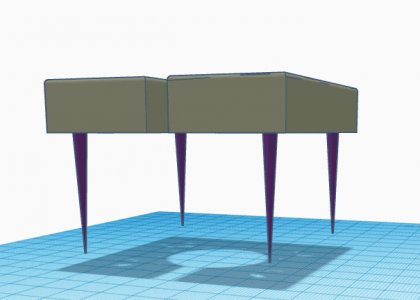
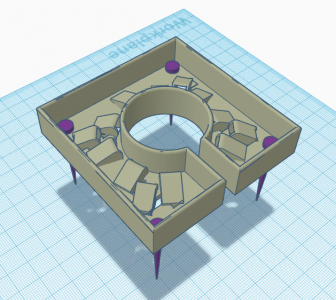
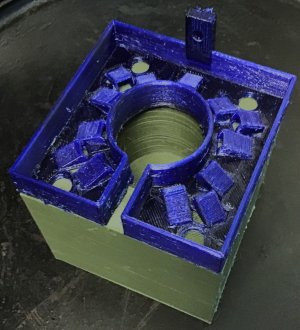
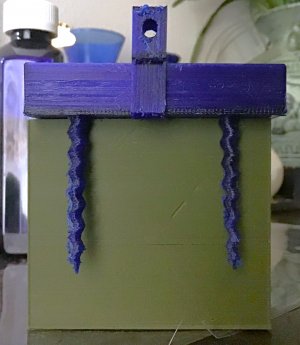
1st print of a complete kit w/ 4 pins, tray, and tubing clip

View attachment IMG_5609.MOV

The tubing clip will likely need it's hole enlarged. It's solid plastic so it can easily be drilled out and it does have a pilot hole.
I slowed my printer down to only 40% to hopefully make them come out clean. All the cobweb like stuff will be off when it's done and I'll give it a test fit on my simulator block.

This single kit should be a 4.5 hour print but since I slowed it down it's coming close to being a 10 hour print. My next step is to print four kits at a time if you think this is a go so I'm pretty sure at this speed printing 4 kits at a time will take almost two full days and nights.
How many kits will you be needing?
When they're all done then I'll do another printing of just pins and tube clips so you have lots of spares
 
Looks like I need to reduce the diameter of the holes for the pins but I think it's there

IMG_5613.JPG


pin depth right now

IMG_5610.JPG

I can change the size of the tube clip hole as well. Just need the outside diameter of the tubing you use and if you want the hole to remain at a downward angle or made horizontal
 
Back
Top Bottom