
Bud Builders - Making Friends, Growing Cannabis

Register a free account today to become a Bud Builders member! Once signed in, you'll be able to participate on our site by adding your own topics and posts, as well as connect with other members through your own private inbox.

Join the fun and make some friends!

New Grow - Rose Gold Pave` by Compound Genetics - Bud Builders

I don’t care how stun the leaves look as long as I have three main colas instead of one 🙂
Serious question here:

I actually tried my first attempt at FIMing there, turns out, I don't think it worked cause all I got was the cut off leaves and no double branch that I was expecting.

If you do not end up with additional cola stalks in this process, how do you get additional colas? Or are you saying for you FIM means to stall the growth on the apical cola to let the side ones catch up?
 
Serious question here:


If you do not end up with additional cola stalks in this process, how do you get additional colas? Or are you saying for you FIM means to stall the growth on the apical cola to let the side ones catch up?
In essence, yes.

Topping vs. Fimming​

Fimming is another technique used to increase the number of colas and yield size. It’s similar to topping in idea and appearance, but not quite the same.

The name stands for “f*ck, I missed” and refers to how sloppy this method appears. It involves pinching and removing around 75% of the tip of the plant: like you tried to top and missed.

Instead of producing two stems, this approach leaves you with four or more new branches. Each develops and fattens a separate apex cola in flowering.

Fimming is a more efficient yield booster than topping, but it’s less precise. The snip must be accurate to get the branching pattern; rookies often end up harming the plant with no benefit. It’s also less successful at managing height, as fimmed weed plants still grow rather tall.

Topping is better for growers with large plants and lofty harvest ambitions. Fimming is suitable for advanced cultivators looking to experiment. It’s also excellent for micro-growing, as it maximizes the yield potential of limited spaces.

This also confirms if not done correctly could for sure be detrimental, and a let down on your take.
I used to routinely get between 4-7 z per free budded plant. By scrogging and Fimming I now routinely yield 8-16 z. A very big difference.
I am very limited on growing space, this is one way I can produce like crazy and make every inch of real estate count.
 
In essence, yes.

Topping vs. Fimming​

Fimming is another technique used to increase the number of colas and yield size. It’s similar to topping in idea and appearance, but not quite the same.

The name stands for “f*ck, I missed” and refers to how sloppy this method appears. It involves pinching and removing around 75% of the tip of the plant: like you tried to top and missed.

Instead of producing two stems, this approach leaves you with four or more new branches. Each develops and fattens a separate apex cola in flowering.

Fimming is a more efficient yield booster than topping, but it’s less precise. The snip must be accurate to get the branching pattern; rookies often end up harming the plant with no benefit. It’s also less successful at managing height, as fimmed weed plants still grow rather tall.

Topping is better for growers with large plants and lofty harvest ambitions. Fimming is suitable for advanced cultivators looking to experiment. It’s also excellent for micro-growing, as it maximizes the yield potential of limited spaces.
Trying to understand here, but SLG said he did not end up with new branches? Are you saying he needs to look closer?
 
Trying to understand here, but SLG said he did not end up with new branches? Are you saying he needs to look closer?
I’m saying being new to the technique, can cause a detrimental effect. If not properly done I would not expect to see a gain in the number of tops, but rather damage to the original top that I had.
He was successful in some of his Fimming as I can see that in his leaf growth up top.
Proper timing is everything.
Fimming 5-7 days prior to being introduced to stretch makes all the difference. Having already completed all topping at least a week and a half prior to Fimming makes all the difference.
Like every single process involved with this plant, the devil is in the details.
Most jump in minus time lines and processes to be completed prior to, and so the results can be very varied.
 
Another important thing to remember is that we are not trying to obtain limbs with this process (that’s why topping is done) we are creating additional colas.
So this last grow I had a question in my mind about this process.
One. Does this process actually create more bud than free budding and am I just using better genetics and processes now?
In other words, if I just had the initial apex cola or I had 3-4 more apex colas on a plant would there be a profound difference in weight, or would it weigh the same even though I had 3-4 vs 1 Flower.
So, half of my crop I fimmed half I did not. The free budded flower single apex cola weighed consistently far below the cluster of 3-4 fimmed flowers. Answered that question for me.
It’s a process that works and works well. If not I sure would not waste my time repeating it.
While many have dedicated their experiences to a certain process, like hydro,
etc. The last 12 years, I have dedicated mine to max production in limited spaces. That is my audience when I teach home grow classes.
Soooo, I love the Fimming process find it greatly increases harvest..
I am CannyGranny Queen of the Corner ( okay okay, the only fem there) and I endorse this message! ☺️😊😂🤣
 
Thanks for all this info GC, it's a great technique that you have down to a science!

I'm just jumpin in head first, see what I can do. I know my timing and this and that will be off, but only one way to learn and that is do it. I'll refine this on the next one and the next and the next 👊

Sounds like fiming is an art that is worth pursuing. I will try it some more.

I am very nervous about waiting till Monday to throw that table in there, she has really taken off the past few days as I have her dialed in on a slow and steady increase in nutrients levels. The table might be ready but snow and ice on the roads don't make me excited to go out to get that table and install it today before I go out of town.
 
Thanks for all this info GC, it's a great technique that you have down to a science!

I'm just jumpin in head first, see what I can do. I know my timing and this and that will be off, but only one way to learn and that is do it. I'll refine this on the next one and the next and the next 👊

Sounds like fiming is an art that is worth pursuing. I will try it some more.

I am very nervous about waiting till Monday to throw that table in there, she has really taken off the past few days as I have her dialed in on a slow and steady increase in nutrients levels. The table might be ready but snow and ice on the roads don't make me excited to go out to get that table and install it today before I go out of town.
Since you have control of the height by dropping it, I promise ya, four days won’t make nor break ya! You really want that extra height so you can properly spread your limbs below the screen. Remember we don’t allow the tops to just poke through your table, we push them under. I’d rather see you start with the bigger plant.
Please don’t challenge snow and ice to just pick up your table!
You are most welcome, my pleasure!🥰
 
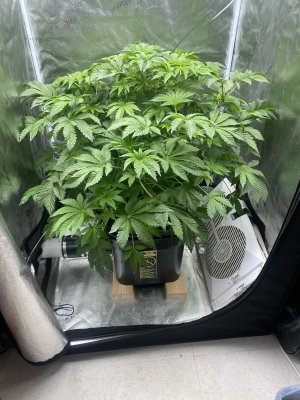
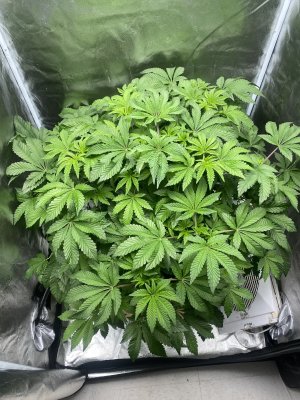
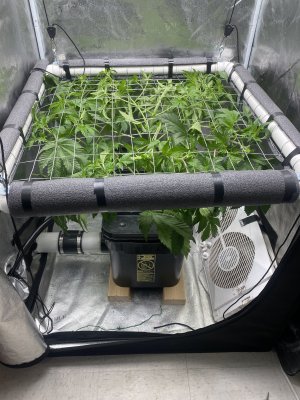
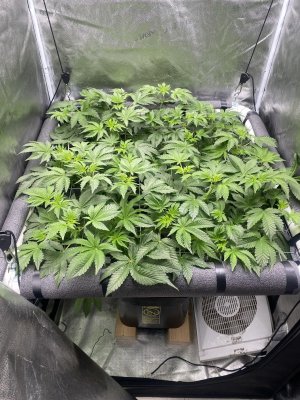
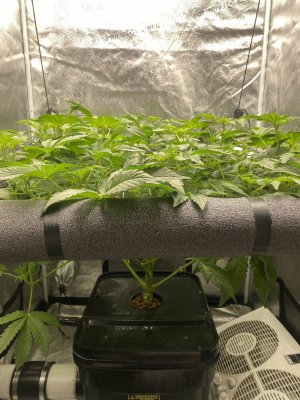
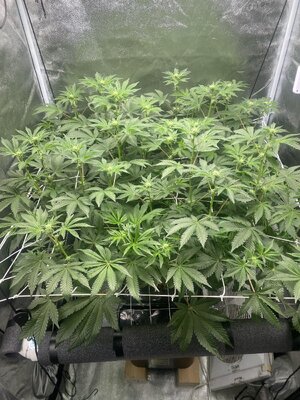
OK, got the new scrog table and here is my first attempt at this form of art. Thanks for taking the time to help CG, can't wait to see what she does now.

I did get in and do some defoliation on the lower part of the plant and pulled some of the larger fan leaves off, but I think I got her pushed down pretty good. Before and after below.

Going to flip the lights to 12/12 tonight at lights off and get ready for the show, currently feeding at around 560 ppm, will probably change out the res on Thursday before I go out of town for work and update to bloom ratios.


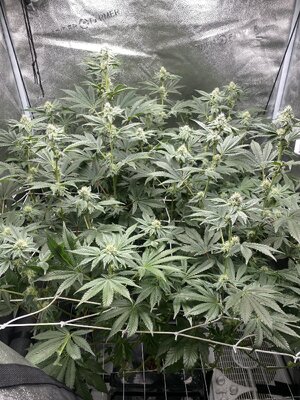
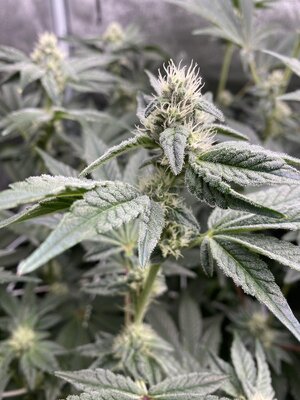
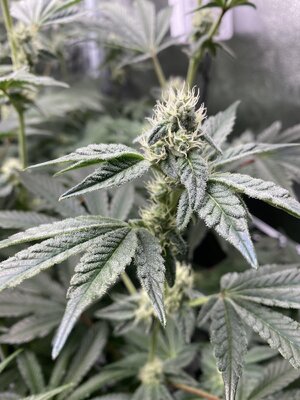
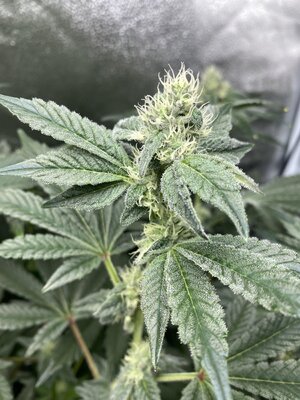
IMG_4229.jpegIMG_4230.jpegIMG_4232.jpeg
 
OK, got the new scrog table and here is my first attempt at this form of art. Thanks for taking the time to help CG, can't wait to see what she does now.

I did get in and do some defoliation on the lower part of the plant and pulled some of the larger fan leaves off, but I think I got her pushed down pretty good. Before and after below.

Going to flip the lights to 12/12 tonight at lights off and get ready for the show, currently feeding at around 560 ppm, will probably change out the res on Thursday before I go out of town for work and update to bloom ratios.


View attachment 44644View attachment 44645View attachment 44646
Looking good and exactly how I wanted you to table them, pushed under and lain out long wise! Don’t do any weaving don’t change a thing. Flip them and watch them grow!
 
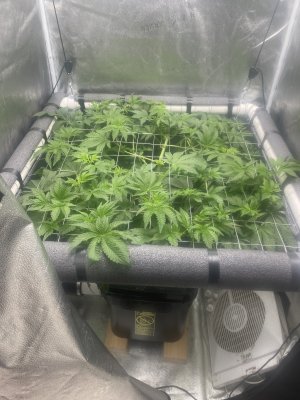
Cruising along here, 10 days since flip, not showing any pistils yet but looks like she might be starting to stretch. I am surprised at how long this plant took to recover from placing that scrog table and I am also having other issues with her. Not long after I set the table, she stopped drinking on me. Trying to get that figured out, never had this scenario before so working through it trying to get her drinking again.

This morning, she seems to have started back to drinking but it's very slow to start. Running at 570 ppm, she has been asking for more nutrients steadily since I changed out the res this last Monday. I like to come in light and then adjust up rather than overfeed and have to deal with that mess. I'm hoping by this time tomorrow she will be drinking as normal again, which prior to changing the res she was drinking almost 2 gallons a day.

Looking to have a great canopy, gotta get in and do some pruning soon, just waiting till she establishes her main colas, then gonna take everything else off.IMG_4250.jpegIMG_4251.jpeg
 
Not sure what’s going on there. My plants recover rather quickly after tabling. I think she is looking lovely!
You do need to remove everything below the table that has not reached the top at this point. There should be nothing below your net.
I do my major defoil up top at week three. I try to never do a hard defoil after week 3.5, but rather I will tuck leaves where I can and only remove if they are blocking a major budsite.
Expect differences, different method, different time periods etc. Relax! She’s gorgeous 🥰
 
Not sure what’s going on there. My plants recover rather quickly after tabling. I think she is looking lovely!
You do need to remove everything below the table that has not reached the top at this point. There should be nothing below your net.
Thanks CG, I might just have unreasonable expectations since this is my first time, but I do think there is something going on with her not drinking. Just checked and it does appear that she is finally drinking again today.

I've realized I need to prune a bunch of lower stuff but was waiting to see if I could fix this water uptake problem before I did a bunch of defoliation and shock her even more. I might need to slightly raise the ppfd on the light, gonna try that and see if that might not jump start her, then take off that larf underneath once I see that recovery.
 
So you changed the res at the time you added the net? And presumably did some defoliation in the process? How large a percentage of foliage did you remove?

Your PPM seems high but the plants seem to like it.

What changed? Did you use the same ratios? Did you get a VPD swing that caused transpiration to stall? Did you change lights or anything else?
 
So, I added the scrog and 4 days later did a res change. Some minor defoliation yes, nothing major.

Yea, ppms are higher with this one, at least if I am reading the chart right. There is a little ambiguity when they are not drinking and I was a bit unsure what to do. Most solutions when the plant is not drinking involve less ppms, but there are a couple of scenarios where it calls for raising the ec and one of these seemed to fit so I went with it. I have raised the ppm by .1 a couple of times since the res change, she keeps asking for more, and it finally looks like she is drinking some after not hardly drinking most of this week.

Nothing else has changed except we are warming up around here and it's also been very humid. I don't measure vpd so that is probably part of this. The only other thing I did change was to raise the ppfd on the light from around 500 to 700, see if I can drive em a bit harder and see what that does. Did that earlier today and I don't see any issues other than I am pretty sure she is drinking again, slowly anyway.

I'm using early bloom ratios, did change that when I did the res change.

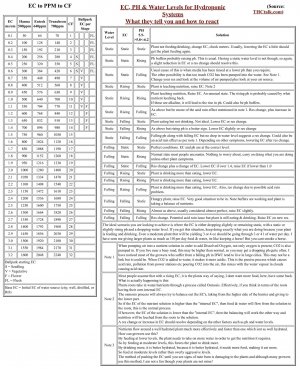
Here is a new chart I found that I have been using. Of note, this one has all the scenarios where the water level is static and has a few other helpful notes.

EC:PH Balance Chart.jpg
 
RH could be part of it. As it goes up but temp does not, there is less room in the air for H2O molecules to leave the stomata bringing new water into the roots.

Since you brought the lights up, watch them close for a day. If there is a problem underneath it will show up with the higher PPFD.

Honestly tho the plant seems good, I would not be overly concerned. But it's good to notice these things for sure.

PH stable?

You heading out of town for the weekend? Maybe the Mrs can snap a photo or 2 tomorrow nite if you are.
 
They slow drinking if they aren't thirsty.
Some do some don't
As we talked, my silver haze stopped eating for the last maybe the last 10 days. That was new to me but its what they preferred as 2 complete water/nute changes did nothing

Edit she looks good imo
 
RH could be part of it. As it goes up but temp does not, there is less room in the air for H2O molecules to leave the stomata bringing new water into the roots.

Since you brought the lights up, watch them close for a day. If there is a problem underneath it will show up with the higher PPFD.

Honestly tho the plant seems good, I would not be overly concerned. But it's good to notice these things for sure.

PH stable?

You heading out of town for the weekend? Maybe the Mrs can snap a photo or 2 tomorrow nite if you are.
PH has been good, not exactly stable but not wicked dives either, it's very close to being stable. Don't have my notes over here but the trend has been dropping pH and EC which says she wants more nutrients. Been bumping that up slowly. She did take a couple of gallons of water last night when I tended to everything so that was good, did not notice anything wonky with turning the light up. I'll see if Mrs SweetLeaf can give us an update while I am out of town. She's going to be over here with me tonight so will have to wait till tomorrow.
 
PH has been good, not exactly stable but not wicked dives either, it's very close to being stable. Don't have my notes over here but the trend has been dropping pH and EC which says she wants more nutrients. Been bumping that up slowly. She did take a couple of gallons of water last night when I tended to everything so that was good, did not notice anything wonky with turning the light up. I'll see if Mrs SweetLeaf can give us an update while I am out of town. She's going to be over here with me tonight so will have to wait till tomorrow.
I'll bet you are fine, just being overly cautious.

I'm having fun on my grow doing 8 different seeds out of the same res. They all want things a little different.

I have no idea if one plant is drinking and another is not. One of the drawbacks to what I am doing. Another thing I learned is that 2 plants in 1 tub when they get big, you end up ripping roots that are intertwined when you try to move things. +1 for square 8 or 13 gal pots.
 
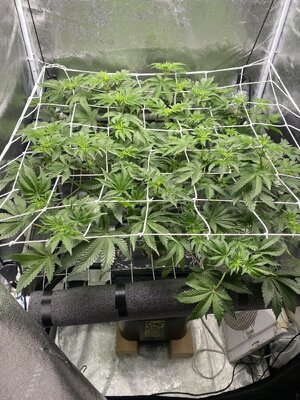
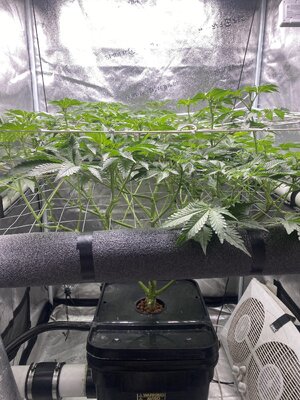
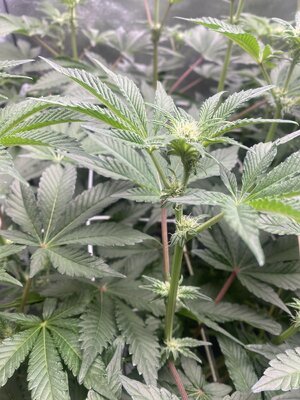
IMG_4271.jpegIMG_4272.jpegIMG_4273.jpegIMG_4274.jpegIMG_4275.jpegCruising along pretty smooth, starting to show blossoms and stretching nicely. I installed a trellis to hold everything up, canopy is not bad for my first scrog attempt so I’m happy with that.

Feeding at 530 ppm early bloom ratios, gonna change this res every two weeks or so during flowering.
 
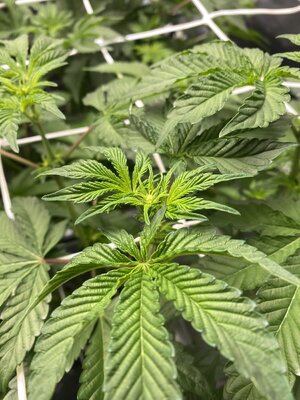
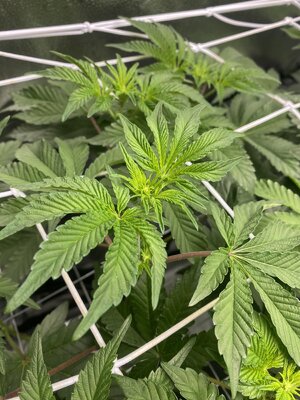
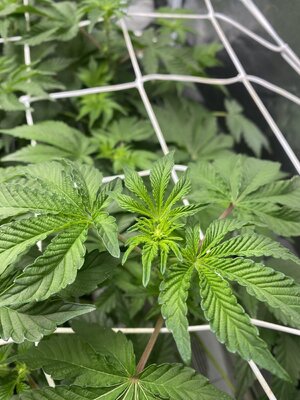
IMG_4293.jpegIMG_4294.jpegIMG_4300.jpegIMG_4301.jpegFull on flower mode in this tent, the Rose Gold Pave’ is in full blossom and looking lovely, still stretching but I’d say close to done with that. Nice canopy taking shape and super happy with my first scrog😀

Gonna change out the res today and get the nutrient solution reset to mid bloom ratios, she is back to drinking normal and everything is going well 👊
 
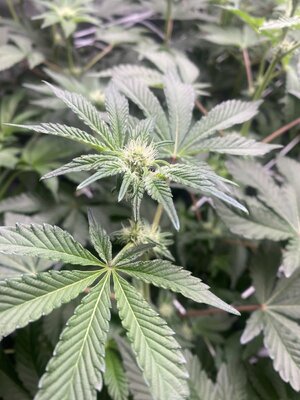
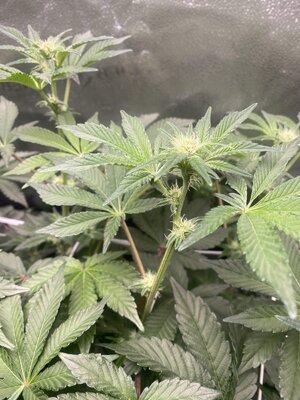
IMG_4324.jpegIMG_4325.jpegIMG_4326.jpegIMG_4327.jpegFlipped around the 12th of February, started showing blossoms on the 27th, gonna try counting weeks from when blossoms started to form for my flowering time, see how it goes. Will always let the trichomes tell me when to cut, but I like to see how that lines up with breeder times.

Breeder says 9 weeks, gonna start counting from the 27th, so by that date, I'm a bit over 2 weeks into flower.

She's a stretcher that's for sure, hoping to not run out of headroom. Lots of trichomes on the fans, gonna be a frosty one I think. Changed the res last week to update for week 3-5 nutrient ratios, will change that up one more time around week 5 to change that ratio to a finish and ripening period.
 
Another exciting thing I forgot to mention, I know I'm a geek, but I got a new membrane for my RO system and it rocks now and fixen to get even better!

I think I discovered my ppm problem, we will see, but I just last week had to change out the pressure tank on my well which I think is the culprit. I also updated to a 60/40 pressure switch so we now have great water pressure in the whole house.

With the new membrane, I got a steady stream coming out and my barrel filled up over one night! Hell yea. I'm going up the ante a bit and spring for a booster pump that will keep a steady 65 psi on my RO system at all times. My water system now gets me up to 60 psi, but that continually drops until it hits 40 before it kicks back on. At 40 psi, my RO system is at the edge of the yellow on the gauge, still workable, but that pumps gonna keep me at 65 all the time, should be more optimal than I have ever had.
 
I'm curious steam, you know a lot about pumps, maybe you can answer a question I had.

So the pump will have between 60 and 40 psi on the intake side and puts out that 65 psi on the out put side. Does it run all the time to do this or is it "on demand" where it shuts off when not needed? How do these things work?

The reason I ask is because with this kind of output, I can shut the system off when not needed to preserve on waste water. Hoping that pump shuts off and doesn't run continually. It's designed for the system I am using so I would figure it's ideal for what I want but just wondering how it all works.
 
I'm curious steam, you know a lot about pumps, maybe you can answer a question I had.

So the pump will have between 60 and 40 psi on the intake side and puts out that 65 psi on the out put side. Does it run all the time to do this or is it "on demand" where it shuts off when not needed? How do these things work?

The reason I ask is because with this kind of output, I can shut the system off when not needed to preserve on waste water. Hoping that pump shuts off and doesn't run continually. It's designed for the system I am using so I would figure it's ideal for what I want but just wondering how it all works.
Got a link to the pump?

The one I have only runs when water is flowing.
 
EXPENSIVE~!
What I use.
Just make sure to get right pipe tube size.
 
Thanks man but I think my wife already ordered it. I'll check and if she didn't I will send her that link. Can I get fittings for 3/4" pex for that pump?
 
EXPENSIVE~!
What I use.
Just make sure to get right pipe tube size.
I wish I could fix my valves to make the damn things shut off when the tank is full. I've replaced them 3 times now on all 3 RO units, still never shuts off when the float valve closes. I've currently got a pressure reducer hoping it might help. I just manually turn on and off the feed valve and waste a bunch of water sometimes. sux. These are different brand and different flow rate systems showing this issue.
 
I wish I could fix my valves to make the damn things shut off when the tank is full. I've replaced them 3 times now on all 3 RO units, still never shuts off when the float valve closes. I've currently got a pressure reducer hoping it might help. I just manually turn on and off the feed valve and waste a bunch of water sometimes. sux. These are different brand and different flow rate systems showing this issue.
Yea, mine still throws out waste water even when the tank is full and will be more with the pump inline. I plan to just shut that valve off when the tank is full so I'm not wasting so much water and with the new membrane and pump I will be able to keep up with my needs at the same time.
 
Thanks man but I think my wife already ordered it. I'll check and if she didn't I will send her that link. Can I get fittings for 3/4" pex for that pump?
Not sure about 3/4. I have seen 1/4 and 3/8. I would not know this for certain but IMO the larger 3/4 feed line could be reducing your pressure.
I wish I could fix my valves to make the damn things shut off when the tank is full. I've replaced them 3 times now on all 3 RO units, still never shuts off when the float valve closes. I've currently got a pressure reducer hoping it might help. I just manually turn on and off the feed valve and waste a bunch of water sometimes. sux. These are different brand and different flow rate systems showing this issue.
I don't understand how we couldn't get this to work when we replaced the part?
 
Not sure about 3/4. I have seen 1/4 and 3/8. I would not know this for certain but IMO the larger 3/4 feed line could be reducing your pressure.
Interesting. I was planning on hooking it into the water line that feeds that RO which is 3/4 pex that I ran to a faucet like you see outdoors. The RO input line has a fitting that screws onto that and has a smaller line. Seems like I might have been wrong in this install and best to just install it in that line that comes off the faucet which is a much smaller line.

If that is the case, this is good news because when I built that area, I did not make an access and was going to have to do that first lol. This install seems would be way easier and not have to tear apart walls.
 
Back
Top Bottom