Forgot what you are using in your pots.
I was using a Mother Earth soil w/perlite / 25% coco coir w/ Clay balls mix and think I was using 2 gal a day
pretty much after they were in flower. And using about same as you 5/5/10 mix
Asking cause I'm not sure what I will be using in the pots on the next AP grow.
I was using the smaller pots so that would explain only 2 gal a day.
But was thinking of using all soil to slow down the feed intake, maybe? idk

Yep I had light burn problems too. I also had roots growing into the bubble dome but
I don't think it was a problem. Mainly had the light too low and too high intensity, I
believe 100%. I don't think I will go over 55 lux next time. I believe on my light it would be at 75% for that.
Hey, I'm in Promix and perlite with a sprinkling of Azomite, Gypsom and worm castings and clay balls on the bottom. I'd been timing my lights and feed to be at 4 weeks in flower to be at maximum feed and 100% light. Increasing every week from 60% at flip. I've recently read that 6 weeks should be my goal for the 100% feed and light to be at max so next grow I'll aim for that.
My leaves stayed pretty healthy until I started cutting back on nutes at week 9 so I'm getting there. I got some seeds in my Sour D too, not sure how bad but I could see white tips poking through the buds on some lowers and 1 hard seed so far. Fk I hope its not all seeded up, I have enough for oil already I don't need 1/2lb more from this big beauty
 
Hey, I'm in Promix and perlite with a sprinkling of Azomite, Gypsom and worm castings and clay balls on the bottom. I'd been timing my lights and feed to be at 4 weeks in flower to be at maximum feed and 100% light. Increasing every week from 60% at flip. I've recently read that 6 weeks should be my goal for the 100% feed and light to be at max so next grow I'll aim for that.
My leaves stayed pretty healthy until I started cutting back on nutes at week 9 so I'm getting there. I got some seeds in my Sour D too, not sure how bad but I could see white tips poking through the buds on some lowers and 1 hard seed so far. Fk I hope its not all seeded up, I have enough for oil already I don't need 1/2lb more from this big beauty
Ah I used coco-coir in there but now that I have Pro-Mix maybe I'll follow and just use it with the other stuff.
I don't have Azomite nor Gypsom but have wormcastings and clay balls.

100% is where I had problems maybe too close.
The new set up I will have will give me more room above the canopy, so maybe I could go 100%.
 
Last edited:
Ah I used coco-coir in there but now that I have Pro-Mix maybe I'll follow and just use it with the other stuff.
I don't have Azomite nor Gypsom but have wormcastings and clay balls.

100% is where I had problems maybe too close.
The new set up I will have will give me more room above the canopy, so maybe I could go 100%.
Slowly build up the intensity maybe 5% a week after flipping to be at 100% at 6 weeks in flower then backing down again at 9 & 10 weeks was something I saw on a YT video from Mr. Grow it I think it was. I'm easily swayed

More Myco's this time too when I'm transplanting into a larger pot. I need to make up a hundred dollar order for free shipping but I'm stocked on everything but Myco's and Amzon's shit is too expensive.

A Garden shop just up the street has some too but they put on a big sale soon so I've been waiting for their clear out notice
 
Last edited:
Aug 8
Week 9.5 for the girls in my tent, They are just about done. I think I can start cutting them down Monday. We've a hot spell with high humidity right now and I'll just keep them going a few more days Monday will be 10 weeks and I'll start pulling my Quebec Blast first she seems to be furthest along. She's hidden by the Sour D...both with similar structures to them both Sativa leaning but the Sour D stands out...

My clones of the Quebec Blue didn't turn out as nice as mom was. more fox tailing and that's my fault having the light too strong too early and maybe too close as well. I'll try and keep my next crop a bit smaller so I don't have to crunch them in so tight together as well.

I have a new batch of seeds to pop this weekend and a new tool to use. I was gifted a vertical seed germinating tool from Bandit420 ...Thank you very much.... I'll put it to use tomorrow..View attachment 20579View attachment 20580View attachment 20581View attachment 20582View attachment 20583View attachment 20584
Beautiful ladies
 
Beautiful ladies
Thankyou Chita, I've finished my grow for now. I have 6 more babies just 1 week old growing. I'll be posting again when I can there's nothing much to show now. I'll continue posting with your lights highlighted as my favourite grow lights, they do a fantastic job and I'm proud to have SpiderFarmer as a sponsor.
Thankyou

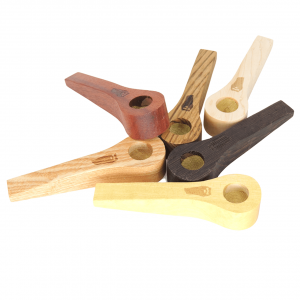
I've started back pipes again 1696854608746.jpeg
 
Thankyou Chita, I've finished my grow for now. I have 6 more babies just 1 week old growing. I'll be posting again when I can there's nothing much to show now. I'll continue posting with your lights highlighted as my favourite grow lights, they do a fantastic job and I'm proud to have SpiderFarmer as a sponsor.
Thankyou

I've started back pipes again View attachment 24715
Oct 9
I made 2 pipes today and I took pics of the tools I use and the steps I take
1st pic
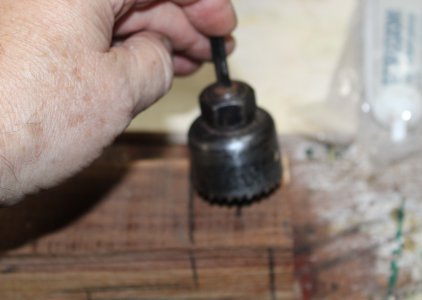
I use a hole saw to mark my centre and size of the block
hole saw.JPG
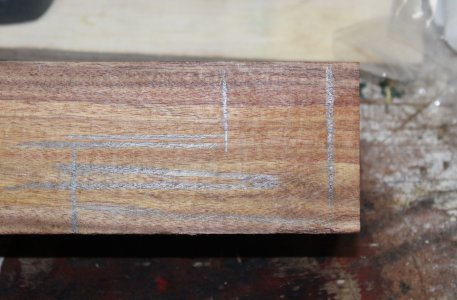
I sketch out the basic shape
sketch.JPG
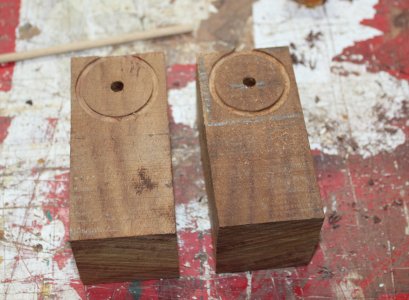
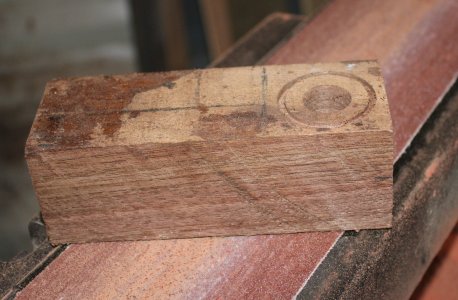
I score the top of my blocks to mark my outer ringscored blocks.JPG
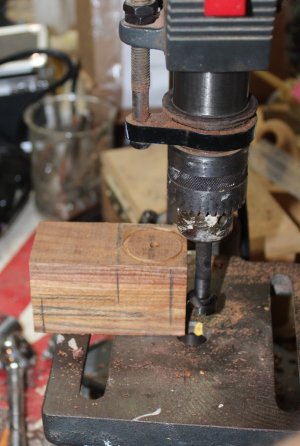
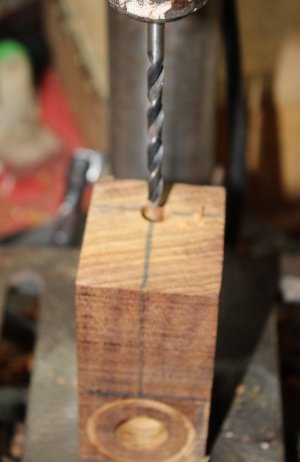
I then drill the bowl holeblockdrillpress.JPG
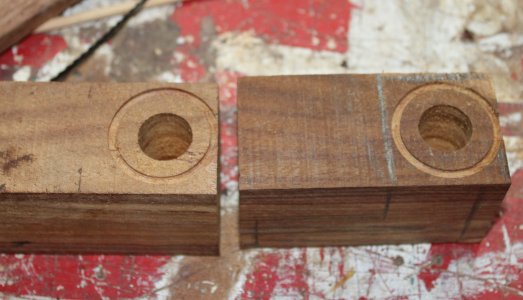
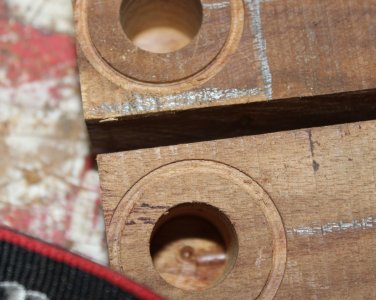
and drill the holes2blockshole1.JPG
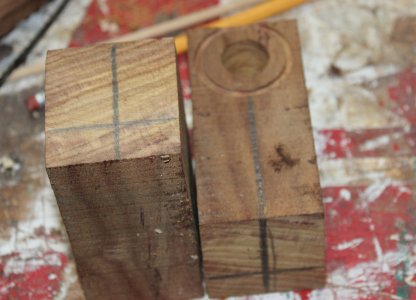
Then I mark my stem hole2blockcmarks.JPG
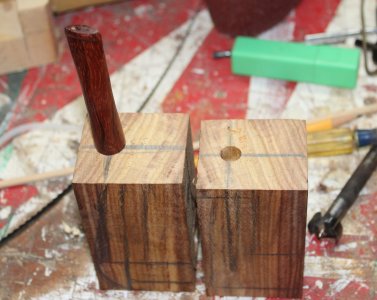
and drill them out
2 blocks pipestem.JPG
Then the breath holebreathhole.JPG


I
 
Oct 9
I made 2 pipes today and I took pics of the tools I use and the steps I take
1st pic
I use a hole saw to mark my centre and size of the block
View attachment 24798
I sketch out the basic shape
View attachment 24800
I score the top of my blocks to mark my outer ringView attachment 24801
I then drill the bowl holeView attachment 24802
and drill the holesView attachment 24803
Then I mark my stem holeView attachment 24804
and drill them out
View attachment 24806
Then the breath holeView attachment 24808


I
bowlhole.JPG
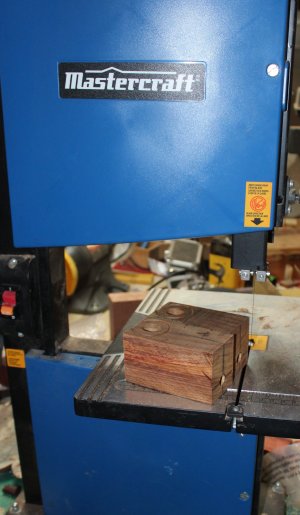
now to my bandsaw that's not working well as is evident with my cut blocks

bandsaw.JPG
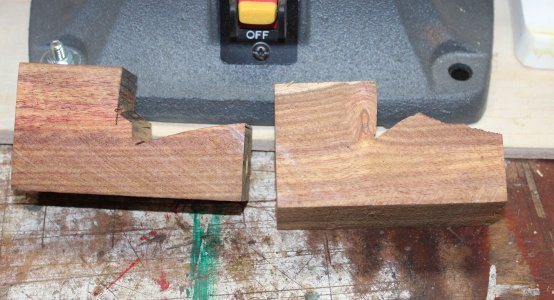
crap cut blocks2blocksroughcut.JPG
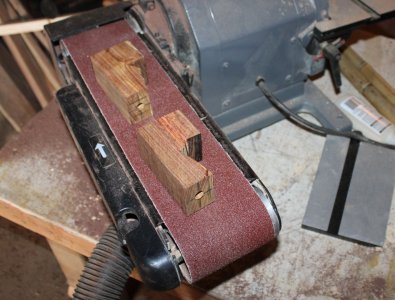
Belt sander
beltsander.JPG
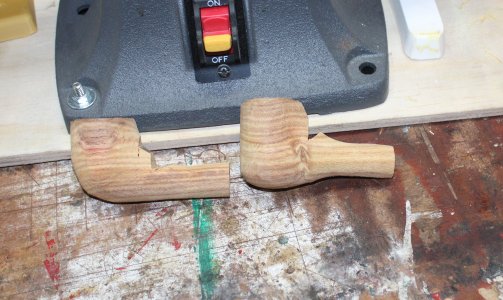
after belt sander2after beltsander.JPG
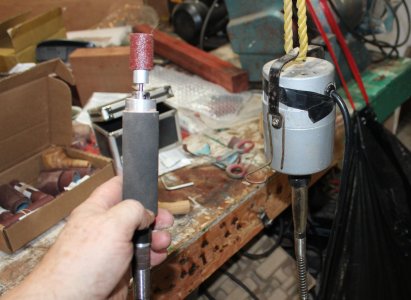
Foredom
foredom.JPG
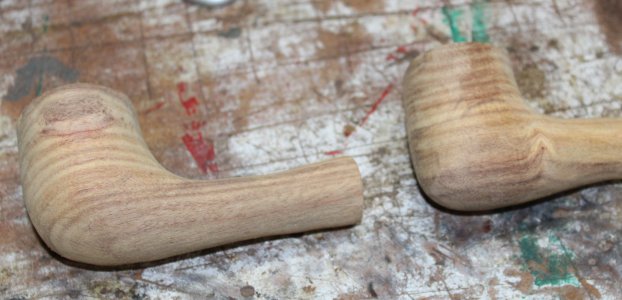
after 80 grit80grit.JPG
after 120grit120grit.JPG
after 220 grit220 grit.JPG
after 320 grit320 grit.JPG
after 400 grit400grit.JPG
I sanded with 600 grit and forgot the pic
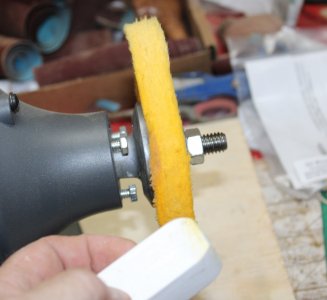
Polishing wheel and white diamond firstwhitediamond.JPG
after white diamond waxpipeswdiamond.JPG
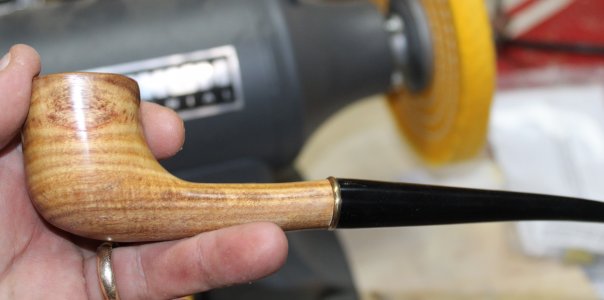
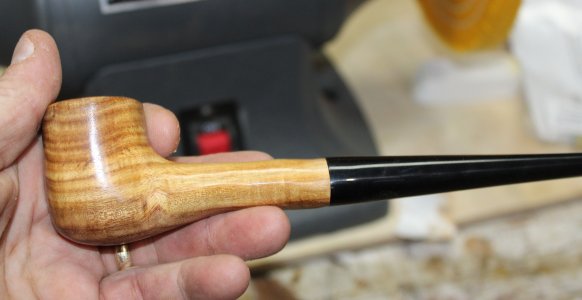
After Caranuba waxlongstem canary.JPG

after Caranuba wax pipe 2 long stemlongstem canary2.JPG
 
View attachment 24829
now to my bandsaw that's not working well as is evident with my cut blocks

View attachment 24831
crap cut blocksView attachment 24832
Belt sander
View attachment 24833
after belt sanderView attachment 24834
Foredom
View attachment 24835
after 80 gritView attachment 24836
after 120gritView attachment 24837
after 220 gritView attachment 24838
after 320 gritView attachment 24839
after 400 gritView attachment 24840
I sanded with 600 grit and forgot the pic
Polishing wheel and white diamond firstView attachment 24841
after white diamond waxView attachment 24842
After Caranuba waxView attachment 24843

after Caranuba wax pipe 2 long stemView attachment 24844
Beautiful work man, i really like the one with the brass band before the stem.
 
View attachment 24829
now to my bandsaw that's not working well as is evident with my cut blocks

View attachment 24831
crap cut blocksView attachment 24832
Belt sander
View attachment 24833
after belt sanderView attachment 24834
Foredom
View attachment 24835
after 80 gritView attachment 24836
after 120gritView attachment 24837
after 220 gritView attachment 24838
after 320 gritView attachment 24839
after 400 gritView attachment 24840
I sanded with 600 grit and forgot the pic
Polishing wheel and white diamond firstView attachment 24841
after white diamond waxView attachment 24842
After Caranuba waxView attachment 24843

after Caranuba wax pipe 2 long stemView attachment 24844
Very cool PC!

Love the grain and colours. 👍

On a normal day I imagine you do a few in stages and finish together but how long would you say it takes to build one pipe?
 
Very cool PC!

Love the grain and colours. 👍

On a normal day I imagine you do a few in stages and finish together but how long would you say it takes to build one pipe?
Hey Gmorning, maybe 2 hrs start to finish, I was making 6 a day when I was in a groove. The belt sander is the time consumer, once I can get it roughed out my Foredom sleeveless sander does the rest. I start with 80 grit -120-220-320-400-600. Up to 320 grit I'm still shaping the pipe, after that its finishing with the 400 & 600. Then polishing only takes 10 min
 
Hey Gmorning, maybe 2 hrs start to finish, I was making 6 a day when I was in a groove. The belt sander is the time consumer, once I can get it roughed out my Foredom sleeveless sander does the rest. I start with 80 grit -120-220-320-400-600. Up to 320 grit I'm still shaping the pipe, after that its finishing with the 400 & 600. Then polishing only takes 10 min
2 hours is amazing. Ya you and my grandfather would have done fine sitting on the porch after dinner. 😝

He wasn’t much of a talker either. Just always working on something.
 
Hey Gmorning, maybe 2 hrs start to finish, I was making 6 a day when I was in a groove. The belt sander is the time consumer, once I can get it roughed out my Foredom sleeveless sander does the rest. I start with 80 grit -120-220-320-400-600. Up to 320 grit I'm still shaping the pipe, after that its finishing with the 400 & 600. Then polishing only takes 10 min
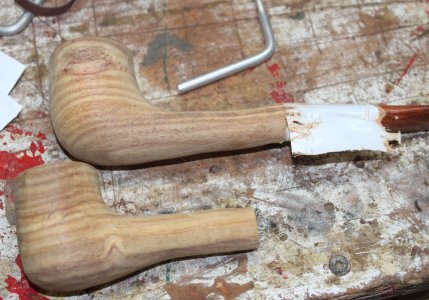
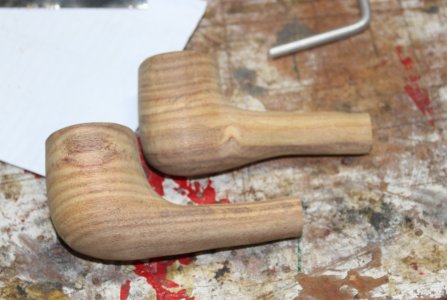
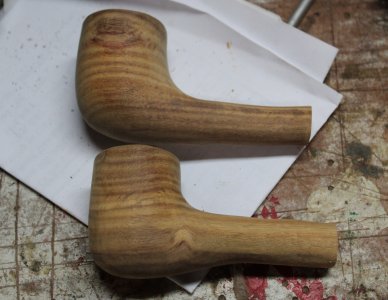
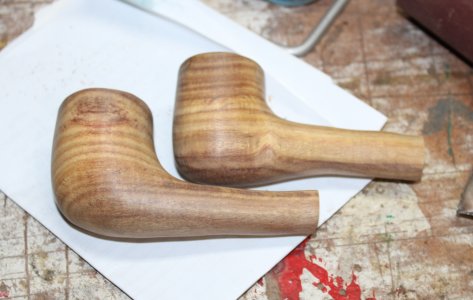
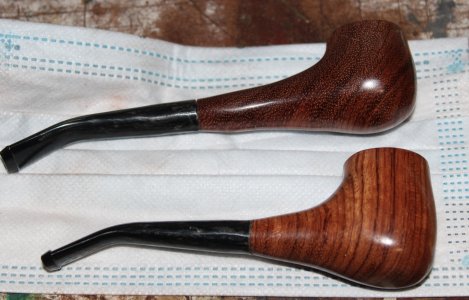
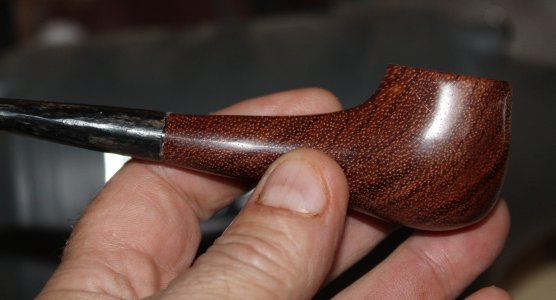
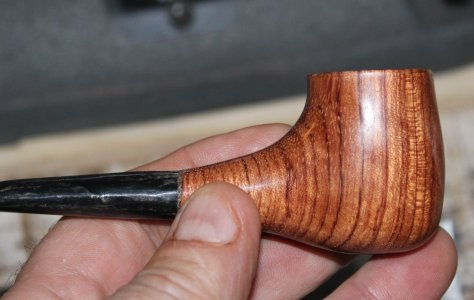
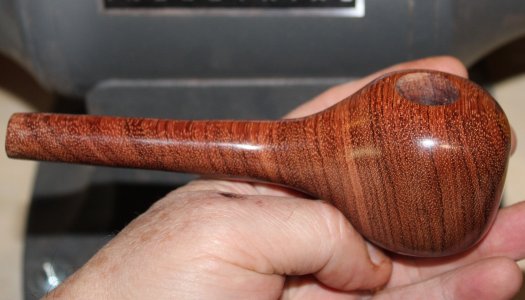
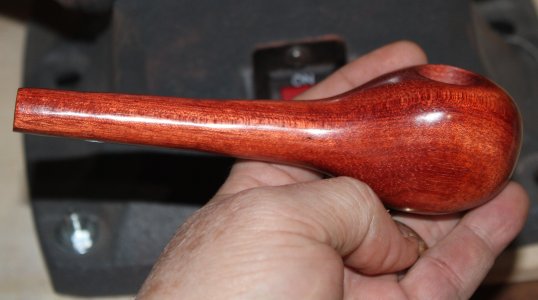
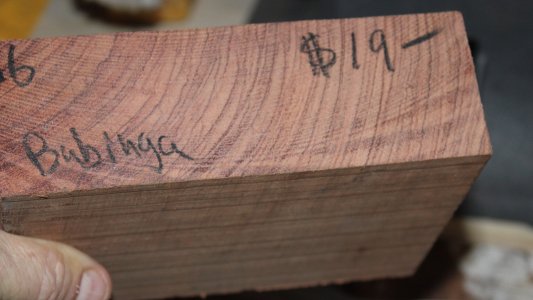
I made 2 small pipes yesterday out of Bubinga, I wasn't sure my tools could handle it being a 10.7 on the hardness scale, Briar is a bit softer at 9.3 so if I can handle 10.7 I can deal with 9.3. I ordered Olive wood before I looked at the hardness and its a 12.0, that won't be as much fun to work with. I have some Blood wood here and its a 12. something as well,,,,anyways here's my 2 today
 

Attachments

  • bubinga 1.JPG
    bubinga 1.JPG
    1.7 MB · Views: 5
  • bubinga2.JPG
    bubinga2.JPG
    1.1 MB · Views: 2
  • bubinga3.JPG
    bubinga3.JPG
    870.7 KB · Views: 2
  • bubinga4.JPG
    bubinga4.JPG
    1.3 MB · Views: 2
Saw them on the corner. Look better here close up. I thought the lighter one looked nicer but here they both look good in the better light.

Did you ever smoke tobacco? I don’t remember my grandfather smoking…just carving.

I’ll see if I can find my old carving set. Might even be from Lee Valley. Post a pic if I find them. Little chisels and a good carving knife.
 
I made 2 small pipes yesterday out of Bubinga, I wasn't sure my tools could handle it being a 10.7 on the hardness scale, Briar is a bit softer at 9.3 so if I can handle 10.7 I can deal with 9.3. I ordered Olive wood before I looked at the hardness and its a 12.0, that won't be as much fun to work with. I have some Blood wood here and its a 12. something as well,,,,anyways here's my 2 today
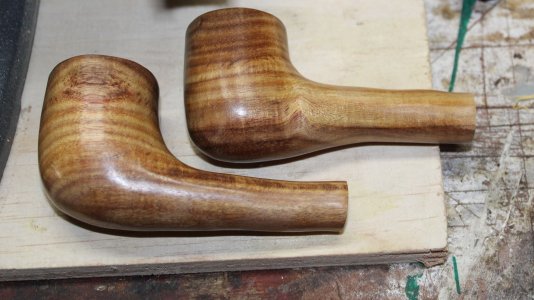
Those 2 were made from the same piece of wood. After I cut a 7 " x 2" x 2" block I cut it in half and took it to my drill press to score my bowl rings on the top. I flipped the grain on 1 to see which way looked better, I surprised with the color difference and its just because one grain is opposite the other

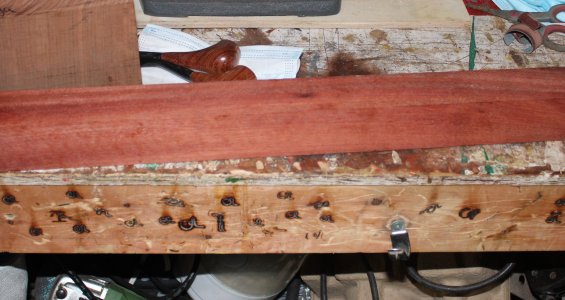
and my blood wood for today
Bubinga7.JPG
 

Attachments

  • bloodwood.JPG
    bloodwood.JPG
    1.2 MB · Views: 7
Saw them on the corner. Look better here close up. I thought the lighter one looked nicer but here they both look good in the better light.

Did you ever smoke tobacco? I don’t remember my grandfather smoking…just carving.

I’ll see if I can find my old carving set. Might even be from Lee Valley. Post a pic if I find them. Little chisels and a good carving knife.
I smoke cig's from 18 - 21 -1970 ish then I went to a gulf island north of Vancouver B.C for a month in the summer with a kilo of grass, home grown leafy shit by todays standards but it was all we had to smoke and it did the job, I've never smoked tobacco since, except when some dumb ass would put in a joint to share and give me the spins from it.
 
I smoke cig's from 18 - 21 -1970 ish then I went to a gulf island north of Vancouver B.C for a month in the summer with a kilo of grass, home grown leafy shit by todays standards but it was all we had to smoke and it did the job, I've never smoked tobacco since, except when some dumb ass would put in a joint to share and give me the spins from it.
Hahaha lol my son just started cannabis at 23. Teaching him the dos and don’ts I showed him how some use a cigarette to take tobacco out and then fill the old shell with weed and rip off the filter.

I used a bit of the old tobacco and leaves to make a spliff. He hadn’t tried buds yet. He passed to me so I took a hit. Mistake. Dizzy, nausea, felt like shit. 🤢

I’ll stick to weed and the blue moon pipe tobacco I still have jarred. 👍

Glad to see you’re back at man. Lost art. And it is art. From selecting the wood to final polish.
 
These are more like my grandfather’s. Never used one. To young then. Always wondered if I would break the mouth piece.

Beautiful work PC. 👍🤩
 
These are more like my grandfather’s. Never used one. To young then. Always wondered if I would break the mouth piece.

Beautiful work PC. 👍🤩
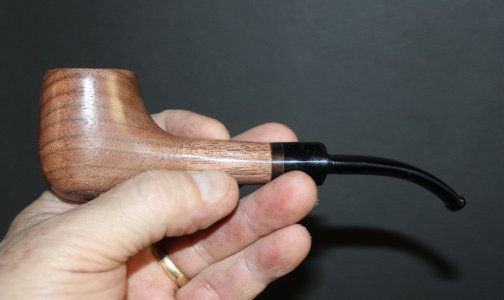
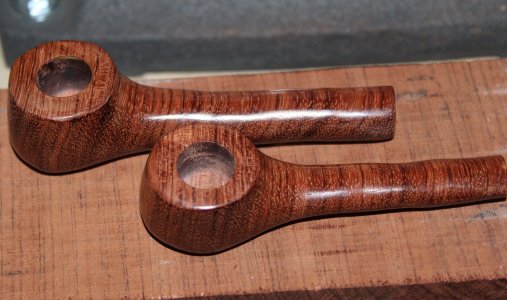
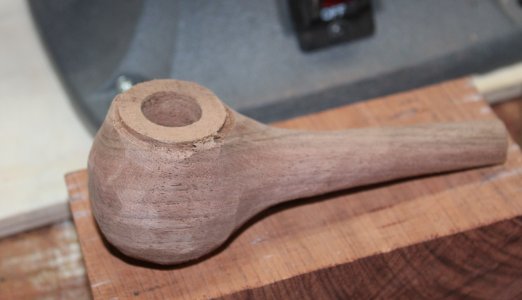
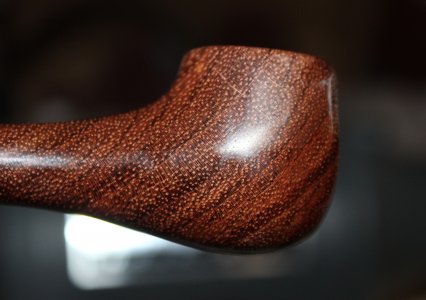
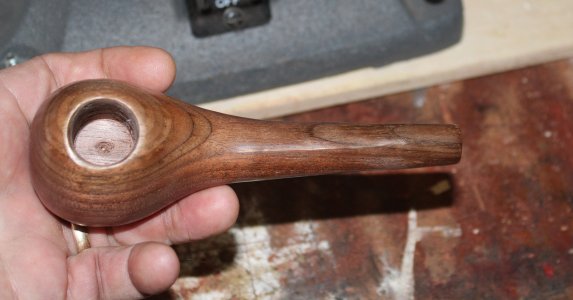
Thanks, I had a large piece of walnut and thought I'd try something new. I'm not sure what I'll carve up today, I still have some Bubinga and Blood wood to work with. I cut my remaining Canary wood into 3 = pieces too small for a pipe without a mouth piece before I realized I didn't have any mouth pieces left. oops. I hope to get my 2 pieces of Briar this week. I'm anxious to work with it, If I like I may get more.
 
Thanks, I had a large piece of walnut and thought I'd try something new. I'm not sure what I'll carve up today, I still have some Bubinga and Blood wood to work with. I cut my remaining Canary wood into 3 = pieces too small for a pipe without a mouth piece before I realized I didn't have any mouth pieces left. oops. I hope to get my 2 pieces of Briar this week. I'm anxious to work with it, If I like I may get more.
Oct 15
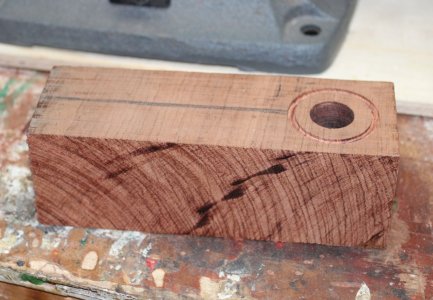
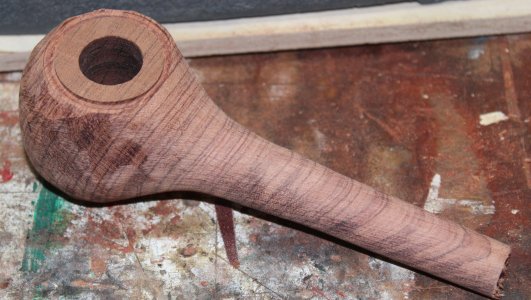
I made 1 pipe out of Bubinga again, I liked what I made yesterday with Walnut so I made a similar piece with BubingaBubinga wood block.JPGroughLBubinga.JPGLBubingaA.JPG
 
Nice. I like the larger bowl. I’ve got large hands. That looks like a good thumb and finger rest. Most weed pipes are to dinky.
Ya I like them larger too, less wood to grind away as well. I tried for a whale I got a sperm....lol It shined up nice the Blood wood is about as hard of a wood as I can work with and its given a 12.1 on the Janka hardwood scale and its the same as the Olive wood I've ordered so its good to know I can work it.

I received my 2 pieces of Briar wood7babies.JPGBloodwoodL.JPG today and they are pretty small, I'll be able to make 2 small pipes & both will need acrylic stems unless I can fiddle up something else.

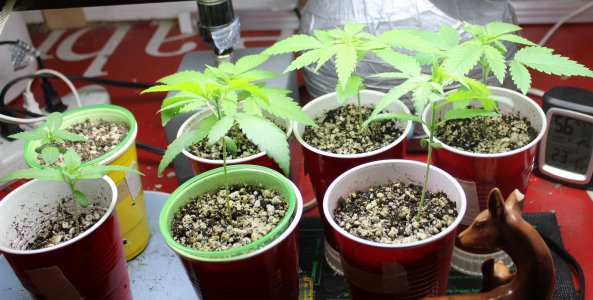
My 7 babies are doing well for 2 weeks above ground. I'm waiting for some Myco's before I transplant, it should be here this week.
 
Pipe and young ladies look great. 👊
I see ones in a double cup. Any reason or just how it worked out?

I double cup all the young ones. I like to ensure the roots are doing well. And we get so many clear cups from Tim’s I had to do something with them before recycling. Great for giving away to new growers too. 😝

Have a great day PC!
 
Pipe and young ladies look great. 👊
I see ones in a double cup. Any reason or just how it worked out?
I double cup all the young ones. I like to ensure the roots are doing well. And we get so many clear cups from Tim’s I had to do something with them before recycling. Great for giving away to new growers too. 😝

Have a great day PC!
No real reason I've a hundred cups here and when I went to plant a clear one was in the stack so I used it. I figure they'll all grow similarly and I can check the root progress this way so I double cupped.
 
No real reason I've a hundred cups here and when I went to plant a clear one was in the stack so I used it. I figure they'll all grow similarly and I can check the root progress this way so I double cupped.
Oct 18
Well yesterday was a waste of time, I had a nice pipe going out of Blood wood until I was sanding with 320 grit and I saw a black spot.....Hmmmm is that a part of the grain as it got bigger and bigger? Nope I sanded through to my breathing hole,,,,,awe fk not again, there goes a nice hunk of wood...lol.

I had to get the car worked onto day so no pipes today either but on returning from the Garage my new pipe stems are here so I can work on my 2 pieces of Briar tomorrow.

My order of Myco's came in today as well so I can up transplant my babies, Oh how they grow up so fast, just 3 weeks ago they were just tiny little seeds and now they have little wings and they look so cute all huddled together waving high as I open the curtain door & all ready for their new homes.

I can already see what looks like stunting on 1 girl, when the top leaves don't develop as quickly as they should and stay small for a day or 2 they need transplanting, they would continue to grow in the solo cups but they'll jump once transplanted into a larger pot and I give them their first feed.
 
Back
Top Bottom